Introduzione
La rimozione dello schermo dell'iMac Intel 27" Schermo Retina 5K richiede di tagliare dell'adesivo con uno strumento specializzato per l'apertura degli iMac. Dopo che avrai completato la tua riparazione, dovrai seguire la nostra guida per la sostituzione delle strisce adesive per rimuovere l'adesivo vecchio e sostituirlo con le strisce biadesive nuove.
Prima di cominciare il tuo lavoro sull'iMac: Scollega il cavo del computer e tieni premuto il pulsante di accensione per almeno dieci secondi così che i condensatori dell'alimentatore si scarichino del tutto.
Fai molta attenzione a non toccare le estremità dei condensatori o qualsiasi altra saldatura esposta sulla parte posteriore dell'alimentatore.
Cosa ti serve
-
-
Con il perno libero di muoversi, l'iMac sarà sbilanciato e sarà difficile lavorarci sopra. Le riparazioni possono essere fatte con l'iMac a faccia in giù, ma sono più veloci e facili con un cuneo di supporto per iMac.
-
Se stai usando il Cuneo iFixit di cartone di supporto dell'iMac. segui queste informazioni per montarlo.
-
-
-
-
Posiziona l'iMac a faccia in su sopra un tavolo.
-
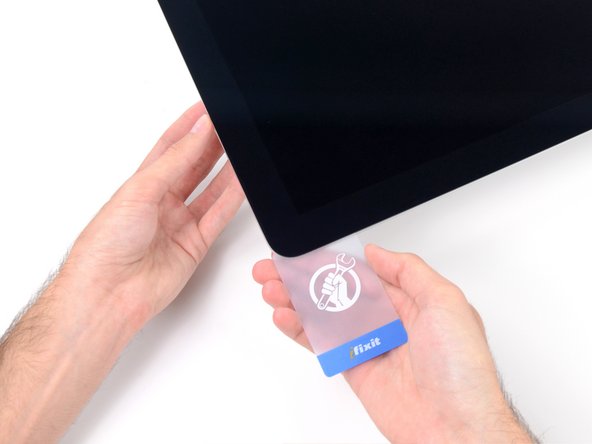
Partendo dall'angolo superiore destro, inserisci una scheda di plastica tra il display e il telaio.
-
-
-
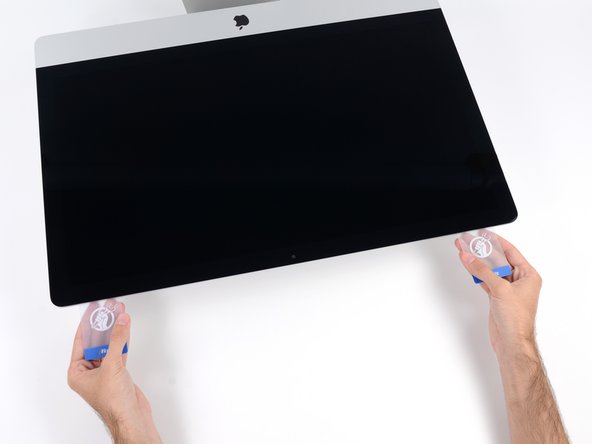
Con le schede inserite come mostrato vicino agli angoli, torci delicatamente le schede stesse per allargare la fessura tra display e scocca.
-
Se c'è ancora qualche punto che sembra incollato e non vuole separarsi, smetti di torcere le schede e usane una per tagliare l'adesivo in quel punto.
-
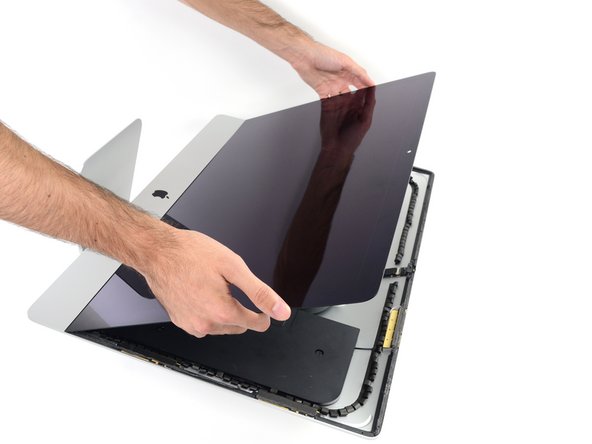
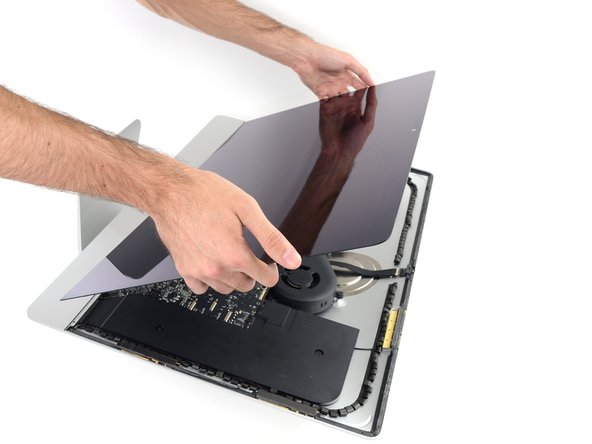
Comincia a sollevare dalla scocca la parte superiore dello schermo.
-
-
-
Se c'è un cavo sotto un nastro adesivo, tira via sempre il nastro adesivo prima di tutto.
-
Se il cavo è incollato al telaio, usa un iOpener riscaldato o un asciugacapelli per ammorbidire la colla. Dopo potrai inserire un plettro sotto il cavo per liberarlo. Non tirare mai direttamente connettori delicati.
-
Fai scorrere un plettro sotto i cuscinetti ammortizzatori per separarli dal display e tirali via delicatamente. Potresti aver bisogno di nastro biadesivo per riattaccarli sul nuovo display.
-
Per riassemblare il dispositivo segui le istruzioni nell'ordine inverso e usa la nostra Guida per le strisce adesive per riattaccare il vetro dello schermo.
Porta i tuoi rifiuti elettronici a un riciclatore certificato R2 o e-Stewards.
La riparazione non è andata secondo i piani? Prova delle soluzioni di base ai problemi, oppure rivolgiti alla nostra comunità Risposte] per trovare aiuto nella risoluzione dei problemi.
Annulla: non ho completato questa guida.
Altre 55 persone hanno completato questa guida.
Un ringraziamento speciale a questi traduttori:
100%
Questi traduttori ci stanno aiutando ad aggiustare il mondo! Vuoi partecipare?
Inizia a tradurre ›
24 Commenti
If you cut around the display well and take your time to roll back and forth (using the iFixit roller opener tool), especially around the corners, you don't actually need to use any cards (Steps 9 - 17) to get the screen to come free of the body. On the top edge left and right, take each end of the screen gently and pry free with your fingers - GENTLY - and you will hear the remaining tape separating along the sides. Take care NOT to flex the screen as you do so.
If you are removing a cracked screen (as I was), be super careful to pry and swing the display EVENLY up from the body - this is an item of utmost importance, whether you use cards or not to get the last of the adhesive to release.
Finally, with the power and data cables disconnected and the display held up at around 80º, you will find that the adhesive along the bottom edge of the display assembly will take quite some work to free. As the guide says, you can use a plastic card; but I found it necessary to use a metal spuger (carefully so as not to touch the power supply board of course!) in order to free the lower adhesive and remove the display.
Overall, take your time and focus on "being one with the iMac" as you work, and you will find it quite trivial to remove this 27" retina display.
hello, I'm writing from Italy. I have a problem with the screen of the iMac 27 "5k retina late 2014, purchased the 12-22-2014, I do not know if the warranty covers this type of defect within two years. There are spots in the lower left, appear as sagging, I think it's the dust, but I assure you that the environment is clean with no smoke or whatever. Obviously the spots are inside, how can I fix it, other news of these spots? I have to completely change the display or can separate the glass from the monitor LED?
Many thanks
Enzo
this should be covered by warranty. call applecare.
vireshkj -
Hello,
Any Update? Mine has the same issue and it is out of warranty.
Would an air blower do the trick past point 17/18?


