
Sony Vaio Tap 11 Screen Camera Module Replacement Replacement
Introduzione
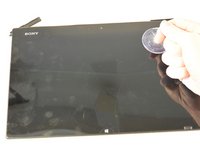
Vai al passo 1With this guide, you will be taking the screen off of the device to locate the camera module. The following steps will explain how to remove the necessary parts in order to remove the camera module located on your screen.
Cosa ti serve


-
-
Begin by opening the HDMI/USB port cover on the left edge.
-
Remove the three #000 headed, 3 mm long screws located underneath the port cover.
-
-
-
-
Flip device upward carefully like you are turning the page of a book.
-


To reassemble your device, follow these instructions in reverse order.
To reassemble your device, follow these instructions in reverse order.
Annulla: non ho completato questa guida.
Un'altra persona ha completato questa guida.
Team

IUPUI, Team 1-2, Harley Fall 2015 Membro di IUPUI, Team 1-2, Harley Fall 2015
IUPUI-HARLEY-F15S1G2
4 Membri
20 Guide realizzate
1Commento della guida
Is it possible to replace the camera module with a different one? I think that it is a usb camera. I would like to replace it a newer sony model.