Salta al contenuto principale

Snowboard Traction Pad Replacement

Cosa ti serve

  1. Snowboard Traction Pad Replacement, Traction Pad: passo 1, immagine 1 di 2 Snowboard Traction Pad Replacement, Traction Pad: passo 1, immagine 2 di 2
    • Use a plastic or metal scraper to remove the existing traction pad.

  2. Snowboard Traction Pad Replacement: passo 2, immagine 1 di 3 Snowboard Traction Pad Replacement: passo 2, immagine 2 di 3 Snowboard Traction Pad Replacement: passo 2, immagine 3 di 3
    • If there is any residual adhesive left from the old traction pad, soak it with adhesive remover.

    • Let the adhesive remover sit for a few minutes.

    • Wipe away the residue using a towel and water.

    • Dry the the surface where the new traction pad will be placed.

  3. Snowboard Traction Pad Replacement: passo 3, immagine 1 di 3 Snowboard Traction Pad Replacement: passo 3, immagine 2 di 3 Snowboard Traction Pad Replacement: passo 3, immagine 3 di 3
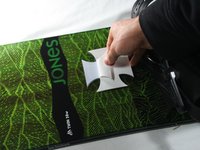
    • Peel the back off of the new traction pad to reveal the adhesive.

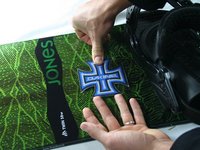
    • When placed, the traction pad should be about an inch away from the rear binding.

    • To avoid creating air bubbles, start with one corner of the pad and roll the rest down.

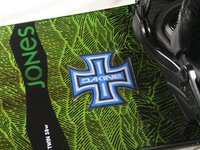
    • Press down firmly to help it stick to the board and remove any air bubbles that may have occurred.

    • Give the adhesive a minimum of 12 hours to dry before use.

Linea Traguardo

Jacob Garcia

Membro da: 01/13/14

101 Reputazione

1 Guida realizzata

Team

Cal Poly, Team 17-4, Forte Winter 2014 Membro di Cal Poly, Team 17-4, Forte Winter 2014

CPSU-FORTE-W14S17G4

5 Membri

9 Guide realizzate

0 Commenti

Aggiungi Commento

Visualizza Statistiche:

Ultime 24 Ore: 0

Ultimi 7 Giorni: 0

Ultimi 30 Giorni: 3

Tutti i Tempi: 3,574