Salta al contenuto principale
Philips Satinelle Metal Rolling Tracks Replacement

Philips Satinelle Metal Rolling Tracks Replacement

Nathan Christian

Nathan Christian e 4 altri collaboratori

Ultimo aggiornamento il July 14, 2024

8 minuti
Moderato
Introduzione Migliore

Introduzione

Vai al passo 1

If you need to replace the metal rolling tracks of your Philips Satinelle, use this guide.

Cosa ti serve

Strumenti

Mostra di più…

  1. Philips Satinelle Metal Rolling Tracks Replacement, Philips Satinelle Disassembly: passo 1, immagine 1 di 2 Philips Satinelle Metal Rolling Tracks Replacement, Philips Satinelle Disassembly: passo 1, immagine 2 di 2
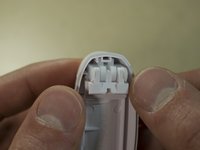
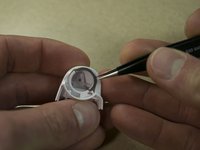
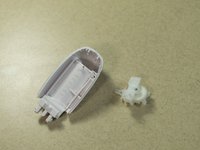
    • Unplug the device and remove the purple guard.

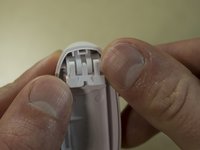
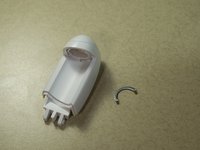
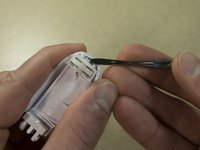
    • Remove the head by pressing the right side of the head (with the device facing away from you).

    • You will hear a 'click' and the head will become dislodged from the body of the device.

  2. Philips Satinelle Metal Rolling Tracks Replacement: passo 2, immagine 1 di 3 Philips Satinelle Metal Rolling Tracks Replacement: passo 2, immagine 2 di 3 Philips Satinelle Metal Rolling Tracks Replacement: passo 2, immagine 3 di 3
    • While wearing safety glasses, use a plastic opening tool to pry from right to left to pry out the tensor clip.

    • Be careful not to lose the clip. It will likely fly off when it releases.

  3. Philips Satinelle Metal Rolling Tracks Replacement: passo 3, immagine 1 di 1
    Attrezzo utilizzato in questo passaggio:
    Tweezers
    $4.99
    • The left side will swing down.

    • Remove the Tweezers.

  4. Philips Satinelle Metal Rolling Tracks Replacement: passo 4, immagine 1 di 3 Philips Satinelle Metal Rolling Tracks Replacement: passo 4, immagine 2 di 3 Philips Satinelle Metal Rolling Tracks Replacement: passo 4, immagine 3 di 3
    • Remove the plastic component that swings down.

    • Use fingernails to lift clips from stubs.

  5. Philips Satinelle Metal Rolling Tracks Replacement: passo 5, immagine 1 di 3 Philips Satinelle Metal Rolling Tracks Replacement: passo 5, immagine 2 di 3 Philips Satinelle Metal Rolling Tracks Replacement: passo 5, immagine 3 di 3
    • Using Needle Nose pliers remove metal roller track on both sides of the Tweezers Head.

  6. Philips Satinelle Metal Rolling Tracks Replacement: passo 6, immagine 1 di 3 Philips Satinelle Metal Rolling Tracks Replacement: passo 6, immagine 2 di 3 Philips Satinelle Metal Rolling Tracks Replacement: passo 6, immagine 3 di 3
    • Use a spudger to pry the gear housing unit from the base.

  7. Philips Satinelle Metal Rolling Tracks Replacement: passo 7, immagine 1 di 3 Philips Satinelle Metal Rolling Tracks Replacement: passo 7, immagine 2 di 3 Philips Satinelle Metal Rolling Tracks Replacement: passo 7, immagine 3 di 3
    • Use your thumbnail and a pair of needle nose pliers to push out the gear housing retention pin.

  8. Philips Satinelle Metal Rolling Tracks Replacement, Metal Rolling Tracks Replacement: passo 8, immagine 1 di 1
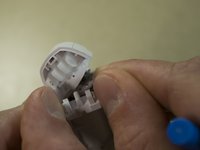
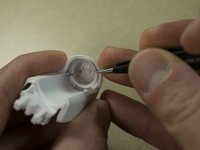
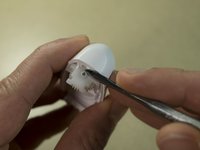
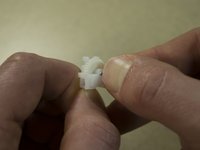
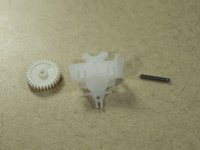
    • Replace Metal Roller Tracks on both sides of the Tweezer Head.

Conclusione

To reassemble your device, follow these instructions in reverse order.

Team

IUPUI, Team S5-G5, Wilson Fall 2017 Membro di IUPUI, Team S5-G5, Wilson Fall 2017

IUPUI-WILSON-F17S5G5

3 Membri

8 Guide realizzate

0 Commenti

Aggiungi Commento

Visualizza Statistiche:

Ultime 24 Ore: 0

Ultimi 7 Giorni: 0

Ultimi 30 Giorni: 2

Tutti i Tempi: 646