
Patch a tear in a pillow

Introduzione
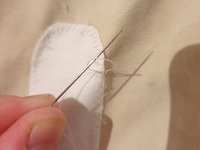
Vai al passo 1My pillow got a 6 cm tear in the washing machine, which lets feathers fall out. Here I will show you how to patch a similar tear using needle and thread.
I could also attach a patch by ironing it on, but I don’t like how after a while the edges get loose. What is more the patch should stay flush to the pillow so it doesn’t push out.
Cosa ti serve
Ricambi
Strumenti

Mostra di più…
-
-
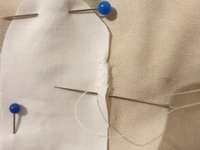
Stitch the tear shut so no more feathers can fall out, for example with an overcast or a herringbone stitch. I used the latter as it stays nice and flush.
-
-
-
Cut a 3cm / 1” wide strip of fabric so that the long side is about 3cm longer than the tear.
-
Round the edges.
-
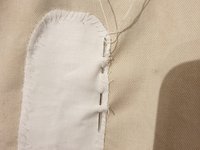
Lay the fabric on the tear so that it protrudes about 1,5 / ½” on each side of the tear.
-
Attach the patch with pins.
-
-
-
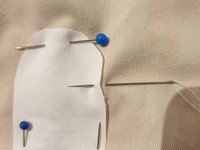
Stitch into the fabric of the pillow right next to the edge of the patch. Bring the needle out 2-3 mm further by stitching through the fabric of the pillow and the patch.
-
Then stitch back in at the stitching point and out at the same stitching point. Repeat this a second time.
-
Now the initial thread is secured.
-
-
-
-
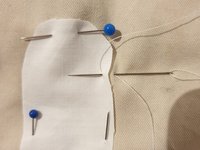
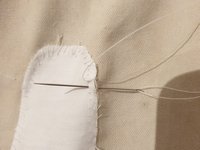
Now slide the end of the thread under the patch.
-
Stitch back into the pillow fabric about 2 mm below the first stitching point and bring the needle out 2-3 mm further by stitching through the pillow fabric and the patch.
-
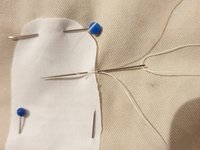
Sew all the way around the patch in this manner.
-
-
-
While sewing the patch on, turn the pillow so that you can always pierce from the right (or from the left if you are left-handed).
-
-
-
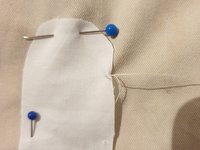
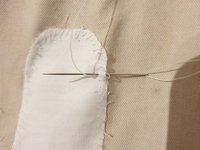
When you have sewn the last stitch, stitch again into the same entry point and out the same exit point.
-
Repeat this a second time.
-
-
-
Stitch a third time into the stitching point of the last stitch and out again at its stitching point. Do not pull the thread completely tight, but leave a small loop.
-
Pass the needle through the loop and pull it tight.
-
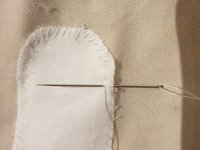
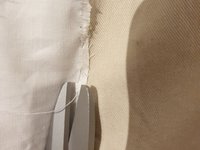
Then weave the needle through the fabric a few times, pull it out and cut just above the last stitch out point.
-
-
-
And this is what it looks like when it is done. Because of the flat seam you won't even notice the patch when there is a cover over it.
-


As the pillow will go inside a pillowcase it doesn’t matter if the patch is visible. If you want to patch a pillow which won’t have a case you can look for various Techniques on Visible Mending, to make your repair a work of art.
As the pillow will go inside a pillowcase it doesn’t matter if the patch is visible. If you want to patch a pillow which won’t have a case you can look for various Techniques on Visible Mending, to make your repair a work of art.
Un ringraziamento speciale a questi traduttori:
100%


Questi traduttori ci stanno aiutando ad aggiustare il mondo! Vuoi partecipare?
Inizia a tradurre ›

Team
