
PSP 300x UMD Drive Replacement
Introduzione
Vai al passo 1Guide for removing the UMD Drive of a Sony PSP-3000


-
-
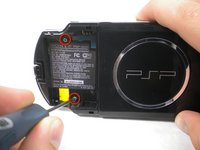
Place the PSP face down and locate the battery cover on the left side of the device.
-
Lift and remove the battery cover to reveal the battery.
-
Remove the battery.
-
-
-
Peel back the warranty sticker that is behind the battery with a spudger or your fingernail.
This will end your warranty, so do it on your own risk!
Even though warranties are long expired on these things.
“IF” your on this Site “I FIX IT(tm) to lean how to repair something on your own… you “Should NOT” be too concerned about warranty any longer, as if you were .. for your iPhone or Pad etc… you would have taken it to the supplier.. No??
-
-
-
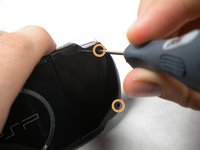
Then, remove the single screw from the bottom edge of the PSP (which is positioned next to the barcode).
“DON’T” forget to put your screws separately on a mag mat (Or sticky tape) so to 1) Not loose them & 2) Remember where they go as they may be of differing sizes. (Refer time the pictures also helps, but you can take a pic on your camera as you go to remind you also.
-
-
-
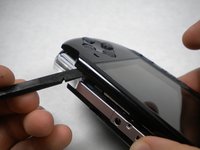
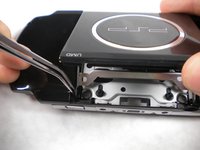
Slide the spudger in between the outer casing of the PSP, beginning at the "R" shoulder button, and gently pry off the casing.
-
Remove the front casing completely.
J’ai récemment fait cette réparation et le boîtier avant ne voulait pas venir à condition d’enlever les deux vis sur le boîtier arrière au niveau du joystick et de la croix directionnelle. Il manque donc selon moi une partie mais je peux me tromper !
-
-
-
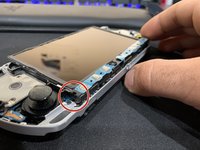
Push the homebar to the right to release the tab located on the right side of the LCD screen.
-
-
-
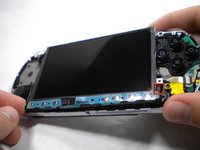
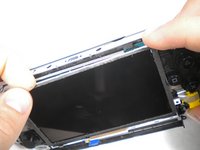
Slowly lift the LCD screen off the PSP starting at the top edge corner.
Attention à cette partie où l’écran est un peu bloqué dans le coin inférieur droit, il faut donner un peu de jeu vers la gauche pour le décaler et le retirer plus facilement.
-
-
-
Flip the small brown locks on the four ribbon cable connectors up using a spudger or fingernail.
-
Pull all four ribbon cables out.
-
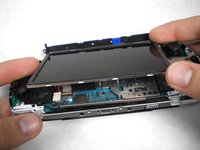
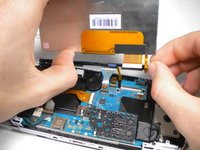
Now remove the LCD screen and homebar from the PSP.
-
-
-
-
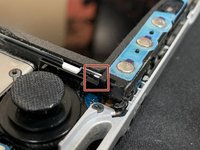
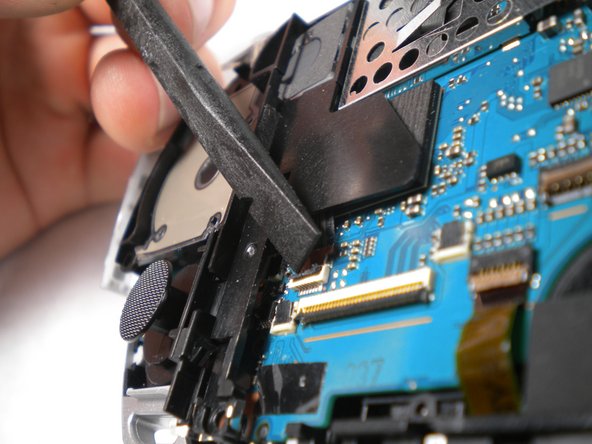
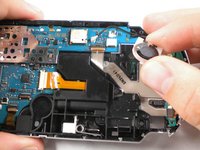
Using a fingernail or spudger, flip up the retaining bracket on the d-pad and 'L' trigger ribbon cable.
-
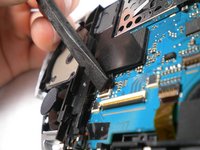
Lift the black plastic bracket along with the d-pad contact pad, disconnecting the ribbon cable as you lift.
-
-
-
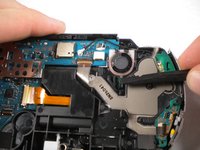
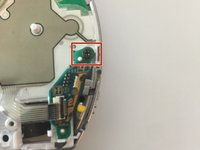
The speaker is spring loaded, so be sure to keep an eye on it in case it starts doing flips into the air when you push the tab. Be careful not to lose or damage it!
-
-
-
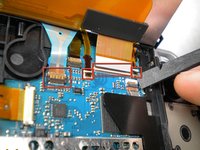
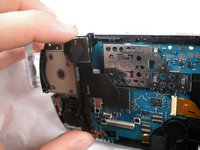
Remove the cable carefully by lifting upwards from port attached to the motherboard .
-
-
-
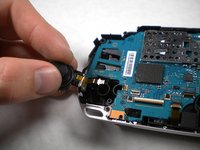
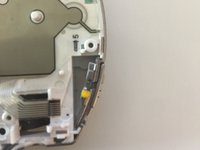
Remove the screw located at the top of the power switch panel.
-
-
-
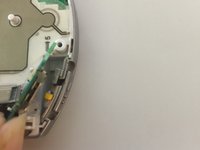
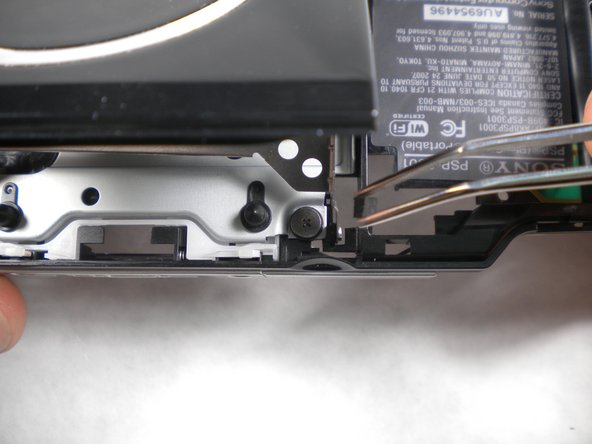
Detach the metal piece from where it is attached to the body underneath the rubber pieces that were just removed.
-
The side of the piece that is closest to the door opening should now be loose. The whole piece should now be slid farther into the drive through the slots.
-
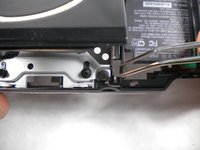
Once you slide the piece toward the back of the slots, the side that is still attached can be pried towards the center of the drive on each side to remove it from the slots on the door.
-


To reassemble your device, follow these instructions in reverse order.
To reassemble your device, follow these instructions in reverse order.
Annulla: non ho completato questa guida.
Altre 26 persone hanno completato questa guida.
6 Commenti
Perfect!!! You forgot to mention 'GET YOUR EYEGLASSES' for the 50+ year old fathers that have to help on this procedure!!!! Man, oh man, are those parts small and delicate!!!! GREAT tutorial, than you very much! Blind in Boston.
The tutorial was great btw, however after assembling everything into my new blue Mod i was left with a white plastic piece and a spring witch is in my psp 3001 models , not sure but i see in the last picture of this tutorial you have the white piece left in the drive. it is located behind the cd rom part near the top of the psp where the 2 x holes are. it sucks cause it dont close properly without the white piece and theres also 1 of the 2 springs not mentioned in this tutorial neither im trying to figure out where it goes. But thanks for this guide as it has helped me alot..
:)
Ken
Someone found the location of the missing spring? Haven’t figured it out yet…
This has too many extra steps. If you’re *just* taking out the UMD drive, you only need to follow these sections: battery, casing, LCD screen, UMD drive. This guide should really just be called “how to completely disassemble your PSP 3000”.
wszystko zgodnie z instrucją , i drugi ekran wylany mimo ostroznosci, autor zapomnial dodac ze od razu ekran mozna sobie nowy zamawiac bo wg tego gownianego opisu uszkodzicie sobie lcd i nie gowno nie ostroznosc wam pomoze autorowi zycze aby ci huju kazdy sprzet sie w rekach rozwalal