
Nikon Coolpix S630 LCD Screen Replacement
Introduzione
Vai al passo 1This guide will go through the steps to properly and safely remove the LCD screen from your Nikon Coolpix S630 for repair, replacement, or maintenance.
Cosa ti serve


-
-
The battery compartment is located on the bottom of the camera.
-
Place your thumb on the battery door.
-
Slide the door away from the camera in the direction the arrow points to.
-
-
-
Slide the yellow tab towards the back of the camera.
-
The battery should pop out.
-
Remove the battery.
-
-
-
Press the memory card down into the camera.
-
The memory card should pop out.
-
Remove the memory card.
-
-
-
-
Unscrew the two 3.5mm Phillips screws from the side with the AV outlet.
-
Unscrew the 3.5mm Phillips screw from the opposite side of the camera.
-
Unscrew the six 3.5mm Phillips screws from the bottom of the camera.
-
-
Attrezzo utilizzato in questo passaggio:Tweezers$4.99
-
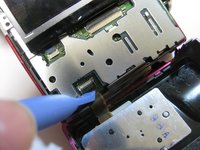
Place the plastic opening tool underneath the ribbon tab as shown. Gently lift the tab up.
-
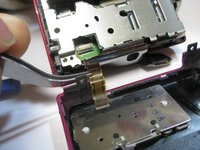
Gently pull the ribbon from the logic board with tweezers.
-
With the ribbon disconnected, the back casing should now be detached from the rest of the camera.
-
-
Attrezzo utilizzato in questo passaggio:Tweezers$4.99
-
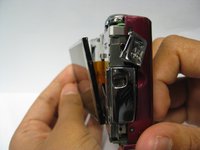
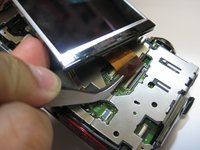
Lift LCD screen carefully from the metal casing
-
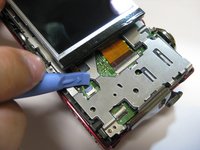
Lift the two tabs for both ribbons with a plastic case opener like in the previous step
-
Pull out ribbons gently from the logic board with tweezers to disconnect screen
-


To reassemble your device, follow these instructions in reverse order.
To reassemble your device, follow these instructions in reverse order.
Annulla: non ho completato questa guida.
Un'altra persona ha completato questa guida.
Team

Cal Poly, Team 8-56, Johann Spring 2013 Membro di Cal Poly, Team 8-56, Johann Spring 2013
CPSU-JOHANN-S13S8G56
4 Membri
18 Guide realizzate