
Nikon Coolpix S5300 Button Panel Replacement
Introduzione
Vai al passo 1This guide will allow the reader to how to disassemble the Nikon Coolpix S5300 and get to its button panel.
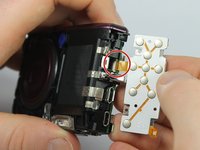
- Make sure to be gentle when removing ribbon cables.
- Be sure to keep track of all your screws.
Cosa ti serve


-
-
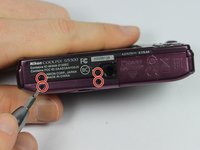
Turn the camera upside down and locate the battery compartment.
-
Slide the compartment open following the direction of the arrow.
-
-
-
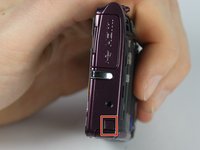
Remove the four 0.1mm screws from the bottom of the camera using the phillips head screwdriver
-
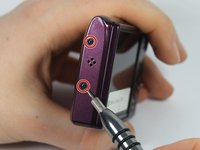
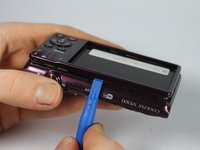
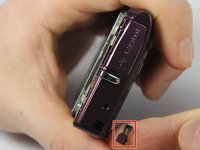
Using the same screwdriver, remove the 2 screws on the side of the camera.
-
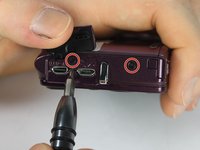
Remove the 2 screws from the other side of the camera.
-
-
-
-
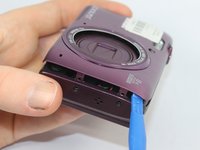
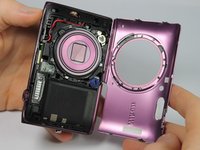
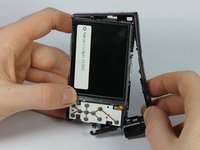
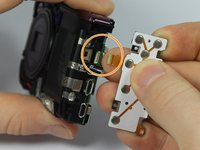
Remove the 2 screws on the silver plate
-
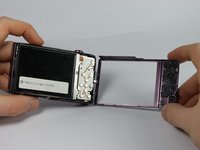
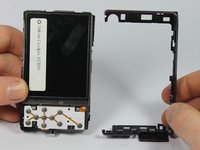
Gently lift the screen and silver plate away from the internal components.
-


To reassemble your device, follow these instructions in reverse order.
To reassemble your device, follow these instructions in reverse order.
Team

UMass Dartmouth, Team 6-1, Bhusal Spring 2016 Membro di UMass Dartmouth, Team 6-1, Bhusal Spring 2016
UMASSD-BHUSAL-S16S6G1
3 Membri
12 Guide realizzate