Salta al contenuto principale
Nikon Coolpix L32 Selection buttons Replacement

Nikon Coolpix L32 Selection buttons Replacement

Sherika Jacobs

Sherika Jacobs e 4 altri collaboratori

Ultimo aggiornamento il June 26, 2020

6 minuti
Moderato

Introduzione

Vai al passo 1

This guide will explain how to replace the selection buttons on the camera. There are no hazards associated with this replacement. Let's get started!

Cosa ti serve

Strumenti

  1. Nikon Coolpix L32 Selection buttons Replacement, Front Panel: passo 1, immagine 1 di 3 Nikon Coolpix L32 Selection buttons Replacement, Front Panel: passo 1, immagine 2 di 3 Nikon Coolpix L32 Selection buttons Replacement, Front Panel: passo 1, immagine 3 di 3
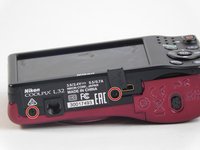
    • Remove the six(3.93mm screws) on the outside of the camera using a Phillips 00 screwdriver.

  2. Nikon Coolpix L32 Selection buttons Replacement: passo 2, immagine 1 di 1
    • Open the battery compartment door and pull the black back face apart from the front red face.

  3. Nikon Coolpix L32 Selection buttons Replacement, Selection buttons: passo 3, immagine 1 di 1
    • Secure the black back case in hand and remove selection buttons from the case by pushing them upward and replace them with a new set of buttons.

Conclusione

To reassemble your device, follow these instructions in reverse order.

Team

USF Tampa, Team 2-4, Blackwell Fall 2016 Membro di USF Tampa, Team 2-4, Blackwell Fall 2016

USFT-BLACKWELL-F16S2G4

4 Membri

10 Guide realizzate

0 Commenti

Aggiungi Commento

Visualizza Statistiche:

Ultime 24 Ore: 0

Ultimi 7 Giorni: 5

Ultimi 30 Giorni: 7

Tutti i Tempi: 440