Salta al contenuto principale
Nikon Coolpix B700 Button Assembly Replacement

Nikon Coolpix B700 Button Assembly Replacement

Carlos Salgado

Carlos Salgado e 2 altri collaboratori

Ultimo aggiornamento il June 20, 2020

25 minuti
Moderato

Introduzione

Vai al passo 1

This guide shows how to replace the assembly of the shutter button/mode selector dial/buttons. This assembly can be replaced if any of the buttons malfunction or are faulty. The back cove and bracket need to be removed before removing the button assembly.

Cosa ti serve

Strumenti

Mostra di più…

  1. Nikon Coolpix B700 Button Assembly Replacement, Back Frame Assembly: passo 1, immagine 1 di 1
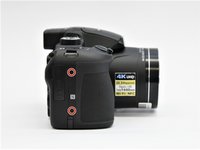
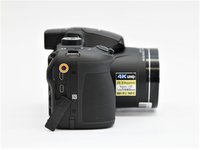
    • Use the Phillips screwdriver to remove the two 5.5 mm screws on the left side of the camera.

  2. Nikon Coolpix B700 Button Assembly Replacement: passo 2, immagine 1 di 1
    • Use the Phillips screwdriver to remove seven 5.5 mm screws from the bottom of the camera.

  3. Nikon Coolpix B700 Button Assembly Replacement: passo 3, immagine 1 di 2 Nikon Coolpix B700 Button Assembly Replacement: passo 3, immagine 2 di 2
    • Use the Phillips screwdriver to remove the two 5.5mm screws on the right side of the camera.

    • Open the HDMI flap to remove a 5.5mm screw.

    • Don't forget to replace the hidden screw under the HDMI flap during reassembly.

  4. Nikon Coolpix B700 Button Assembly Replacement: passo 4, immagine 1 di 1
    • Use the Phillips screwdriver to remove the two 5.5mm screws under the LCD panel.

  5. Nikon Coolpix B700 Button Assembly Replacement: passo 5, immagine 1 di 3 Nikon Coolpix B700 Button Assembly Replacement: passo 5, immagine 2 di 3 Nikon Coolpix B700 Button Assembly Replacement: passo 5, immagine 3 di 3
    • Open the flash assembly and insert the spudger into the slot under the flash unit and twist.

    • While twisting, pry apart the shell to split the camera in half.

  6. Nikon Coolpix B700 Button Assembly Replacement: passo 6, immagine 1 di 1
    • Be careful not to damage the ribbons that connect the halves together.

  7. Nikon Coolpix B700 Button Assembly Replacement: passo 7, immagine 1 di 2 Nikon Coolpix B700 Button Assembly Replacement: passo 7, immagine 2 di 2
    • Place the pry tool under the black latch. Lift gently until the latch flips up.

    • Gently pull the ribbon away from the latch.

    • Be gentle when taking ribbons out and apart because they are fragile.

  8. Nikon Coolpix B700 Button Assembly Replacement, Button Assembly: passo 8, immagine 1 di 1
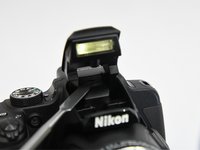
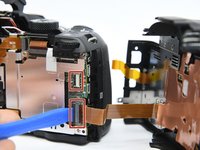
    • Lift the corner under the power button up.

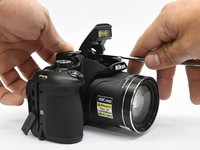
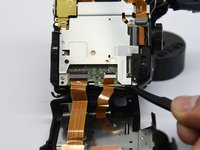
    • While at the same time pushing the selector knob back.

  9. Nikon Coolpix B700 Button Assembly Replacement: passo 9, immagine 1 di 1
    • This should remove the entire assembly from the camera housing.

Conclusione

To reassemble your device, follow these instructions in reverse order.

Altre 3 persone hanno completato questa guida.

0 Commenti

Aggiungi Commento

Visualizza Statistiche:

Ultime 24 Ore: 0

Ultimi 7 Giorni: 4

Ultimi 30 Giorni: 16

Tutti i Tempi: 524