
Nikon Coolpix AW130 Map/Wi-Fi/Action Buttons Replacement
Introduzione
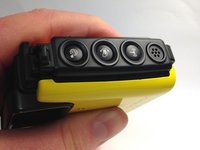
Vai al passo 1These three buttons supply the Nikon Coolpix AW130 with its supplementary features such as instantaneous sharing and location services. Nevertheless, they can become easily dirtied by underwater adventures and off-roading.
Cosa ti serve


-
-
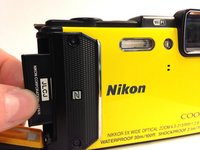
Using your thumb and pointer finger, open the card/battery hatch by pressing the center button of the wheel and turning the entire wheel to the left.
-
-
-
-
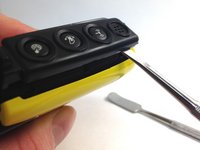
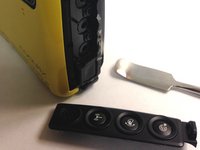
Using the spudger, pry the plastic button face from the camera body.
-


To reassemble your device, follow these instructions in reverse order.
To reassemble your device, follow these instructions in reverse order.
Team

Western Carolina University, Team 1-4, Virtue Spring 2016 Membro di Western Carolina University, Team 1-4, Virtue Spring 2016
WCU-VIRTUE-S16S1G4
5 Membri
16 Guide realizzate