Salta al contenuto principale
Nikon CoolPix S600 Motherboard Assembly Replacement

Nikon CoolPix S600 Motherboard Assembly Replacement

andreas anggasastra

andreas anggasastra e 5 altri collaboratori

Ultimo aggiornamento il January 6, 2015

30 minuti
Difficile
Necessarie Immagini Migliori
Passi mancanti
Introduzione Migliore

Cosa ti serve

Strumenti

  1. Nikon CoolPix S600 Motherboard Assembly Replacement, Front and Rear Casing: passo 1, immagine 1 di 1
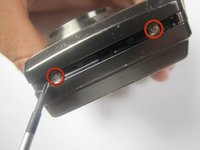
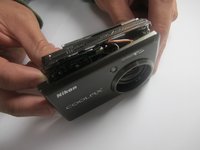
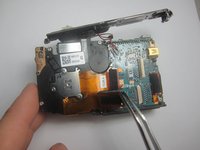
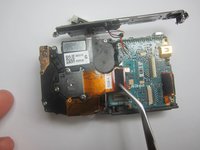
    • With the lens facing forward, remove the one 4.2 mm screw on the bottom right hand corner of the camera.

  2. Nikon CoolPix S600 Motherboard Assembly Replacement: passo 2, immagine 1 di 1
    • Remove the chrome side cover from the body of the camera.

  3. Nikon CoolPix S600 Motherboard Assembly Replacement: passo 3, immagine 1 di 1
    • Remove the four 3.2 mm screws on the bottom of the camera.

  4. Nikon CoolPix S600 Motherboard Assembly Replacement: passo 4, immagine 1 di 2 Nikon CoolPix S600 Motherboard Assembly Replacement: passo 4, immagine 2 di 2
    • Remove the two 3.2 mm screws from the right side of the camera (with lens is facing forward)

    • Remove the one 3.2 mm screw from the left side of the camera (with lens facing foward)

  5. Nikon CoolPix S600 Motherboard Assembly Replacement: passo 5, immagine 1 di 2 Nikon CoolPix S600 Motherboard Assembly Replacement: passo 5, immagine 2 di 2
    • Gently separate the back cover from the body of the camera.

    • The back casing will still be connected to the circuit board by a ribbon

  6. Nikon CoolPix S600 Motherboard Assembly Replacement: passo 6, immagine 1 di 1
    Attrezzo utilizzato in questo passaggio:
    Tweezers
    $4.99
    • Use the tweezers to disconnect the ribbon from the circuit board.

  7. Nikon CoolPix S600 Motherboard Assembly Replacement: passo 7, immagine 1 di 1
    • Remove the one 2.6 mm screw from the left side of the camera (with the lens facing forward)

  8. Nikon CoolPix S600 Motherboard Assembly Replacement: passo 8, immagine 1 di 2 Nikon CoolPix S600 Motherboard Assembly Replacement: passo 8, immagine 2 di 2
    • Gently separate the front cover from the body of the camera.

    • The front casing will still be connected to the circuit board by a few wires

  9. Nikon CoolPix S600 Motherboard Assembly Replacement: passo 9, immagine 1 di 1
    • Remove the two 3.2 mm screws that hold the flash to the front cover.

  10. Nikon CoolPix S600 Motherboard Assembly Replacement: passo 10, immagine 1 di 3 Nikon CoolPix S600 Motherboard Assembly Replacement: passo 10, immagine 2 di 3 Nikon CoolPix S600 Motherboard Assembly Replacement: passo 10, immagine 3 di 3
    • Use the Spudger to remove the copper colored light bulb clip.

    • Remove the front cover entierly from the camera body.

  11. Nikon CoolPix S600 Motherboard Assembly Replacement, Lens Assembly: passo 11, immagine 1 di 2 Nikon CoolPix S600 Motherboard Assembly Replacement, Lens Assembly: passo 11, immagine 2 di 2
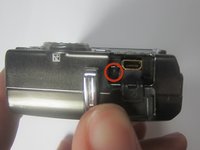
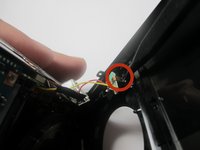
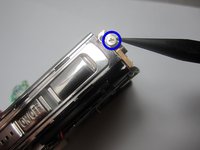
    • From the top view of the camera, remove the one 5.8 mm screw.

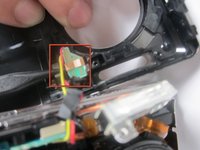
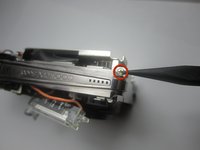
    • From the top view of the camera, remove the one 2.8 mm screw

  12. Nikon CoolPix S600 Motherboard Assembly Replacement: passo 12, immagine 1 di 1
    • Remove the three 3.4 mm screws from the back side of the camera.

  13. Nikon CoolPix S600 Motherboard Assembly Replacement: passo 13, immagine 1 di 1
    • Remove the two 3.4 mm screws from the side of the camera.

  14. Nikon CoolPix S600 Motherboard Assembly Replacement: passo 14, immagine 1 di 1
    • Separate the two metal body pieces from the rest of the camera.

  15. Nikon CoolPix S600 Motherboard Assembly Replacement: passo 15, immagine 1 di 2 Nikon CoolPix S600 Motherboard Assembly Replacement: passo 15, immagine 2 di 2
    • Gently remove the two ribbons connecting the lens to the mother board.

  16. Nikon CoolPix S600 Motherboard Assembly Replacement: passo 16, immagine 1 di 2 Nikon CoolPix S600 Motherboard Assembly Replacement: passo 16, immagine 2 di 2
    • Gently separate the camera lens from the mother board.

  17. Nikon CoolPix S600 Motherboard Assembly Replacement, Motherboard Assembly: passo 17, immagine 1 di 1
    • The mother board is permanently fixed to the battery housing.

    • Mother board cannot be taken a part any further.

Conclusione

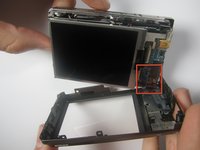
To reassemble your device, follow these instructions in reverse order.

Un'altra persona ha completato questa guida.

Team

Cuesta, Team 1-6, Zipperian Fall 2011 Membro di Cuesta, Team 1-6, Zipperian Fall 2011

CUESTA-ZIPPERIAN-F11S1G6

2 Membri

6 Guide realizzate

0 Commenti

Aggiungi Commento

Visualizza Statistiche:

Ultime 24 Ore: 0

Ultimi 7 Giorni: 1

Ultimi 30 Giorni: 5

Tutti i Tempi: 1,291