
Nikon COOLPIX P500 Front Case Replacement
Introduzione
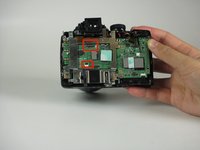
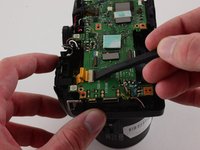
Vai al passo 1This guide will demonstrate how to isolate the front case of the camera from the rest of the device.
Cosa ti serve


-
-
Press down and forward on the battery cover latch.
-
Push the orange latch, in the direction of the arrow on it, to release the battery.
-
-
-
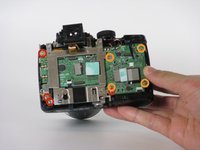
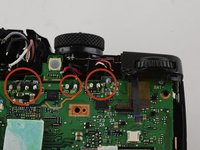
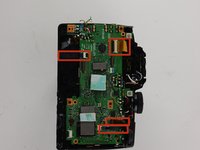
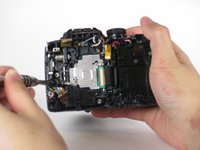
Remove all the marked screws using a PH00 screwdriver.
-
Remove the two 3mm screws on the grip.
-
Remove the two 4mm screws on the side opposite the grip.
-
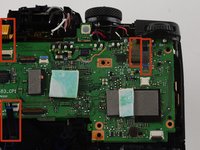
Remove the three 4mm screws on the base of the camera.
-
Remove the four 3mm screws on the base of the camera.
-
-
-
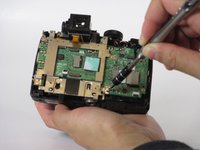
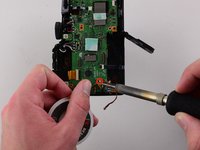
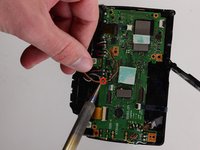
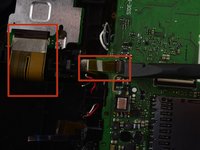
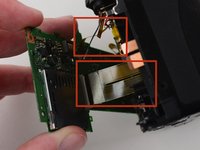
Remove the 2mm screw from the microphone metal grid using a PH00 screwdriver.
-
Remove the 4mm screw that was under the metal microphone grid using a PH00 screwdriver.
-
-


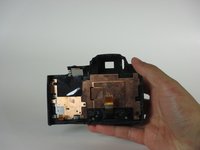


To reassemble your device, follow these instructions in reverse order.
To reassemble your device, follow these instructions in reverse order.
Annulla: non ho completato questa guida.
Un'altra persona ha completato questa guida.
Team

Cal Poly, Team 19-10, Maness Winter 2015 Membro di Cal Poly, Team 19-10, Maness Winter 2015
CPSU-MANESS-W15S19G10
4 Membri
14 Guide realizzate
2 Commenti
Resolveu a minha vida. Eu estava com problemas de fungos no sensor.
consegui desmontar e limpar.