
Nexus 7 Speaker Assembly Replacement

Introduzione
Vai al passo 1Lack of sound got you down? Use this guide to replace a damaged or broken speaker assembly.
Cosa ti serve
Ricambi

Strumenti


Mostra di più…
-
-
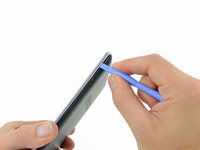
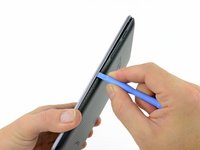
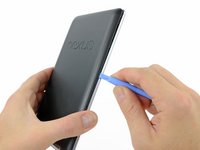
Gently insert a plastic opening tool near the top of the Nexus 7 between the rear panel and the front panel assembly.
-
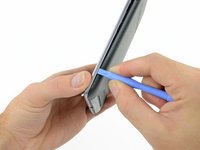
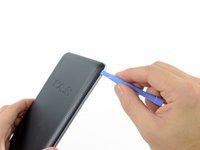
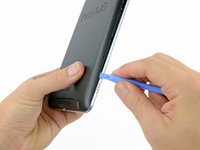
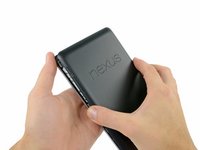
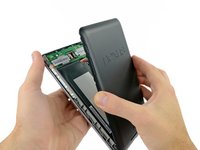
Carefully run the plastic opening tool along the top edge to pry the rear panel away from the front panel assembly of the Nexus 7.
My Nexus 7 looks nothing like this. These instructions are horrible as they do not work.
someone help? my nexus looks completely different
-
-
-
-
Using the tip of a spudger, push first on one side then the other to "walk" the battery cable straight out of its socket on the motherboard.
I have the newer version of Nexus and the battery connection inside is different from pictured here. I can't seem to get any part of the connector backed out. Any further details about how to accomplish this step?
After my post I tried it again, and realized the connector comes straight UP, not OUT. Once I went this direction, the process was simple.
I followed this, everything worked fine. Even though the battery is now charging, the OS doesn't recognise when the USB cable is connected to a wall socket or a PC. The battery icon when the tablet is shut down shows charging so it works, but the OS in itself doesn't seem to know about it...any ideas?
/D
Thanks for your guide. It makes the process very straightforward. Easier than I was expecting.
Yes, this is a really helpful guide. I wouldn't have had a clue without it, but it all turned out to be very simple. Thanks a lot!
Step 6 could be much clearer. I thought it meant to pry the connector upward, away from the surface. When I did this, all the pins broke off. The correct procedure would appear to be to slide the connector along the surface toward the wire side and battery, leaving the pins at parallel to the surface.
Unfortunately I don't think my Nexus 7 is salveagable now.
Watching a YouTube video helped. Dislodge the battery first, then pull the battery away from the connector and the connector will become dislodged quite easily.
-
-
-
Peel back the copper ESD shielding covering the bottom of the motherboard.
-
If you're just replacing the micro usb charge port, there is no need to peel back the copper heatsink like in the photo, the speaker assembly can simply be moved out of the way once unscrewed. If the speakers are to be replaced simply peel back the bottom corner to expose the speaker connection. Leave the rest of the heatsink shield alone.
-
-
-
Remove the following screws securing the speaker assembly to the display assembly:
-
Two 4.25 mm black Phillips screws
-
One 3.2 mm silver Phillips screw
-


To reassemble your device, follow these instructions in reverse order.
To reassemble your device, follow these instructions in reverse order.
Annulla: non ho completato questa guida.
Altre 36 persone hanno completato questa guida.

7 Commenti
Bobski, if you're not covered under warranty then you'll have to buy the speaker assembly on your own, from eBay or a third party site. They're kind of rare.
EXCELLENT guide, had no issues replacing mine and works great! Thanks iFixit!
Guide was great! Worked perfectly. Thank you!
Thanks so much, my nexus speaker had blown and I had another dead nexus laying around in my basement so with the help of this guide replaced the blown device
Mine doesn't look like this. There is no metal band around it. The only opening looks like its between the front glass and back which is on the front. I'm afraid to try it for fear of breaking it. Any suggestions?
Kim McCauley - Replica
There is no front or rear panel. There’s no sign of any seam whatsoever. The front and back are one solid piece of plastic.
Proud Liberal - Replica