
Nexus 4 Speaker Replacement
Introduzione
Vai al passo 1This guide will detail how to remove and install the phone's speakers, located at the bottom of the Nexus 4.
Cosa ti serve
Ricambi
Strumenti


Mostra di più…
-
Attrezzo utilizzato in questo passaggio:SIM Card Eject Tool$2.99
-
Power off the phone, by long-pressing the power button and touching Power off.
-
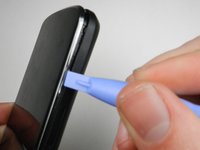
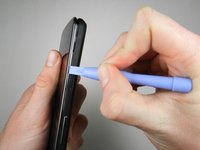
Remove the SIM tray using the SIM Card Eject Tool.
-
-
Attrezzo utilizzato in questo passaggio:T5 Torx Screwdriver$5.49
-
Remove the two screws from the bottom of the phone with a T5 Torx Screwdriver.
-
-
-
-
Remove the two 1.8 mm Phillips screws holding down the battery connector.
-
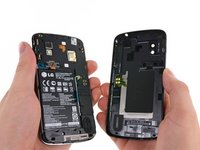
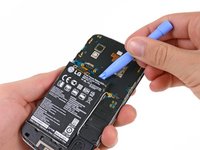
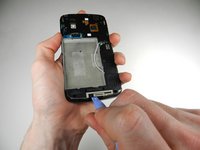
Using a plastic opening tool, disconnect the battery cable from its socket on the motherboard.
-
-
Attrezzo utilizzato in questo passaggio:Plastic Cards$2.99
-
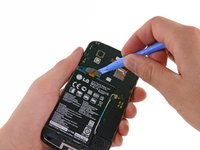
Remove the blue tape that secures the white antenna cable to the battery.
-
Using a spudger, carefully disconnect the white antenna cable.
-
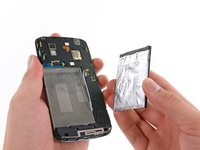
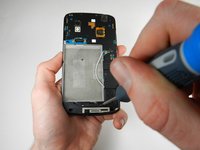
Carefully pry the battery out with a Plastic Opening Tool, starting at the top left-hand corner and working down towards the bottom right-hand corner.
-
-
-
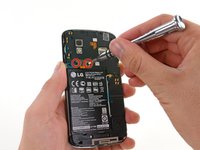
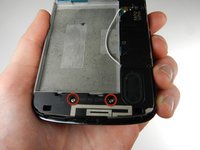
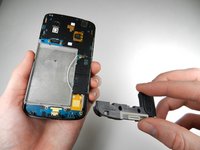
Remove the two 4.8 mm screws that hold the speaker enclosure together using the Phillips 00 screwdriver.
-


To reassemble your device, follow these instructions in reverse order.
To reassemble your device, follow these instructions in reverse order.
Annulla: non ho completato questa guida.
Altre 10 persone hanno completato questa guida.
Team

Cal Poly, Team 3-32, Amido Winter 2013 Membro di Cal Poly, Team 3-32, Amido Winter 2013
CPSU-AMIDO-W13S3G32
4 Membri
8 Guide realizzate