Introduzione
Use this guide to remove or replace the screen on your Xiaomi Mi 11.
If the frame is deformed, it's important to replace it to make sure the new screen will mount correctly and won’t suffer damage from uneven pressure.
Note: This guide instructs you to replace only the screen while leaving the original frame and motherboard in place. However, some replacement screens for this phone come pre-installed in a new frame (a.k.a. chassis), which requires a very different procedure. Make sure you have the correct part before starting this guide.
Before you begin this procedure, be sure to have a set of replacement adhesives for both the back panel and the screen.
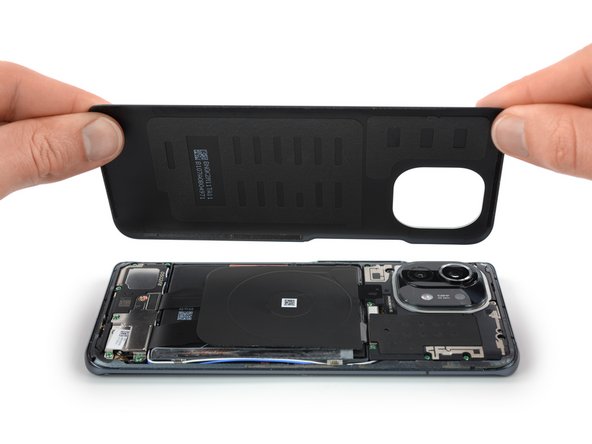
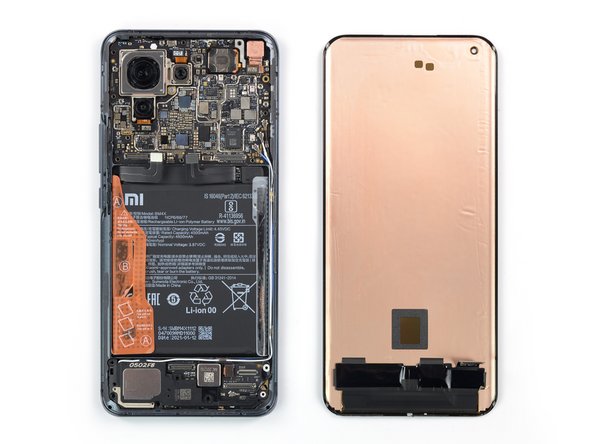
Note: In this guide we’re using a teardown device. This means that the motherboard has been deshielded during the teardown procedure. You can still do all the repairs with this guide but your motherboard will look like this.
Cosa ti serve
-
-
Prepare an iOpener and apply it to the rear glass for at least two minutes to loosen the adhesive underneath.
-
-
-
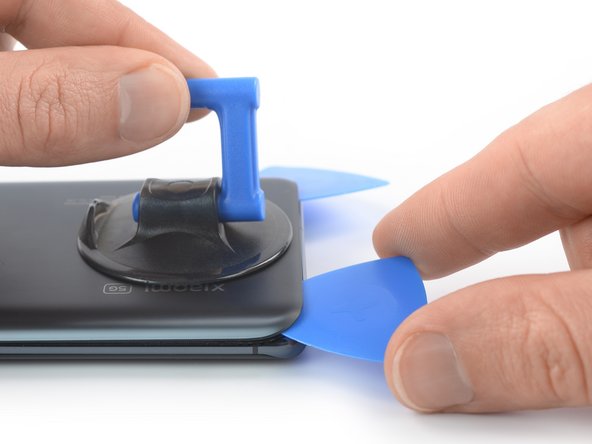
Secure a suction handle to the bottom edge of the rear glass, as close to the edge as possible.
-
Lift the back cover with the suction handle to create a small gap between the back cover and the frame.
-
Insert an opening pick into the gap you created.
-
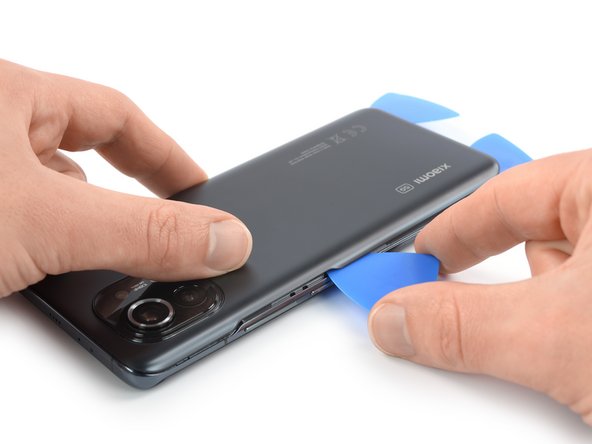
Slide the opening pick to the bottom right corner to slice the adhesive.
-
Leave the opening pick in place to prevent the adhesive from resealing.
-
-
-
Insert a second opening pick at the bottom edge of your phone.
-
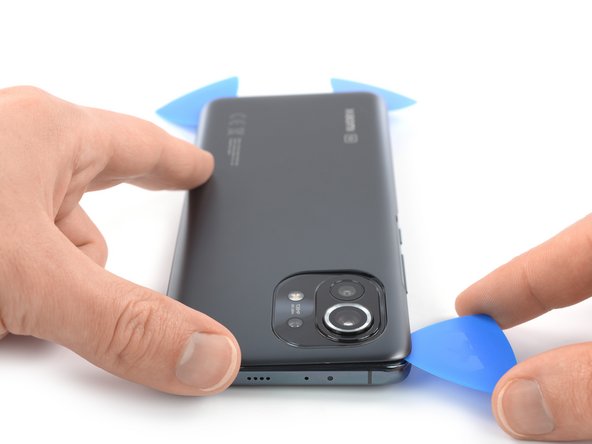
Slide the opening pick to the bottom left corner to slice the adhesive.
-
Leave the opening pick in place to prevent the adhesive from resealing.
-
-
-
Insert a third opening pick at the bottom left corner of your phone.
-
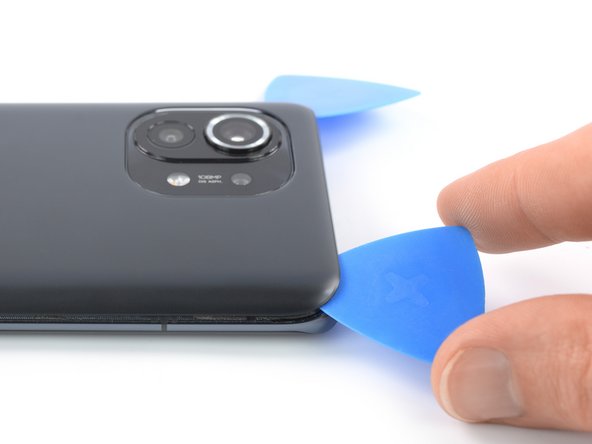
Slide the opening pick along the left edge of your Xiaomi Mi 11 to slice the adhesive.
-
Leave the opening pick in the top left corner to prevent the adhesive from resealing.
-
-
-
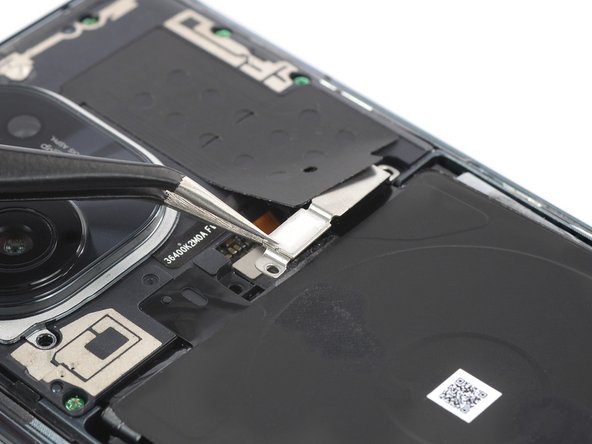
Use a Phillips screwdriver to remove the screws securing the connector metal bracket and the camera cover:
-
Two 4.4 mm-long screws
-
One 4.9 mm-long screw
-
Two 3.9 mm-long screws
-
-
-
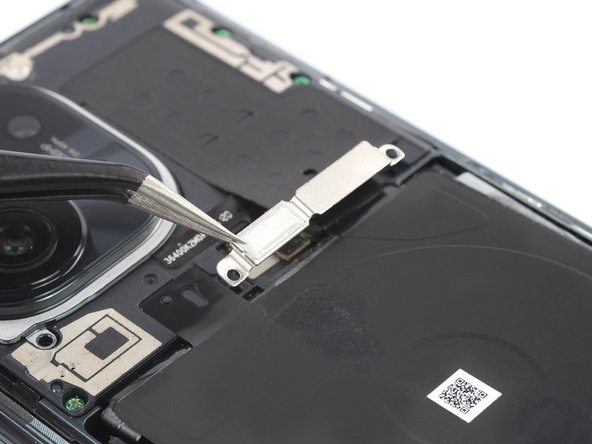
Use a pair of tweezers to remove the connector bracket by pulling it in the direction of the battery.
-
-
-
-
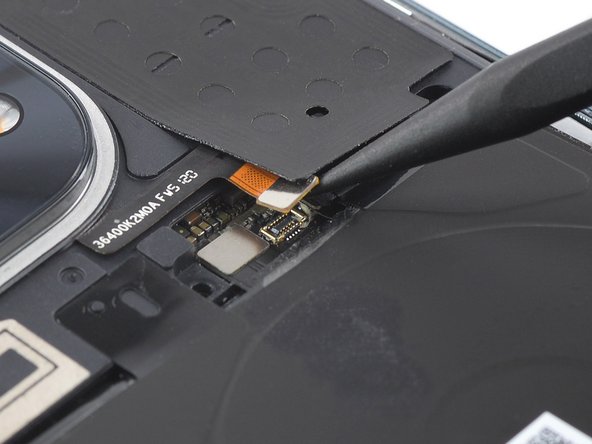
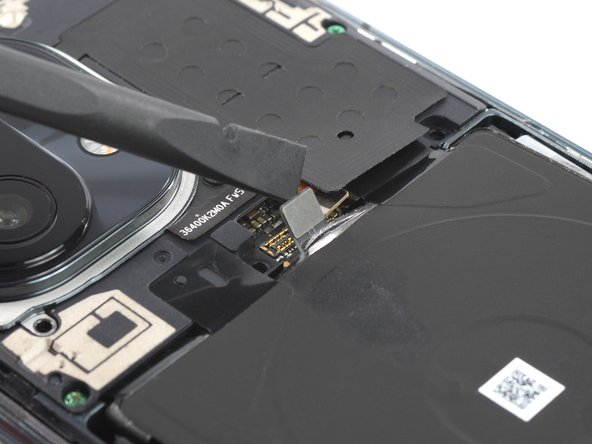
Use the pointed end of a spudger to disconnect the flash assembly cable by prying the connector straight up from its socket.
-
-
-
Use a spudger to disconnect the right battery cable by prying the connector straight up from its socket.
-
-
-
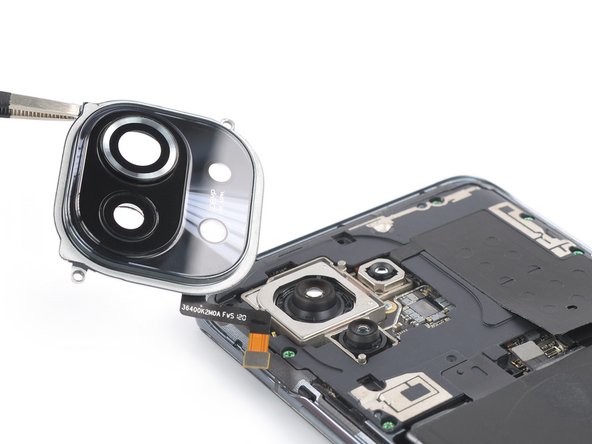
Use your fingers or a pair of tweezers to carefully lift the camera cover including the flash assembly off the camera lenses and remove it.
-
-
-
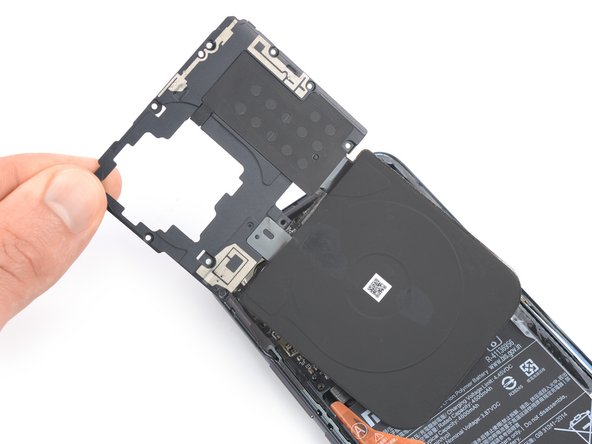
Use a Phillips screwdriver to remove the five 3.9 mm-long screws securing the motherboard cover.
-
-
-
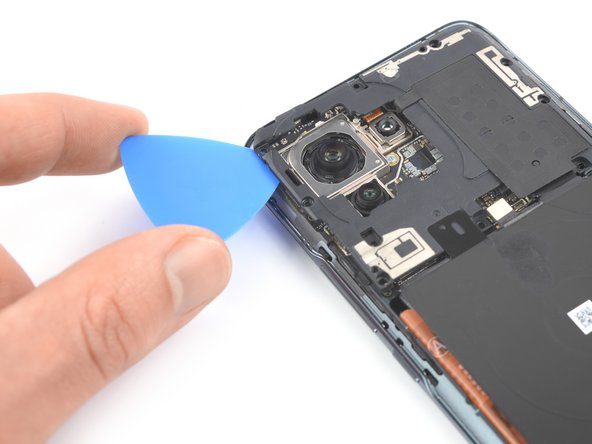
Insert an opening pick underneath the bottom left edge of the motherboard cover.
-
Slide the opening pick along the left edge of the motherboard cover and pry it up.
-
-
-
Use a spudger to disconnect the left battery cable by prying the connector straight up from its socket.
-
-
-
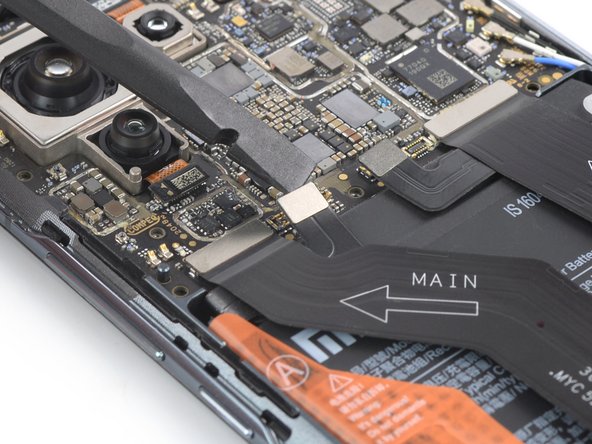
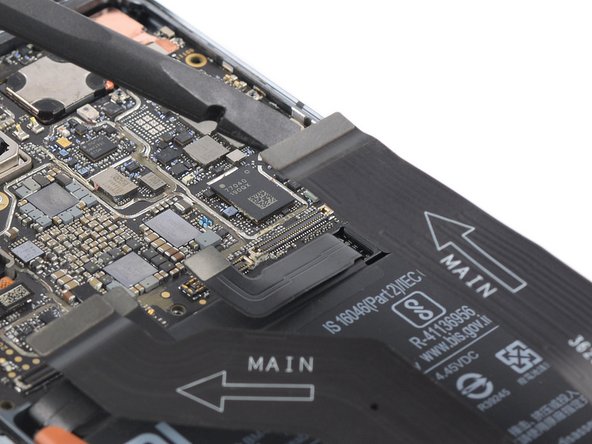
Use a spudger to disconnect the right interconnect cable from the motherboard by prying the connector straight up from its socket.
-
-
-
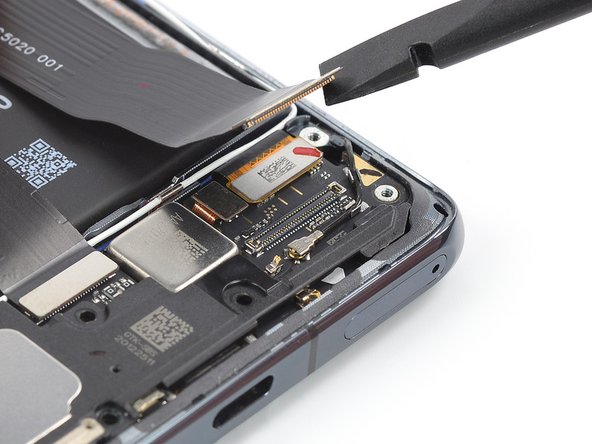
Use a spudger to disconnect the right interconnect cable from the daughterboard by prying the connector straight up from its socket.
-
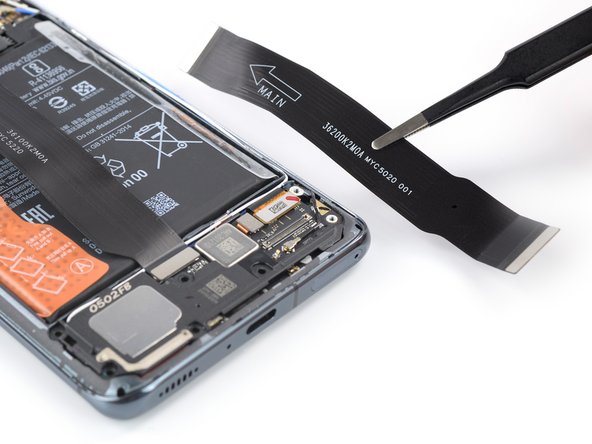
Remove the right interconnect cable.
-
-
-
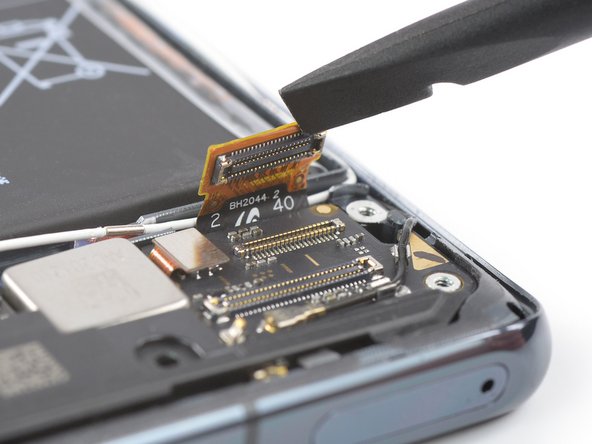
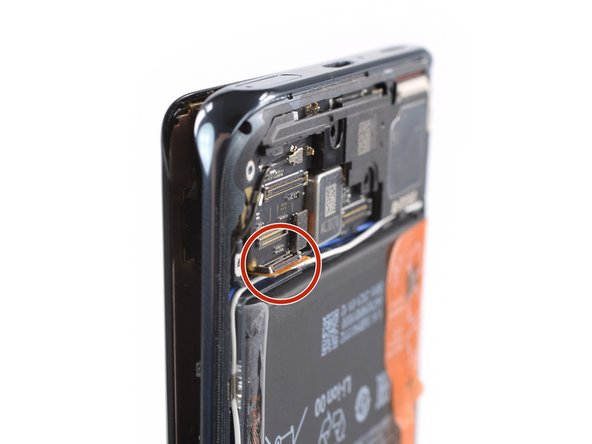
Use a spudger to disconnect the display flex cable by prying the connector straight up from its socket.
-
-
-
Apply a heated iOpener or a heat gun to the screen for two minutes to loosen the adhesive underneath.
-
-
-
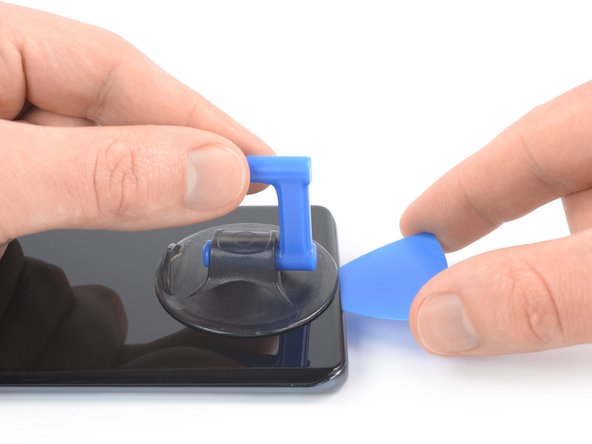
Once the screen is warm to the touch, apply a suction cup to the bottom edge of the phone.
-
Lift the screen with the suction handle to create a small gap between the screen and the frame.
-
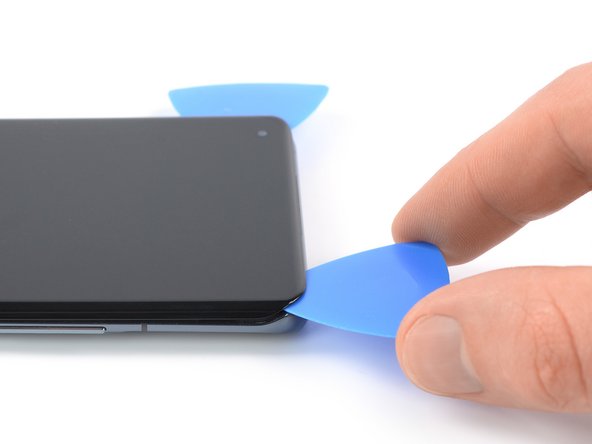
Insert an opening pick in the gap between the midframe and the screen.
-
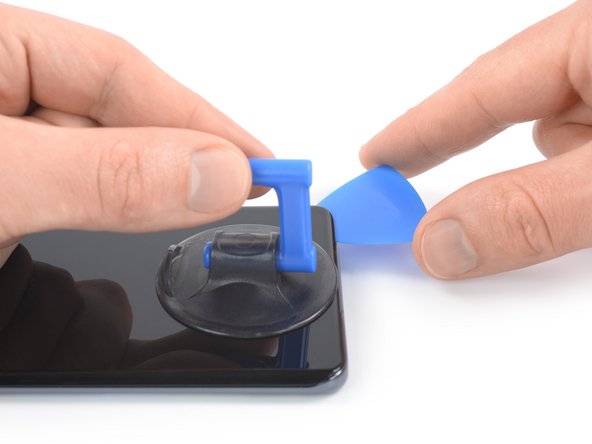
Slide the opening pick to the bottom right corner of the screen to slice its adhesive. Leave the opening pick in place to prevent the adhesive from resealing.
-
-
-
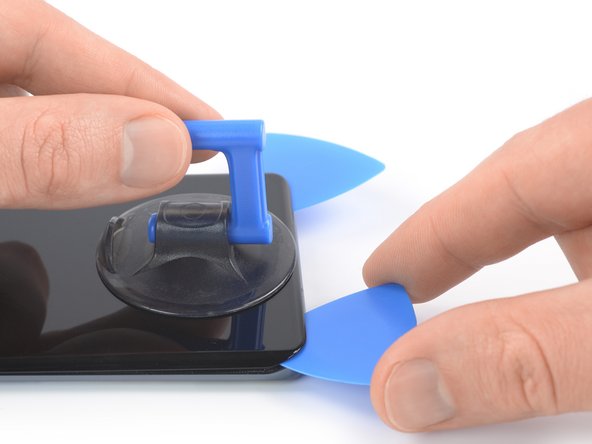
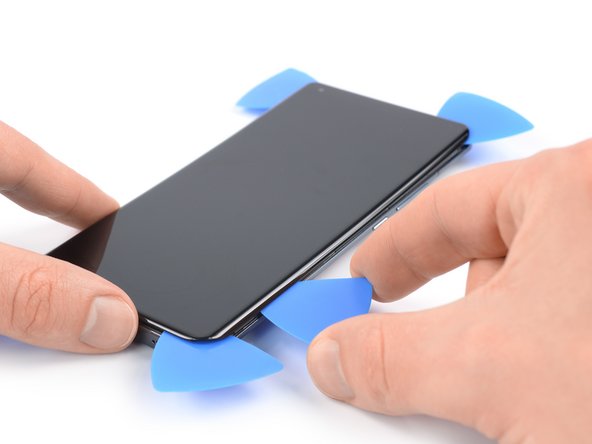
Insert a second opening pick and slide it to the bottom left corner of the screen to cut the adhesive.
-
Leave the opening picks in place to prevent the adhesive from resealing.
-
-
-
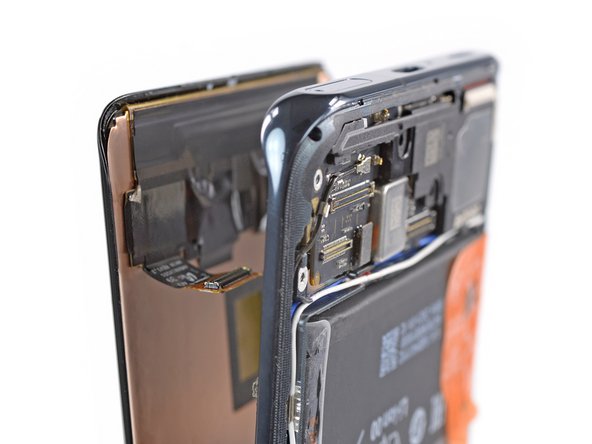
Thread the display flex cable through the gap in the midframe and remove the screen.
-


If possible, turn on your device and test your repair before installing new adhesive and resealing.
Compare your new replacement part to the original part—you may need to transfer remaining components or remove adhesive backings from the new part before installing.
To reassemble your device, follow the above steps in reverse order.
Take your e-waste to an R2 or e-Stewards certified recycler.
Repair didn’t go as planned? Try some basic troubleshooting, or ask our Answers community for help.
Annulla: non ho completato questa guida.
Altre 8 persone hanno completato questa guida.


2 Commenti
After new screen substitution is Impossible to add new fingerprint
You need to calibrate the fingerprint sensor. There are guides on Youtube and parts on Aliexpress