
Logitech M215 Button Plate Replacement

Introduzione
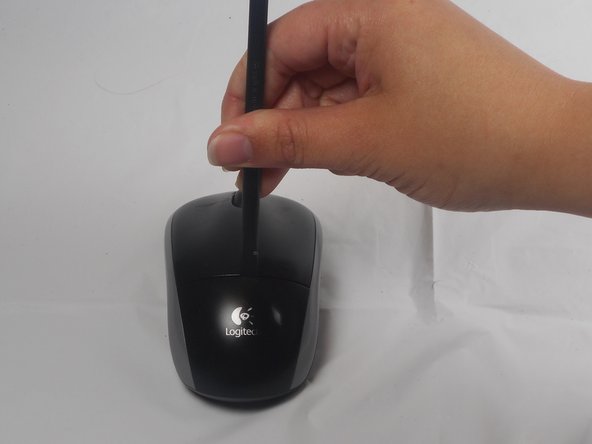
Vai al passo 1You will need a screw driver and prying tool for this guide. Some of the parts are hard to remove at first and have some force applied to them.
Cosa ti serve


-
-
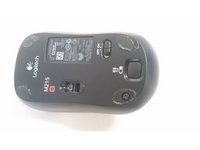
The battery compartment cover is located on the top of the mouse. The seam running horizontally across the mouse is the top of the cover.
-
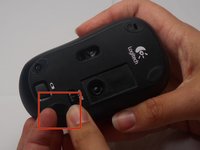
There is a button to pop off the cover. It is located on the bottom of the mouse. you may need to press hard on this button to pop the cover.
-
If the button does not work, you will need to pry off the cover. You can use your fingernails or a prying tool in order to do this, as seen in the third image.
-
-
-
Remember to insert the new battery in the same orientation as the old one. The positive (plus) end should be facing away from the buttons.
After replacing battery light goes on then off. I tried it twice. Do I need a new part.
After replacing battery the remote green light goes on then off. I tried it twice
What do u mean reverse order?
The laser light did not go on
Thank you this worked nicely
Thanks for this!
-
-
-
-
The pads on the underside of the mouse hide the screws. Remove these first. You may need to use your fingernails or a prying tool.
-
There will be two 0.5mm phillips head screws. Both will be underneath the bottom two pads.
-
-
-
Use your fingernail to carefully remove the two skid stickers from the fat (non-button) end of the bottom of the mouse to reveal two Philips head screws. Remove these, then unclip the bottom cover. Don't get the sticky dusty. Now remove buttons; they're both attached by one 0.5mm Phillips head screw. It is located in the center of the top cover.
-
-
-
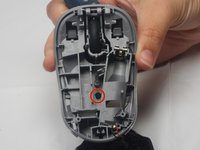
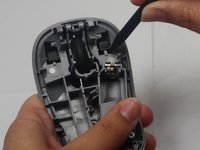
The button are now only attached by a small overhang near the front. You will need to use the pry tool to push the button plate off of this overhang as shown.
-
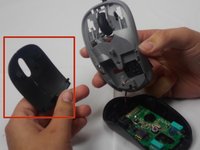
The button plate should be able to be completely removed at this point.
-


To reassemble your device, follow these instructions in reverse order.
To reassemble your device, follow these instructions in reverse order.
Annulla: non ho completato questa guida.
Un'altra persona ha completato questa guida.

Team

USF Tampa, Team 1-1, Watkins Winter 2015 Membro di USF Tampa, Team 1-1, Watkins Winter 2015
USFT-WATKINS-W15S1G1
4 Membri
28 Guide realizzate
1Commento della guida
Step 5 loops back to step 3. If you follow steps 3 and 4 you will break the tabs at the front of the top cover.
In step 4 use the pry tool to loosen the back end of the mouse if necessary but it should just come apart, then slide the top cover out from under the tabs at the front of the base.
Most of step 5 is a recap of steps 3 and 4, the circled screw in the second picture allows you to remove the button plate from the top cover.
Step 6 is only necessary for replacing the button plate or cleaning between the button plate and top cover, the actual switches are on the circuit board
The battery lid lifts up from the back. It does not slide back.
Bob Peters - Replica
U need to keep clean…& battery compartment needs gently pried off. Make sure to put back lid cover, pushing down on black prong..OR will not make contact.
cconradmoore - Replica
Thanks to u, i succeeded
aresa0519 - Replica