Salta al contenuto principale
Lenovo ThinkPad L440 RAM Replacement

Lenovo ThinkPad L440 RAM Replacement

Kristen Gismondi

Kristen Gismondi e un altro collaboratore

Ultimo aggiornamento il January 27, 2025

3 - 5 minuti
Moderato
Introduzione Migliore
Dettagli Mancanti
Studente al lavoro

Introduzione

Vai al passo 1

This guide provides step-by-step instructions for replacing the RAM in a Lenovo ThinkPad L440. Upgrading or replacing your laptop's RAM can improve its performance, allowing for smoother multitasking and better overall system responsiveness. This guide will help you complete the process safely and efficiently. Make sure to follow the instructions carefully and take appropriate precautions to avoid damaging your laptop.

Cosa ti serve

iFixit guadagna commissioni quando acquisti tramite questi link.
  1. Lenovo ThinkPad L440 RAM Replacement, Battery: passo 1, immagine 1 di 3 Lenovo ThinkPad L440 RAM Replacement, Battery: passo 1, immagine 2 di 3 Lenovo ThinkPad L440 RAM Replacement, Battery: passo 1, immagine 3 di 3
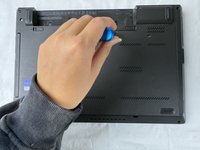
    • Open the laptop to access the power button.

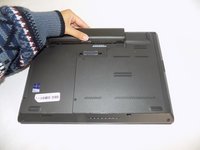
    • Hold the power button in the top right until the computer powers off.

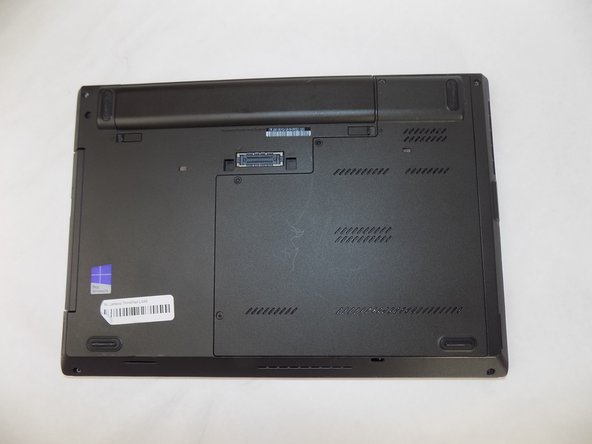
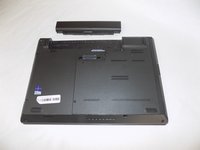
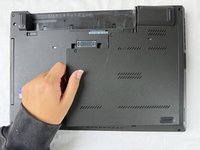
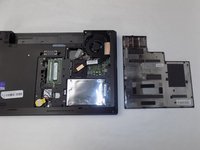
    • Turn the computer over so that the bottom of the computer is facing up

  2. Lenovo ThinkPad L440 RAM Replacement: passo 2, immagine 1 di 1
    • On the left side under the raised surface, move the tab to the left towards the unlocked symbol. Repeat this on the right side and move the tab to the right towards the unlocked symbol.

  3. Lenovo ThinkPad L440 RAM Replacement: passo 3, immagine 1 di 2 Lenovo ThinkPad L440 RAM Replacement: passo 3, immagine 2 di 2
    • From the top of the laptop, slide the raised surface away from the rest of the laptop and out of its slot to remove the battery from the computer.

  4. Lenovo ThinkPad L440 RAM Replacement, Back Panel: passo 4, immagine 1 di 2 Lenovo ThinkPad L440 RAM Replacement, Back Panel: passo 4, immagine 2 di 2
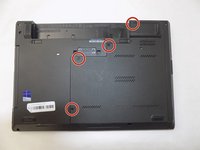
    • Loosen the four retainer screws on the bottom of the laptop using a Phillips #0 screwdriver.

    • These four screws are attached to the panel with washers, so they will spin freely when they are loose and will come off with the panel.

  5. Lenovo ThinkPad L440 RAM Replacement: passo 5, immagine 1 di 2 Lenovo ThinkPad L440 RAM Replacement: passo 5, immagine 2 di 2
    • With your fingers, lift up the back panel from the left side.

  6. Lenovo ThinkPad L440 RAM Replacement, RAM: passo 6, immagine 1 di 2 Lenovo ThinkPad L440 RAM Replacement, RAM: passo 6, immagine 2 di 2
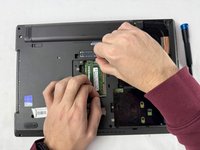
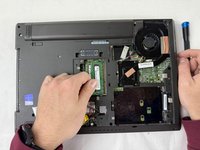
    • Pull the tabs on either side of the RAM in opposite directions.

    • Pull the RAM stick up and out.

    • Repeat for the second RAM stick.

Conclusione

To reassemble your device, follow these instructions in reverse order.

Un'altra persona ha completato questa guida.

Kristen Gismondi

Membro da: 11/12/14

92.084 Reputazione

241 Guide realizzate

Team

iFixit Membro di iFixit

Staff

118 Membri

19.455 Guide realizzate

0 Commenti

Aggiungi Commento

Visualizza Statistiche:

Ultime 24 Ore: 0

Ultimi 7 Giorni: 4

Ultimi 30 Giorni: 6

Tutti i Tempi: 39