
Lenovo IdeaPad U530 Touch Battery Replacement
Introduzione
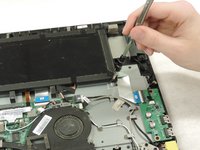
Vai al passo 1This guide will assist with the replacement of the battery. The user should be familiar with using a screwdriver, and should be able to keep track of all removed screws. Be careful of any sharp edges within the computer itself.
Cosa ti serve


-
-
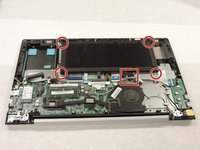
Remove the back panel by removing all screws. Use a PH000 screwdriver head.
-
Make sure to also remove the hinge screws.
-
-


To reassemble your device, follow these instructions in reverse order.
To reassemble your device, follow these instructions in reverse order.
Annulla: non ho completato questa guida.
Altre 3 persone hanno completato questa guida.
Team

Western Carolina University, Team S1-G2, Virtue Spring 2018 Membro di Western Carolina University, Team S1-G2, Virtue Spring 2018
WCU-VIRTUE-S18S1G2
4 Membri
3 Guide realizzate