Salta al contenuto principale

LG G5 Charging Port Replacement

Cosa ti serve

  1. LG G5 Charging Port Replacement, Battery: passo 1, immagine 1 di 3 LG G5 Charging Port Replacement, Battery: passo 1, immagine 2 di 3 LG G5 Charging Port Replacement, Battery: passo 1, immagine 3 di 3
    • Power down the phone by holding the power button for several seconds.

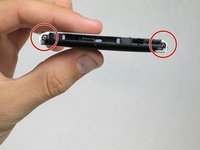
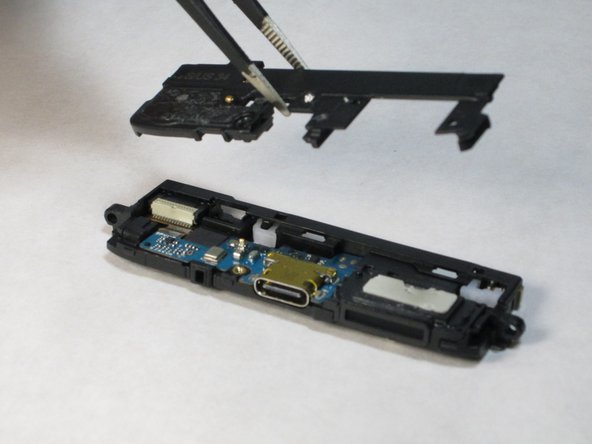
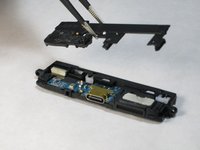
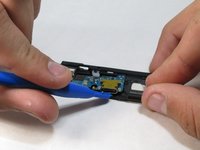
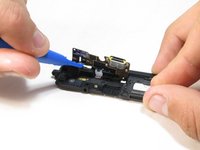
    • While holding the battery release button, pull the bottom end of the phone out of the body.

  2. LG G5 Charging Port Replacement: passo 2, immagine 1 di 2 LG G5 Charging Port Replacement: passo 2, immagine 2 di 2
    • Separate the battery from bottom half.

    • Insert the new battery in the same position and orientation as the old battery. Match up the arrows to be sure the orientation is correct.

  3. LG G5 Charging Port Replacement, Charging Port: passo 3, immagine 1 di 2 LG G5 Charging Port Replacement, Charging Port: passo 3, immagine 2 di 2
    • Remove the two 5.5mm Phillips #00 screws from the base of the phone.

  4. LG G5 Charging Port Replacement: passo 4, immagine 1 di 2 LG G5 Charging Port Replacement: passo 4, immagine 2 di 2
    • Insert the plastic opening tool into the bottom seam

    • Pry the plastic from the base only a slight amount.

  5. LG G5 Charging Port Replacement: passo 5, immagine 1 di 2 LG G5 Charging Port Replacement: passo 5, immagine 2 di 2
    • Remove the one 5.5mm Phillips #000 screw.

  6. LG G5 Charging Port Replacement: passo 6, immagine 1 di 3 LG G5 Charging Port Replacement: passo 6, immagine 2 di 3 LG G5 Charging Port Replacement: passo 6, immagine 3 di 3
    • Insert the plastic opening tool into the seam between the two plastic layers.

    • Pry the plastic from the body.

  7. LG G5 Charging Port Replacement: passo 7, immagine 1 di 2 LG G5 Charging Port Replacement: passo 7, immagine 2 di 2
    • Insert the plastic opening tool into the seam under the metal charging port.

    • Pry the metal charging port from the body.

Conclusione

To reassemble your device, follow these instructions in reverse order.

Altre 23 persone hanno completato questa guida.

Team

Cal Poly, Team 18-2, Forte Fall 2016 Membro di Cal Poly, Team 18-2, Forte Fall 2016

CPSU-FORTE-F16S18G2

4 Membri

15 Guide realizzate

13 Commenti

I would love steps to show not only pulling out the usb port, but also putting the new one in and re-assembly. Also maybe tips about things to avoid doing -- easy slip ups people make when doing it. Why replace just the usb port instead of the whole board assembly or instead of the entire bottom module? Thanks! Great pics

jessicacollins267 - Replica

Anyone know how to bypass the "insert a supported module" error that comes up after changing the charging port?

Rene - Replica

Do you solve the problem? Can you help me, please?

Budai Daniel -

I need to do this repair on my phone, but Rene's comment worries me. Does this error message come up often? Can it be fixed?

Brad - Replica

Hello. I have the same problem like Rene . I changed the usb port and when I try to power on my smartphone it shows me the picture that said “insert a supported module” like what Rene said earlier. Please, I need help.

Budai Daniel - Replica

Aggiungi Commento

Visualizza Statistiche:

Ultime 24 Ore: 0

Ultimi 7 Giorni: 7

Ultimi 30 Giorni: 36

Tutti i Tempi: 23,798