
Joy-Con ZL Switch Replacement
Introduzione
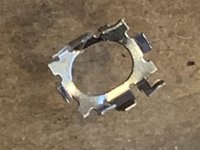
Vai al passo 1The metal cover holding the ZL switch together had broken off the switch and jammed the control
Cosa ti serve
Ricambi
Strumenti


Mostra di più…
-
-
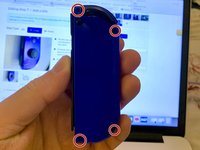
Using the Y00 Tri-Point screwdriver, remove four M1.4 x 5mm screws to loosen the hard plastic back of the Joy-Con.
-
-
-
After the screws are removed, lift the cover to reveal the inside of the Joy-Con and locate the ZL button.
-
-
Attrezzo utilizzato in questo passaggio:Tweezers$4.99
-
Use tweezers to lift the ZL button a little then pull upwards to get it back into place.
-
Once the button is back in place, place the hard cover back on the Joy-Con and screw it back on.
-
-
-
Click the button a couple times to ensure that it's back in place and working.
-
-
-
Resume gameplay!
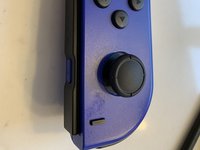
I tried to fix my yellow Nintendo Switch right Joy-Con's ZR button using this guide, but it turns out it's beyond saving. RIP Joy-Con XCW15123935474.
-
-
-
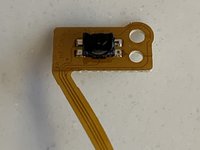
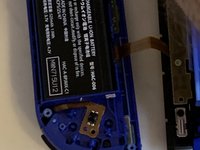
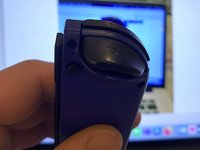
This tiny piece of metal had come off the small pcb and ribbon cable. In doing so it had jammed the switch.
-
Use the guide for un-jamming ZL switch, to remove the case screws, the top cover and the ZL switch and springs.
-
-
-
Having removed the plastic button and 2 springs you uncover the switch and holding screw.
-
Remove the holding screw.
-
-
-
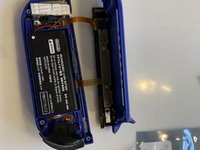
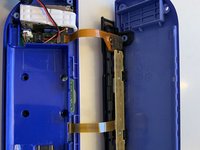
Lift the battery out of the battery chassis tray.Use a plastic splitter if necessary.
-
Do not remove the sticky tape underneath as this is unnecessary. It does not effect the repair.
-
-
-
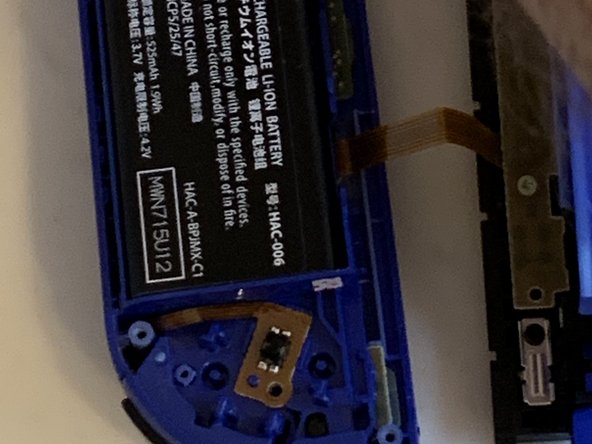
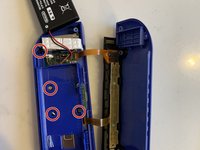
Remove the 4 screws holding down the inner battery support chassis. This exposes the switch connector to the pcb.
-
Note the bottom left screw in this picture is shorter than the others and needs to be put back in the correct aperture.
-
-
Attrezzo utilizzato in questo passaggio:Tweezers$4.99
-
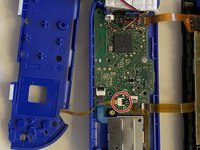
Gently pull on the ribbon cable to remove the plug from the socket.
-
Insert plug on new ribbon cable & switch.
-
You may need to push in the plug with plastic tweezers. Take care not to damage the cable.
-
-
-
Replace batters chassis tray and screw back into place. Note to put back the shorter screw into the correct hole.
-
Fold battery back into place. Gently push down to get the battery stuck back to the tape.
-
Adjust the ribbon cable to ensure it is not trapped. Place the switch over the alignment pin and screw down the retaining screw.
-
-
-
Put the two springs back on their retaining pins and push the button back into place.
-
It should click into place and when you push on the button you should hear the switch click.
-
Fold the cover back over and check there are no trapped wires before screwing back the 4 screws on the cover to complete the repair.
-


To reassemble your device, follow these instructions in reverse order.
To reassemble your device, follow these instructions in reverse order.
Annulla: non ho completato questa guida.
Un'altra persona ha completato questa guida.
Preparati per le riparazioni future
Acquista tutti


1Commento della guida
This doesn’t really cover the removal of the ZL/ZR Buttons.
It is good for removing the actual button on the mother board, but not for removing the plastic button on the remote.
My lil brother threw my switch but screen was not broken but the ZL button fell out
Jarrett Swanson - Replica
My screw bit won’t work, all it’s doing is destroying the screw
[deleted] - Replica