
How to replace a zipper slider

Introduzione
Vai al passo 1Over time, the zipper puller of your item might get damaged or broken. This doesn't mean the end, and it doesn't need to be a difficult repair or replacement of the entire zip! In this guide, we will demonstrate a simple and practical method for replacing the zipper slider, and keeping your favourite item going.
➡️Before you get started, please check the safety disclaimer at the bottom of the page.
Cosa ti serve
Strumenti


Mostra di più…
-
-
Inspect your product to understand the way the zipper has been constructed, and what the defect is.
-
In this example, the zipper sliding component is defective, and cannot slide properly anymore. It needs to be replaced.
-
Note: at this stage, it is important to determine which part of the zipper is broken. If there is something wrong with the zipper teeth (i.e., one tooth has snapped off) then this guide will not help solve the problem
-
-
-
To perform this repair, we will first remove the "top stop" of the zipper. This is piece of plastic at the top of the zipper, which is slightly larger than the other zipper teeth.
-
Important: This procedure will permanently remove this part of the zipper and we will replace it with a thick knot instead. Do not perform this repair if you do not wish to cause this type of damage/repair.
-
Use sturdy scissors, or preferably pliers, to remove the top stop. Take care not to damage the surrounding material or zipper teeth; and take care with your fingers!
-
Note: For this guide, we have demonstrated on a plastic top-stop. Some zippers may have a metal top-stop, which can be carefully removed by un-bending, and re-attached at the end.
-
Once the top stop is removed, keep it to one side, for referring to later when making the replacement knot.
-
-
-
Slide the defective slider up to the top of the zipper, and remove it.
-
-
-
Remove any pullers/toggles/fasteners from the zipper puller, and set them aside. These can be reused later.
-
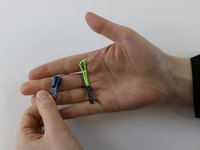
Find a new slider, matching with the zip tape size. Craft shops, sewing shops, or even second-hand shops are great places to find these.
-
Tip: to determine the zipper puller size, check for the number on the backside. For more information, check out the iFixit guide Plastic Tooth Zipper Size
-
Take your new zipper puller, and insert it back onto the zip from the topside...
-
... and pull it down to the middle of the zip.
-
-
-
Because we removed the plastic top stop, we need to create a new one, which we will do by tying a thick knot. For this, we will use a sewing needle and thick thread. The knot must be thick enough to stop the slider at the tape end again.
-
Get creative: this knot will be visible, so might choose a matching thread colour to be less noticeable; or a bright contract colour to celebrate your repair!
-
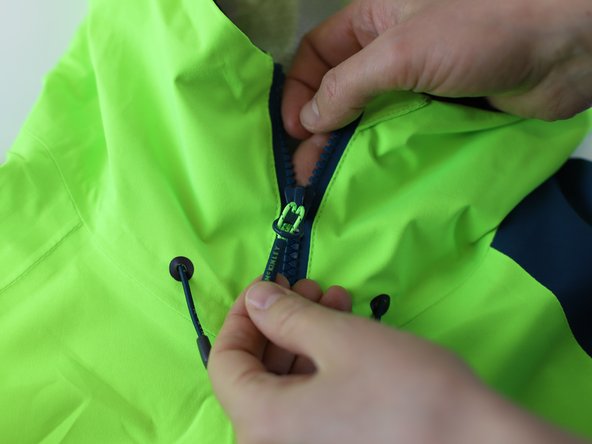
Start by putting the needle through the zipper tape, and making a standard hand-sewing knot. Then, keep repeating the process of sewing through the tape, to build a thicker and thicker bundle of thread.
-
Tip: periodically pull the zipper up to the repair, and gently test if the thread bundle is large enough to stop it coming off. If it's still too small, keep adding more thread.
-
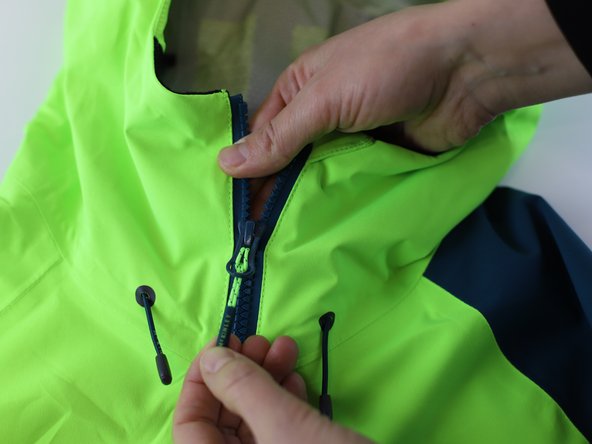
Once the thread bundle is large enough to prevent the zipper puller from coming off, make a final securing knot, and cut the excess thread away.
-
-
-
The thread bundle is now complete, and will stop the new slider from coming off.
-
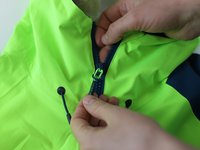
Re-attach any additional strong/thread/loops which were on the original zipper puller (here, we re-attached the pulling string).
-
Check that the repair functions correctly by pulling the zip and and down. Put on the item and test it again.
-
-
-
🛠️🏆👏 Congratulations! The repair is complete, and you're ready to go!
-


In need of another repair? Don't worry! Check out our other guides to find quick solutions for your favourite clothing, footwear and equipment!
----------------------------------------
🚨🛠️🩹 IMPORTANT SAFETY NOTICE:
The repair guides provided on this site are intended to help you repair products on your own. While we have put a lot of care into them, all repair work carries some risk:
- Safety Precautions: When repairing your product, take all necessary precautions to ensure your safety. Use appropriate tools and follow the instructions carefully.
- Product Condition: Once your product has been repaired, it may not meet original compliance guidelines anymore and could potentially have issues.
- Liability: We are not responsible for any damage or injury that may occur during the repair process or as a result of using a repaired product. You, as the repairer, assume all risks and responsibilities associated with the repair.
By using these repair guides, you fully acknowledge and accept the potential risks and responsibilities involved.
Annulla: non ho completato questa guida.
Altre 2 persone hanno completato questa guida.
Preparati per le riparazioni future
Acquista tutti


Team
