How to Repair a Broken Hook and Loop Strap
Introduzione
Vai al passo 1If you've noticed a falling-apart velcro strap on your favorite pair of shoes, don't worry – repairing the seam on a velcro strap is a simple process and doesn't require advanced sewing skills. We will walk you through the steps, ensuring the velcro on your shoes are just as new after a few minutes.
➡️Before you get started, please check the safety disclaimer at the bottom of the page.
Cosa ti serve
Strumenti
Mostra di più…
-
-
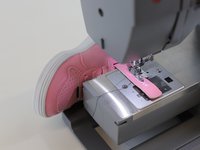
Here we can clearly see the defect: The stitching of the velcro strap is broken.
-
The upper material and the velcro strap are not properly attached anymore.
-
We can repair the strap by using a sewing machine.
-
-
-
Check the original seam in terms of thread color, stitching length and pattern.
-
For better results, try to use similar thread color and stitching technique as with the original seam.
-
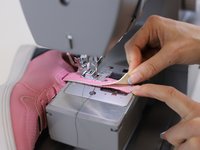
After having set-up the sewing machine, place the strap onto the needle thread plate.
-
Make sure you can easily move the strap through the needle feed.
-
-
-
-
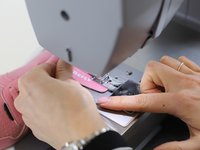
Start the stitching a few mm before the damaged thread to secure it.
-
Use back stitching to prevent the seam from opening.
-
Tip: In-between the stitching, check carefully whether the edges are correctly overlapping.
-
-
-
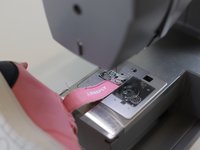
Follow the original seam to cover the stitching holes and ensure a close-to-original look.
-
-
-
Use a back stitching to prevent the seam from opening.
-
Remove the strap carefully from the sewing machine and cut off all the excess seams.
-
-
-
🛠️🏆👏 Congratulations! The repair of the strap is complete, and you're ready to go!
-
In need of another repair? Don't worry! Check out our other guides to find quick solutions for your favourite clothing, footwear and equipment!
----------------------------------------
🚨🛠️🩹 IMPORTANT SAFETY NOTICE:
The repair guides provided on this site are intended to help you repair products on your own. While we have put a lot of care into them, all repair work carries some risk:
- Safety Precautions: When repairing your product, take all necessary precautions to ensure your safety. Use appropriate tools and follow the instructions carefully.
- Product Condition: Once your product has been repaired, it may not meet original compliance guidelines anymore and could potentially have issues.
- Liability: We are not responsible for any damage or injury that may occur during the repair process or as a result of using a repaired product. You, as the repairer, assume all risks and responsibilities associated with the repair.
By using these repair guides, you fully acknowledge and accept the potential risks and responsibilities involved.


