Salta al contenuto principale
Unisciti alla Community delle riparazioni - Crea un account
How to Reattach a Backpack Grab Handle

How to Reattach a Backpack Grab Handle

Onyinyechi Onyeagucha

Onyinyechi Onyeagucha e un altro collaboratore

Ultimo aggiornamento il April 26, 2022

25 minuti
Moderato

Introduzione

Vai al passo 1

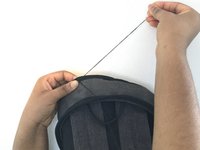
The grab handle (or the bag handle) is a key feature for any backpack. It gives the backpack user an alternative to resting the bag against something or placing it on something (like the ground). That is why it can be very frustrating and a great inconvenience when the grab handle on a backpack pulls off. This guide provides eight quick and easy steps on how to solve this problem and put an end to your frustration. It just requires you to have knowledge of the most basic stitching techniques.

  1. How to Reattach a Backpack Grab Handle, How to Reattach a Backpack Grab Handle: passo 1, immagine 1 di 3 How to Reattach a Backpack Grab Handle, How to Reattach a Backpack Grab Handle: passo 1, immagine 2 di 3 How to Reattach a Backpack Grab Handle, How to Reattach a Backpack Grab Handle: passo 1, immagine 3 di 3
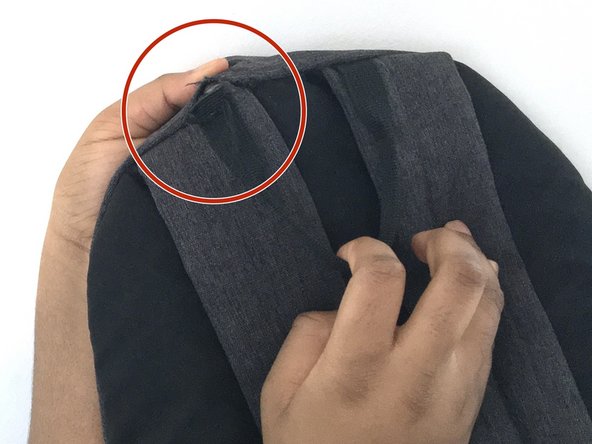
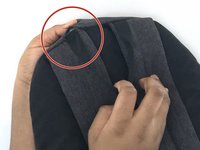
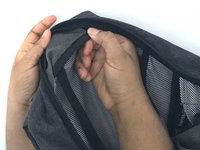
    • Use a pair of scissors to open the seam on the backpack where the grab handle was torn off.

    • Caution: Be careful when using scissors this way.

  2. How to Reattach a Backpack Grab Handle: passo 2, immagine 1 di 2 How to Reattach a Backpack Grab Handle: passo 2, immagine 2 di 2
    • Open up the inner seam at the same spot using a pair of scissors.

  3. How to Reattach a Backpack Grab Handle: passo 3, immagine 1 di 2 How to Reattach a Backpack Grab Handle: passo 3, immagine 2 di 2
    • Get your sewing needle and thread with a colour that matches the area on the backpack being repaired.

  4. How to Reattach a Backpack Grab Handle: passo 4, immagine 1 di 3 How to Reattach a Backpack Grab Handle: passo 4, immagine 2 di 3 How to Reattach a Backpack Grab Handle: passo 4, immagine 3 di 3
    • Thread your sewing needle.

    • Make sure your thread is doubled; this makes it more durable and less likely for your stitching to come apart.

  5. How to Reattach a Backpack Grab Handle: passo 5, immagine 1 di 3 How to Reattach a Backpack Grab Handle: passo 5, immagine 2 di 3 How to Reattach a Backpack Grab Handle: passo 5, immagine 3 di 3
    • Hold the edge of your grab handle down at the the first seam you opened.

    • Use the threaded needle to stitch the end of the handle to that spot, then cut off the thread and tie it into a knot.

    • Caution: Sewing needles are sharp; be careful not to poke yourself.

    • This repair only requires one of these two basic stitching methods.

  6. How to Reattach a Backpack Grab Handle: passo 6, immagine 1 di 2 How to Reattach a Backpack Grab Handle: passo 6, immagine 2 di 2
    • Hold down the second seam you opened, over the reattached grab handle, and stitch it closed.

    • Use one of these basic stitching methods.

  7. How to Reattach a Backpack Grab Handle: passo 7, immagine 1 di 3 How to Reattach a Backpack Grab Handle: passo 7, immagine 2 di 3 How to Reattach a Backpack Grab Handle: passo 7, immagine 3 di 3
    • Cut off the remaining thread and tie it into a knot.

Conclusione

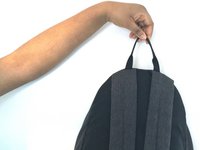
Once you have completed this guide, you will be able to make use of your grab handle once again.

Altre 5 persone hanno completato questa guida.

0Commenti sulla guida

Aggiungi Commento

Visualizza Statistiche:

Ultime 24 Ore: 5

Ultimi 7 Giorni: 34

Ultimi 30 Giorni: 151

Tutti i Tempi: 9,092