Salta al contenuto principale
Unisciti alla Community delle riparazioni - Crea un account
How to Reassemble a Pyraminx

How to Reassemble a Pyraminx

gstandr

gstandr e un altro collaboratore

Ultimo aggiornamento il 20 dic 2023

30 minuti
Moderato

Introduzione

Vai al passo 1

Greetings iFixit Community,

Welcome to our Fast Fix Project! In this guide, we aim to assist you in the seamless reassembly of your Pyraminx Rubik's cube, ensuring it returns to a fully functional state. Follow our step-by-step instructions to easily bring your Pyraminx back to life. Let's dive into the world of Pyraminx reassembly together!

Cosa ti serve

Strumenti

  1. How to Reassemble a Pyraminx, How to Reassemble a Pyraminx: passo 1, immagine 1 di 2 How to Reassemble a Pyraminx, How to Reassemble a Pyraminx: passo 1, immagine 2 di 2
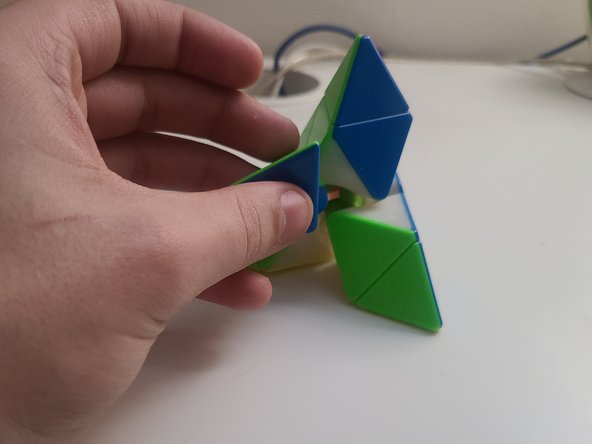
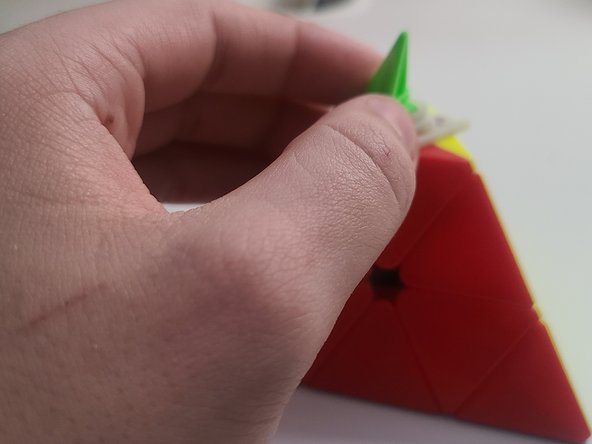
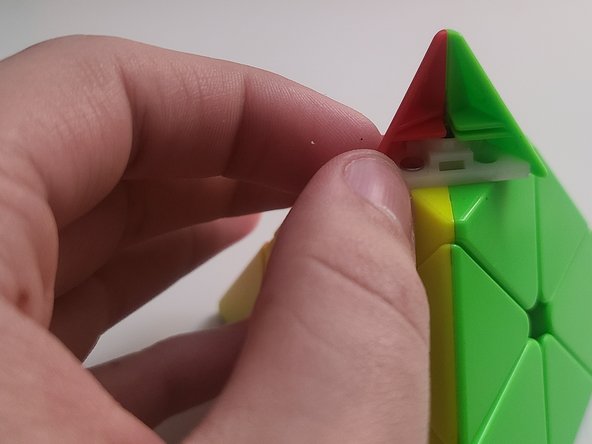
    • Place the pieces and core on a flat surface for easy building.

  2. How to Reassemble a Pyraminx: passo 2, immagine 1 di 2 How to Reassemble a Pyraminx: passo 2, immagine 2 di 2
    • Adjust the top to a 45-degree angle and place red and green in the center of each other.

  3. How to Reassemble a Pyraminx: passo 3, immagine 1 di 1
    • Adjust the top to a 45-degree angle and place red and blue in the center of each other.

  4. How to Reassemble a Pyraminx: passo 4, immagine 1 di 1
    • Rotate the tip to 45 degrees and position the blue and green pieces so their centers line up.

  5. How to Reassemble a Pyraminx: passo 5, immagine 1 di 3 How to Reassemble a Pyraminx: passo 5, immagine 2 di 3 How to Reassemble a Pyraminx: passo 5, immagine 3 di 3
    • Adjust the tilt to 45 degrees and position the blue and yellow pieces so their centers line up.

    • Adjust the tilt to 45 degrees and position the blue and green pieces so that their centers line up.

    • If it's stuck, gently pry the tip in your direction. Alternatively, you could skip this step and repeat for the final two pieces. Occasionally, the screw can be easily visible by pulling off the entire tip.

  6. How to Reassemble a Pyraminx: passo 6, immagine 1 di 3 How to Reassemble a Pyraminx: passo 6, immagine 2 di 3 How to Reassemble a Pyraminx: passo 6, immagine 3 di 3
    • Now grab the Phillips head screwdriver and turn towards the left, just enough to loosen it for you to put the edge in. Remember, lefty loosey, righty tighty.

    • Tighten the screw to your memory after adding edges. Put back the tip pieces.

Conclusione

Thank you for exploring the Pyraminx assembly guide. I trust it helped you successfully reassemble your puzzle. Any questions, comments, or suggestions are highly valued; please share them below. Your feedback is instrumental in refining the guide for future users. Happy solving!

Un'altra persona ha completato questa guida.

gstandr

Membro da: 10/20/23

133 Reputazione

1 Guida realizzata

Team

0Commenti sulla guida

Aggiungi Commento

Visualizza Statistiche:

Ultime 24 Ore: 0

Ultimi 7 Giorni: 8

Ultimi 30 Giorni: 26

Tutti i Tempi: 453