Salta al contenuto principale

Harman Kardon Onyx Studio 2 Circuit Board Replacement

Cosa ti serve

  1. Harman Kardon Onyx Studio 2 Circuit Board Replacement, Front Panel: passo 1, immagine 1 di 3 Harman Kardon Onyx Studio 2 Circuit Board Replacement, Front Panel: passo 1, immagine 2 di 3 Harman Kardon Onyx Studio 2 Circuit Board Replacement, Front Panel: passo 1, immagine 3 di 3
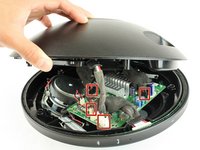
    • Using a plastic opening tool, pry off the front grill by wedging it in the notch on the front of the device.

  2. Harman Kardon Onyx Studio 2 Circuit Board Replacement: passo 2, immagine 1 di 2 Harman Kardon Onyx Studio 2 Circuit Board Replacement: passo 2, immagine 2 di 2
    • Remove the five 14.4 mm T10 Torx screws.

  3. Harman Kardon Onyx Studio 2 Circuit Board Replacement: passo 3, immagine 1 di 1
    • Gently pull the front apart from the back.

  4. Harman Kardon Onyx Studio 2 Circuit Board Replacement: passo 4, immagine 1 di 2 Harman Kardon Onyx Studio 2 Circuit Board Replacement: passo 4, immagine 2 di 2
    • Remove the four wires connecting the front and back panels.

    • Pinch the connector tab and pull gently upwards.

    • Repeat for the other three connectors.

  5. Harman Kardon Onyx Studio 2 Circuit Board Replacement, Control Board: passo 5, immagine 1 di 1
    • Pull the silicone button band off of the outer edge of the speaker.

  6. Harman Kardon Onyx Studio 2 Circuit Board Replacement: passo 6, immagine 1 di 2 Harman Kardon Onyx Studio 2 Circuit Board Replacement: passo 6, immagine 2 di 2
    • Disconnect the two pressure connections from the circuit board.

  7. Harman Kardon Onyx Studio 2 Circuit Board Replacement: passo 7, immagine 1 di 2 Harman Kardon Onyx Studio 2 Circuit Board Replacement: passo 7, immagine 2 di 2
    • Gently remove the control board band by placing fingers in contact with it through the button openings.

    • Work from the outer edges in so as not to bend the band.

  8. Harman Kardon Onyx Studio 2 Circuit Board Replacement, Circuit Board: passo 8, immagine 1 di 2 Harman Kardon Onyx Studio 2 Circuit Board Replacement, Circuit Board: passo 8, immagine 2 di 2
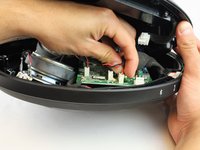
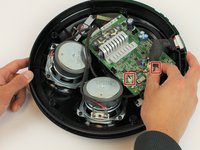
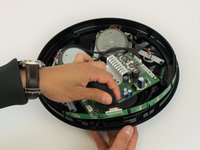
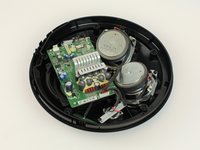
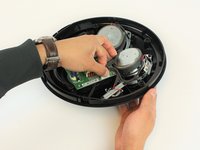
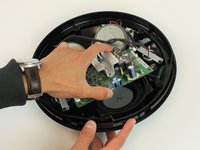
    • Disconnect the remaining connectors from the circuit board.

    • Disconnect the Bluetooth antenna.

  9. Harman Kardon Onyx Studio 2 Circuit Board Replacement: passo 9, immagine 1 di 2 Harman Kardon Onyx Studio 2 Circuit Board Replacement: passo 9, immagine 2 di 2
    • Remove the four 10 mm T10 Torx screws.

    • Pull the circuit board out of the device as it is now free.

Conclusione

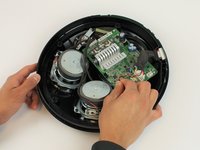
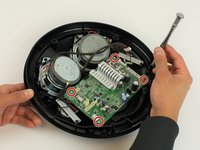
To reassemble your device, follow these instructions in reverse order.

Altre 11 persone hanno completato questa guida.

Team

USF Tampa, Team 16-5, Blackwell Spring 2017 Membro di USF Tampa, Team 16-5, Blackwell Spring 2017

USFT-BLACKWELL-S17S16G5

3 Membri

24 Guide realizzate

5 Commenti

Where do I get another one

Adrian tlahuel - Replica

Where we buy the board?

Eric Therrien - Replica

Umm… this was rather anticlimactic. Last step was basically like “and now contemplate your life choices”.

markcendan - Replica

Where can I Buy a new hk onix studio Main board?

tecnologia en localizaciòn - Replica

My speaker was working great. I just disconnected my phone to make a call, put YouTube back on it was all mumbled & the big button in the back kept pulsing so fast.

Maureen Field - Replica

Aggiungi Commento

Visualizza Statistiche:

Ultime 24 Ore: 0

Ultimi 7 Giorni: 10

Ultimi 30 Giorni: 115

Tutti i Tempi: 21,498