Salta al contenuto principale
HDD Removal

HDD Removal

Spencer Day

Spencer Day

Ultimo aggiornamento il August 28, 2024

Nessuna stima
Moderato
Solo Prerequisita
Questa guida è destinata a essere usata solo come prerequisito per altre guide. Da sola è incompleta.

Cosa ti serve

Strumenti

  • Phillips #1 Screwdriver
    Phillips #1 Screwdriver
  • Spudger
    Spudger
  1. HDD Removal, Unfasten the HDD hatch: passo 1, immagine 1 di 2 HDD Removal, Unfasten the HDD hatch: passo 1, immagine 2 di 2
    • Use a Phillips screwdriver to remove the screw securing the HDD hatch on the bottom left of the lower case.

  2. HDD Removal, Remove the HDD hatch: passo 2, immagine 1 di 3 HDD Removal, Remove the HDD hatch: passo 2, immagine 2 di 3 HDD Removal, Remove the HDD hatch: passo 2, immagine 3 di 3
    • Insert the flat end of a spudger under the cutout on the top right corner of the HDD hatch and pry it up.

    • Remove the HDD hatch.

  3. HDD Removal, Unfasten the HDD assembly: passo 3, immagine 1 di 2 HDD Removal, Unfasten the HDD assembly: passo 3, immagine 2 di 2
    • Your HDD assembly may be secured to the lower case with screws. If it's not, skip this step.

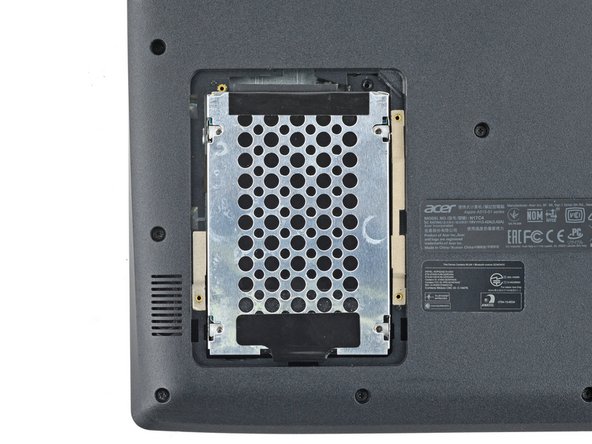
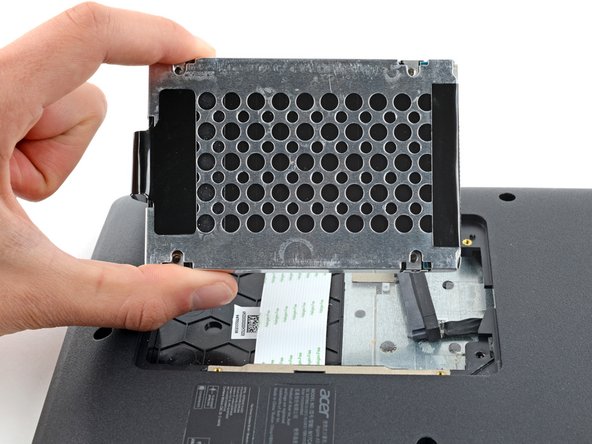
    • Use a Phillips screwdriver to remove the four screws securing the HDD assembly.

  4. HDD Removal: passo 4, immagine 1 di 3 HDD Removal: passo 4, immagine 2 di 3 HDD Removal: passo 4, immagine 3 di 3
    • Firmly grip the HDD assembly and HDD cable connector head.

    • Pull the HDD cable connector out of its socket.

    • Remove the HDD assembly.

Conclusione

To reassemble your device, follow these instructions in reverse order.

Spencer Day

Membro da: 09/14/22

95.328 Reputazione

662 Guide realizzate

Team

iFixit Membro di iFixit

Staff

118 Membri

19.474 Guide realizzate

0 Commenti

Aggiungi Commento

Visualizza Statistiche:

Ultime 24 Ore: 0

Ultimi 7 Giorni: 1

Ultimi 30 Giorni: 5

Tutti i Tempi: 19