Salta al contenuto principale

Google Pixel 9 Pro XL Rear Cover Replacement

Cosa ti serve

  1. Google Pixel 9 Pro XL Rear Cover Replacement, Safety precautions: passo 1, immagine 1 di 2 Google Pixel 9 Pro XL Rear Cover Replacement, Safety precautions: passo 1, immagine 2 di 2
    • Let your Pixel's battery drain below 25% before starting this repair. A charged lithium‑ion battery may catch fire if damaged.

    • Unplug all cables and completely power down your phone.

  2. Google Pixel 9 Pro XL Rear Cover Replacement, Adhesive information: passo 2, immagine 1 di 3 Google Pixel 9 Pro XL Rear Cover Replacement, Adhesive information: passo 2, immagine 2 di 3 Google Pixel 9 Pro XL Rear Cover Replacement, Adhesive information: passo 2, immagine 3 di 3
    • Adhesive secures the perimeter of the rear cover to the frame.

    • When separating the adhesive, don't insert your tool more than 3 mm under the rear cover to avoid damaging the internal components.

    • Measure 3 mm from the tip and mark your opening pick with a permanent marker. Alternatively, you can tape a coin to a pick 3 mm from the tip.

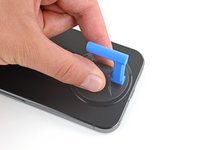
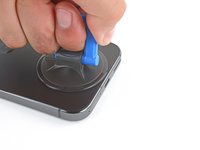
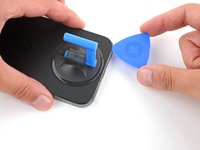
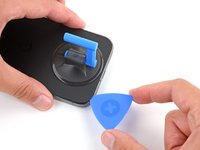
  3. Google Pixel 9 Pro XL Rear Cover Replacement, Apply a suction handle: passo 3, immagine 1 di 2 Google Pixel 9 Pro XL Rear Cover Replacement, Apply a suction handle: passo 3, immagine 2 di 2
    • Attach a suction handle to the bottom edge of the rear cover, as close to the edge as possible.

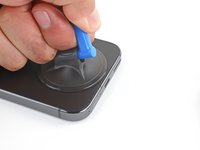
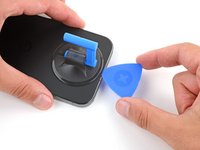
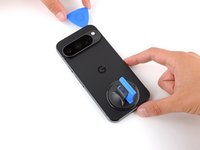
  4. Google Pixel 9 Pro XL Rear Cover Replacement, Insert an opening pick: passo 4, immagine 1 di 3 Google Pixel 9 Pro XL Rear Cover Replacement, Insert an opening pick: passo 4, immagine 2 di 3 Google Pixel 9 Pro XL Rear Cover Replacement, Insert an opening pick: passo 4, immagine 3 di 3
    • Pull up on the suction handle with strong, steady force to create a small gap under the rear cover.

    • Insert the tip of an opening pick in the gap.

  5. Google Pixel 9 Pro XL Rear Cover Replacement, Separate the rear cover adhesive: passo 5, immagine 1 di 3 Google Pixel 9 Pro XL Rear Cover Replacement, Separate the rear cover adhesive: passo 5, immagine 2 di 3 Google Pixel 9 Pro XL Rear Cover Replacement, Separate the rear cover adhesive: passo 5, immagine 3 di 3
    • Slide your opening along the bottom edge to separate the adhesive securing it.

    • Remember: don't insert the opening pick deeper than 3 mm.

  6. Google Pixel 9 Pro XL Rear Cover Replacement: passo 6, immagine 1 di 3 Google Pixel 9 Pro XL Rear Cover Replacement: passo 6, immagine 2 di 3 Google Pixel 9 Pro XL Rear Cover Replacement: passo 6, immagine 3 di 3
    • Slide your opening pick up the left edge and along the top edge to separate the adhesive.

  7. Google Pixel 9 Pro XL Rear Cover Replacement: passo 7, immagine 1 di 3 Google Pixel 9 Pro XL Rear Cover Replacement: passo 7, immagine 2 di 3 Google Pixel 9 Pro XL Rear Cover Replacement: passo 7, immagine 3 di 3
    • Slide your pick down the right edge to separate the remaining adhesive.

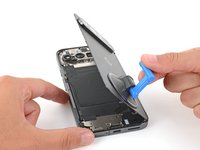
  8. Google Pixel 9 Pro XL Rear Cover Replacement, Prop up the rear cover: passo 8, immagine 1 di 3 Google Pixel 9 Pro XL Rear Cover Replacement, Prop up the rear cover: passo 8, immagine 2 di 3 Google Pixel 9 Pro XL Rear Cover Replacement, Prop up the rear cover: passo 8, immagine 3 di 3
    • Don't try to fully remove the rear cover yet, as a ribbon cable on the right edge connects it to the phone.

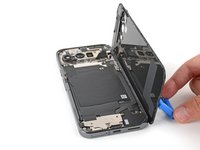
    • Use the suction handle to lift the left edge of the rear cover and swing it over the right edge, like opening the cover of a book.

    • If you're having trouble, check the perimeter for any remaining adhesive and use your opening pick to separate it.

    • Prop up the rear cover with the suction handle so you can access the ribbon cable near the top right corner.

  9. Google Pixel 9 Pro XL Rear Cover Replacement, Remove the cable cover: passo 9, immagine 1 di 2 Google Pixel 9 Pro XL Rear Cover Replacement, Remove the cable cover: passo 9, immagine 2 di 2
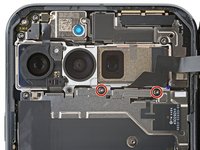
    • Use a Torx Plus 3IP screwdriver to remove the two 5.2 mm‑long screws securing the cable cover.

  10. Google Pixel 9 Pro XL Rear Cover Replacement: passo 10, immagine 1 di 2 Google Pixel 9 Pro XL Rear Cover Replacement: passo 10, immagine 2 di 2
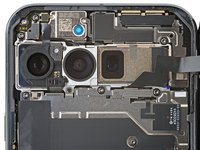
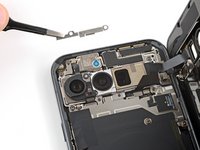
    • Use tweezers or your fingers to remove the cable cover.

  11. Google Pixel 9 Pro XL Rear Cover Replacement, Disconnect the rear cover: passo 11, immagine 1 di 3 Google Pixel 9 Pro XL Rear Cover Replacement, Disconnect the rear cover: passo 11, immagine 2 di 3 Google Pixel 9 Pro XL Rear Cover Replacement, Disconnect the rear cover: passo 11, immagine 3 di 3
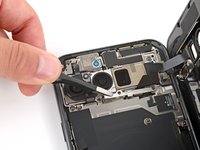
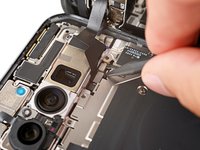
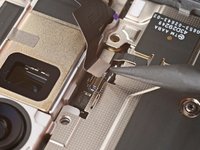
    • Use the point of a spudger to pry up and disconnect the rear cover press connector.

  12. Google Pixel 9 Pro XL Rear Cover Replacement, Remove the rear cover: passo 12, immagine 1 di 1
    • Remove the rear cover.

    • During reassembly, follow this guide to apply new adhesive and install your back cover.

Conclusione

To reassemble your device, follow this guide.

To run a diagnostics test with the built-in Pixel Diagnostic tool, click here.

Take your e-waste to an R2 or e-Stewards certified recycler.

Repair didn’t go as planned? Try some basic troubleshooting, or ask our Answers community for help.

Un'altra persona ha completato questa guida.

Spencer Day

Membro da: 09/14/22

95.824 Reputazione

662 Guide realizzate

Team

iFixit Membro di iFixit

Staff

118 Membri

19.631 Guide realizzate

2Commenti sulla guida

User Torx Plus 3IP screwdriver? I don't find the screwdriver anywhere . Can I use one screw from this toolkit? If so, which one? - Essential Electronics Toolkit

Ram A - Replica

Hi Ram. The Torx Plus 3IP bit (not driver) and many other bits are available here on our site. We also have drivers, in both aluminum and plastic.

Spencer Day -

Aggiungi Commento

Visualizza Statistiche:

Ultime 24 Ore: 18

Ultimi 7 Giorni: 66

Ultimi 30 Giorni: 311

Tutti i Tempi: 1,708