
Golf Club Shaft Replacement

Introduzione
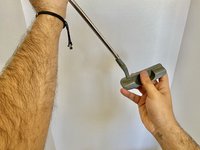
Vai al passo 1This guide will show you how to replace the shaft of a golf club. New golf clubs are expensive, so it is very common to buy golf clubs second hand. A second hand club with a worn out, loose, or warped shaft not only deems itself almost useless, but if used, it prevents a danger in the form of the club head flying off of the shaft swing. Oftentimes, it is recommended to take one’s golf club to a specialty repair shop where they can charge you anywhere from $50-$250 to do these simple steps.
Cosa ti serve
Strumenti


Mostra di più…


Annulla: non ho completato questa guida.
Un'altra persona ha completato questa guida.

Team

CSU Los Angeles, Team S1-G35, Harris Spring 2021 Membro di CSU Los Angeles, Team S1-G35, Harris Spring 2021
CSULA-HARRIS-S21S1G35
1 Membro
2 Guide realizzate