Salta al contenuto principale
Filco Majestouch-2 Key Stabilizer and Key Cap Replacement

Filco Majestouch-2 Key Stabilizer and Key Cap Replacement

theaustinbartley

theaustinbartley e un altro collaboratore

Ultimo aggiornamento il November 8, 2022

5 - 7 minuti
Moderato

Introduzione

Vai al passo 1

Why this is an important replacement!

A good working keyboard is an integral peripheral for a home office or gaming computer setup, and the assurance that it is in working order without any damaged keys will make the experience more enjoyable. With my repair guide, I will show you how to replace the key stabilizers and key caps on the Filco Majestouch-2 mechanical keyboard. This repair guide will also help you save money from having to take it to repair shop, or finding someone else to repair it for you. In a few simple steps we will get your keyboard back to working order in no time!

  1. Filco Majestouch-2 Key Stabilizer and Key Cap Replacement, Stabilizer and Key cap: passo 1, immagine 1 di 1
    • Follow the keyboards USB connector to the back of the computer, and gently pull it out to power it off.

    • Always use caution when working with electrical components!

  2. Filco Majestouch-2 Key Stabilizer and Key Cap Replacement: passo 2, immagine 1 di 1
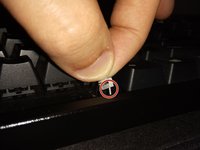
    • Lay out keycap stabilizer and keycap removal tool next to keyboard to ensure organization.

    • The key cap stabilizer tools are small, and we don't want to lose them!

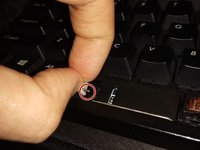
    • The Key Cap removal tool will work with any cap on your keyboard, so it is good to keep it around when the next repair comes along!

  3. Filco Majestouch-2 Key Stabilizer and Key Cap Replacement: passo 3, immagine 1 di 1
    • Grab the key cap removal tool, and while holding vertically, gently press down on the space bar until an audible "click" is heard.

    • Gently lift up to release the key from its foundation.

    • Remember "Gently" is the key here (no pun intended). Too much force may break off a piece of the key.

  4. Filco Majestouch-2 Key Stabilizer and Key Cap Replacement: passo 4, immagine 1 di 3 Filco Majestouch-2 Key Stabilizer and Key Cap Replacement: passo 4, immagine 2 di 3 Filco Majestouch-2 Key Stabilizer and Key Cap Replacement: passo 4, immagine 3 di 3
    • Insert the two key stabilizers by guiding each piece through the metal bar and setting them upright in their holder.

    • Upright signifies that the “+” is facing upward, this is important as the space bar has the same styled holes underneath.

  5. Filco Majestouch-2 Key Stabilizer and Key Cap Replacement: passo 5, immagine 1 di 1
    • Ensure that both stabilizers have been positioned upright, it should look like this.

    • Now could also be a good time to take a small cloth and clean possible dust around the area before the space bar is replaced.

  6. Filco Majestouch-2 Key Stabilizer and Key Cap Replacement: passo 6, immagine 1 di 1
    • Grab the space bar key cap and gently press down on its foundation until you hear an audible click.

    • It is very good practice to press down on multiple areas of they key cap to ensure it is in firmly and not lopsided.

  7. Filco Majestouch-2 Key Stabilizer and Key Cap Replacement: passo 7, immagine 1 di 1
    • Reconnect the USB power cable to computer and test keycap in all areas for consistency. You have completed your repair!

    • Remember, you can use what you have learned in this guide to help others who experience the same issue!

Conclusione

If you want to repair any other key cap on this keyboard, you can return to this guide and follow the same instructions.

Un'altra persona ha completato questa guida.

0Commenti sulla guida

Aggiungi Commento

Visualizza Statistiche:

Ultime 24 Ore: 2

Ultimi 7 Giorni: 15

Ultimi 30 Giorni: 97

Tutti i Tempi: 6,036