
Dyson Pure Cool AM11 Power Cord Replacement

8 minuti
Moderato
Passi mancanti
Introduzione
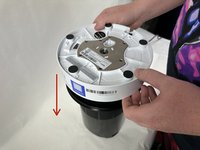
Vai al passo 1This guide provides step-by-step instructions for disassembling the base and locating the power cord of the Dyson Pure Cool AM11. This teardown is useful for understanding the internal components of the power cord and can be helpful for troubleshooting or repair. Remember, this process should be approached with care to avoid damage to your device.
Cosa ti serve
Strumenti

-
-
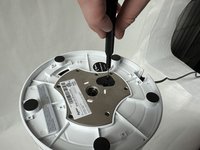
Using a Phillips screwdriver, carefully remove the screws securing the base.
-
-


Quasi finito!
Linea Traguardo

Team

UMass Dartmouth, Team 2-7, Gulbrandsen Fall 2023 Membro di UMass Dartmouth, Team 2-7, Gulbrandsen Fall 2023
UMASSD-GULBRANDSEN-F23S2G7
3 Membri
5 Guide realizzate