Salta al contenuto principale
Dyson Pure Cool AM11 Oscillation Motor Replacement

Dyson Pure Cool AM11 Oscillation Motor Replacement

AidenManchester

AidenManchester e un altro collaboratore

Ultimo aggiornamento il December 29, 2023

10 minuti
Moderato

Introduzione

Vai al passo 1

If, after consulting the troubleshooting page, you believe your oscillation motor has blown, this guide will walk you through accessing it to do your own repair/replacement. The oscillation motor is wired directly into the devices main circuitry and thus requires knowledge and experience to replace. This guide will simply cover how to access and remove it.

Cosa ti serve

Strumenti

Mostra di più…

  1. Dyson Pure Cool AM11 Oscillation Motor Replacement, Base: passo 1, immagine 1 di 3 Dyson Pure Cool AM11 Oscillation Motor Replacement, Base: passo 1, immagine 2 di 3 Dyson Pure Cool AM11 Oscillation Motor Replacement, Base: passo 1, immagine 3 di 3
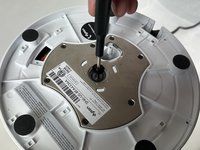
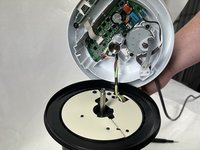
    • With the device flipped upside down, use a Phillips #1 screwdriver to remove the 4 screws holding the 3 tabs down.

  2. Dyson Pure Cool AM11 Oscillation Motor Replacement: passo 2, immagine 1 di 3 Dyson Pure Cool AM11 Oscillation Motor Replacement: passo 2, immagine 2 di 3 Dyson Pure Cool AM11 Oscillation Motor Replacement: passo 2, immagine 3 di 3
    • Remove all 3 tabs that you unscrewed.

  3. Dyson Pure Cool AM11 Oscillation Motor Replacement: passo 3, immagine 1 di 2 Dyson Pure Cool AM11 Oscillation Motor Replacement: passo 3, immagine 2 di 2
    • Using a Torx T20 Screwdriver, remove the screw in the center of the base.

    • Remove the two screws connected to the rotation arm.

  4. Dyson Pure Cool AM11 Oscillation Motor Replacement: passo 4, immagine 1 di 3 Dyson Pure Cool AM11 Oscillation Motor Replacement: passo 4, immagine 2 di 3 Dyson Pure Cool AM11 Oscillation Motor Replacement: passo 4, immagine 3 di 3
    • Lift the base of the housing from the rest of the fan.

    • Be careful not to pull too hard while lifting the lower body housing as there is wires that run throughout the housing that could be damaged if too much force is used.

  5. Dyson Pure Cool AM11 Oscillation Motor Replacement, Oscillation Motor: passo 5, immagine 1 di 2 Dyson Pure Cool AM11 Oscillation Motor Replacement, Oscillation Motor: passo 5, immagine 2 di 2
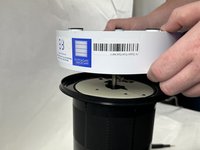
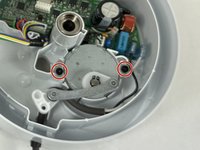
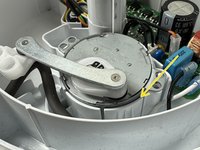
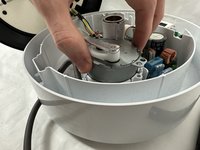
    • Using a T20 Torx screwdriver, remove the two screws on either side of the motor.

  6. Dyson Pure Cool AM11 Oscillation Motor Replacement: passo 6, immagine 1 di 2 Dyson Pure Cool AM11 Oscillation Motor Replacement: passo 6, immagine 2 di 2
    • (Optionally) Use a jimmy around the edge of the motor to loosen it from its housing.

    • Lift the motor out of its housing.

    • Ensure that you do not grab the motor by the swing arm as you may damage both the motor and surrounding components.

Linea Traguardo

Un'altra persona ha completato questa guida.

Team

2 Commenti

Where’d you get the motor

Jon Murch - Replica

any luck finding the proper motor replacement?

Kay -

Aggiungi Commento

Visualizza Statistiche:

Ultime 24 Ore: 4

Ultimi 7 Giorni: 15

Ultimi 30 Giorni: 46

Tutti i Tempi: 737