Salta al contenuto principale
Disassembling IBM ThinkPad T42 Lower Bracket

Disassembling IBM ThinkPad T42 Lower Bracket

Gerald Watanabe

Gerald Watanabe e 8 altri collaboratori

Ultimo aggiornamento il January 2, 2024

10 - 15 minuti
Moderato
Necessarie Immagini Migliori
Passi mancanti
Introduzione Migliore

Introduzione

Vai al passo 1

The lower bracket needs to be removed to get to some components of the laptop.

Cosa ti serve

Strumenti

  1. Disassembling IBM ThinkPad T42 Lower Bracket, Bottom cover: passo 1, immagine 1 di 1
    • Use a Phillips #0 screwdriver to remove the twenty screws on the underside of the T42.

  2. Disassembling IBM ThinkPad T42 Lower Bracket, Rear screws: passo 2, immagine 1 di 1
    • Remove the four Phillips screws located on either side of the rear of the T42 (there are two on each end.)

  3. Disassembling IBM ThinkPad T42 Lower Bracket, Keyboard and Trackpad: passo 3, immagine 1 di 1
    • Flip the laptop over and open the screen to access the keyboard and trackpad.

    • The keyboard and trackpad are connected to the motherboard. Before removing the keyboard and trackpad, disconnect both components from the motherboard, as shown in the following step.

    • The bezel and keyboard will be loose, be careful.

  4. Disassembling IBM ThinkPad T42 Lower Bracket: passo 4, immagine 1 di 2 Disassembling IBM ThinkPad T42 Lower Bracket: passo 4, immagine 2 di 2
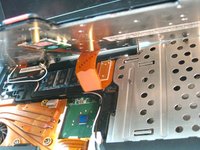
    • Carefully maneuver the palm rest away from the keyboard, as both the keyboard and palm rest/trackpad will come off together.

    • Remember, both the keyboard and trackpad have connectors to the motherboard. Disconnect these before completely removing either component.

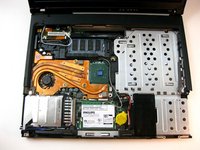
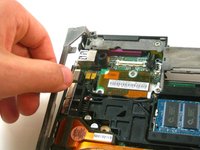
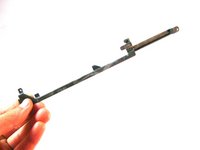
  5. Disassembling IBM ThinkPad T42 Lower Bracket, Lower Bracket: passo 5, immagine 1 di 2 Disassembling IBM ThinkPad T42 Lower Bracket, Lower Bracket: passo 5, immagine 2 di 2
    • Grasp the metal bracket to remove it from the device.

  6. Disassembling IBM ThinkPad T42 Lower Bracket, Microphone cover: passo 6, immagine 1 di 1
    • Remove the rubber cover from the microphone.

Conclusione

To reassemble your device, follow these instructions in reverse order.

Un'altra persona ha completato questa guida.

Team

Cal Poly, Team 29-76, Johann Spring 2010 Membro di Cal Poly, Team 29-76, Johann Spring 2010

CPSU-JOHANN-S10S29G76

4 Membri

37 Guide realizzate

0Commenti sulla guida

Aggiungi Commento

Visualizza Statistiche:

Ultime 24 Ore: 0

Ultimi 7 Giorni: 1

Ultimi 30 Giorni: 18

Tutti i Tempi: 3,523