Introduzione
This guide shows you how to replace the CMOS battery in your Dell XPS 15 9575 laptop.
The CMOS battery powers your laptop's BIOS firmware, which is responsible for booting up your computer and configuring data flow.
You can tell if your CMOS battery has died if your laptop has difficulty booting up, if drivers disappear, and if your laptop's date and time are incorrect.
Check out the Dell XPS 9575 Troubleshooting page for more help narrowing down your issues to the CMOS battery.
Before you begin this repair, turn off your laptop and unplug it from the charging adapter. As an extra precaution, unplug the battery connector from the motherboard or remove the battery before you start.
Cosa ti serve
-
-
Use your T5 Torx driver to remove all eight 3.2 mm screws holding down the back panel.
-
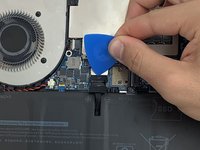
Wedge an opening pick between the back cover and the base of the board, then slightly lift the tool to pop the clips on the back cover off.
-
-
-
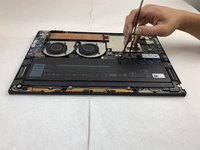
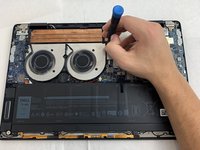
Use the Phillips #0 screwdriver to remove all four silver 3.2 mm screws fastening the interconnect cable.
-
-
-
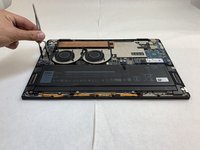
Carefully wedge the plastic opening pick between the fan and the interconnect cable.
-
Remove the interconnect cable.
-
-
-
-
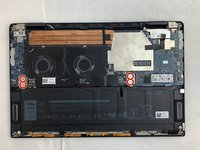
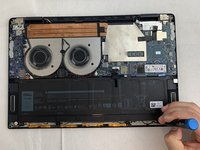
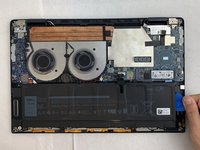
Use the Phillips #0 screwdriver to remove all eight 6.4 mm screws from the battery.
One of the screws was stripped on my laptop (the one between the fans) and rotated without releasing. I had to remove the other 7 and the battery cable and carefully lift up the battery while undoing the screw to try to pull it out. Thinking about it afterwards, maybe the location in the base that is was screwed into had snapped away rather than the thread being stripped which was why extracting was so problematic.
On my laptop. The J1 was a better fit for the screws. I almost stripped on with the j0.
Same situation for me. Battery screw heads are Phillips1 not Phillips0.
-
-
-
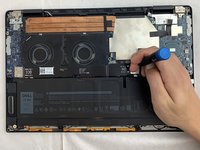
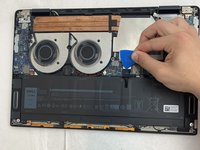
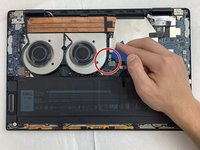
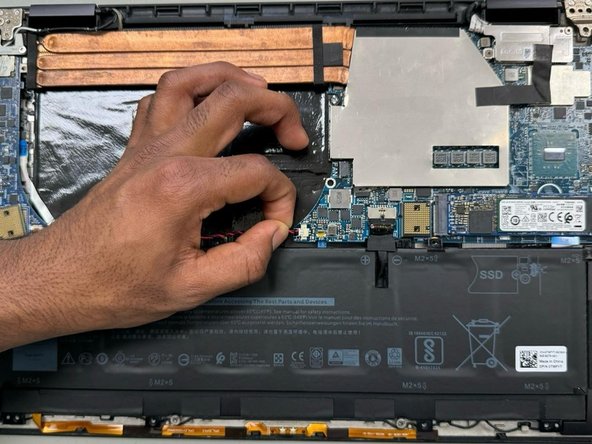
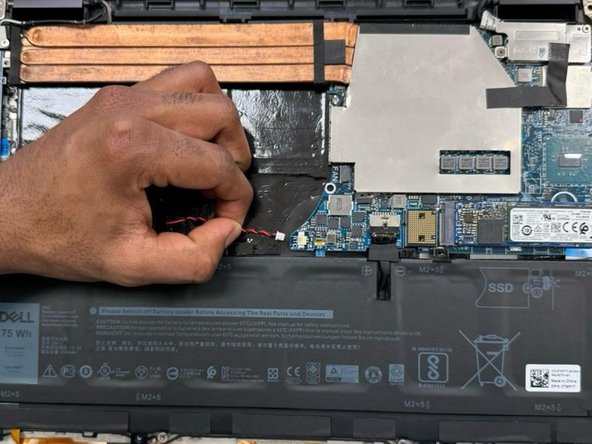
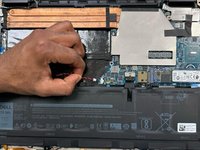
Use a plastic opening pick to pry the black battery cable away from its silver adapter.
Study the connector on the new battery carefully and the large photos in this guide so you know which bit to push in which direction. The connector was in very firmly so you have to apply reasonable force very carefully as you must avoid slipping and damaging the motherboard components. I had to try a few different techniques as pushing just the small black plastic rectangle as shown was doing nothing. I found grabbing the sides of the cable with my fingers and wiggling side to side a little helped.
This connector doesn’t come out easy. Have no idea how the person removed it with the pick as the little plastic rectangle on mine broke easily. What worked for me was to remove all the screws holding the battery so that it’s free. Remove the battery so that’s it’s free and then pull by wires as close to the connectors as you can. It came out easy this way.
Definitely study the connector. I found the best way was to remove the battery and gently pull directly away from the connector. The little “T” has 2 pins underneath so you should not put pressure on it. Remember to turn the power switch back to the “On” position before closing the case.
-
-
-
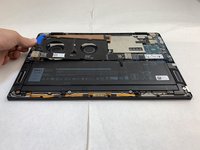
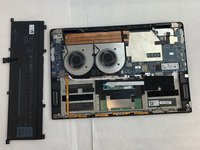
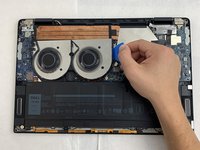
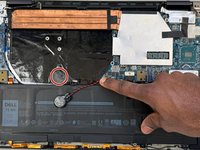
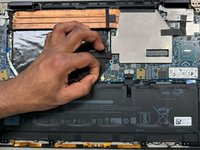
Use a plastic opening pick to separate the battery from the device.
-
Lift the battery straight up and remove it when it is completely separated.
The last bullet seems redundant since the conclusion says the same thing
The most difficult part of this for me was inserting the new battery cable. This will depend on who manufactured the replacement. It was very stiff and I used a spudger on either side of the connector bit by bit - i.e. push the left side in a bit, then the right side, and repeat until it was fully in. Again, be careful not to gouge the motherboard and don’t cut into the outer cable in the connector.
The cable was a bit too long on my replacement and curved upwards proud of the battery. I was hoping that pushing down best I could and reassembling would not cause a problem but now the right mouse click on the mouse pad is very stiff and only just works. I think I’ll live with it rather than open up again as I’m just happy that the laptop still works and has a battery that has a decent life.
-
-
-
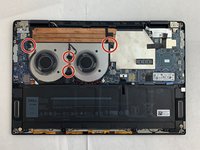
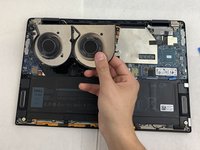
Use the Phillips 0 Screwdriver to carefully extract each of the four 3.2 mm screws.
If you have red markup, you should also have red bullets. Also, make sure to use end punctuation—I would check every step for this.
-
-
-
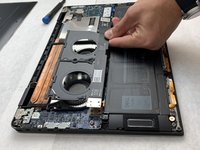
Find the wire connecting the fan into the motherboard and use the plastic opening tool to push the wire out from the motherboard's port.
-
-
-
The fan has been completely disconnected and is now safe to remove.
Remember to begin all steps with action verbs, and remove reassembly directions, since the blue box below has the same information.
The last bullet seems redundant when the conclusion says the same thing
-
-
-
Use a spudger to remove the CMOS battery from the board.
-
Use a spudger to disconnect the CMOS battery connector cable from the motherboard.
-
To disconnect, use the point of a spudger to push on alternating sides of the connector to "walk" it out of its socket.
-


To reassemble your device, follow these instructions in reverse order. Take your e-waste to an R2 or e-Stewards certified recycler.
To reassemble your device, follow these instructions in reverse order. Take your e-waste to an R2 or e-Stewards certified recycler.
Team

University of North Texas, Team 1-5, Coppersmith Spring 2024 Membro di University of North Texas, Team 1-5, Coppersmith Spring 2024
UNT-COPPERSMITH-S24S1G5
4 Membri
4 Guide realizzate
2Commenti sulla guida
Does anyone know where I can find a CMOS battery replacement for a Dell XPS 15 (9575)? I'm looking to replace it after some technical issues. Any help would be greatly appreciated
You can check it on amazon, ebay or a site called called Computer World. The may have it.
Mayuresh -
I found it quite tough to make the initial pick insertion. The easiest point for me was on the rear edge of the laptop just to the outside of the hinge.
The screws were all same size so no need to remember which came from where.
Mr Mac - Replica