Questa traduzione potrebbe non riflettere gli aggiornamenti più recenti dalla guida originale. Aiuta ad aggiornare la traduzione o visualizza la guida d'origine.
Introduzione
Sostituire un bottone è una delle riparazioni più usuali sui capi di abbigliamento. Fortunatamente, è anche la più facile. La presente guida mostra come ricucire un normale bottone a quattro fori usando ago e filo. In questa guida utilizziamo un filo di colore a contrasto, ma quando sarà il momento di realizzare il lavoro, utilizzate un filo intonato al colore del tessuto.
Cosa ti serve
-
-
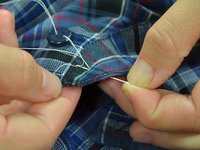
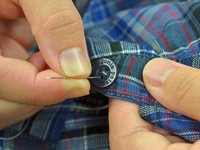
Individuare la parte di tessuto da cui si è staccato il bottone.
 Chiedi a FixBot
-
-
-
Sovrapporre l'asola sulla parte in cui va ricucito il bottone. Inserire il gesso da sarto nell'asola e fare un segno sul tessuto sottostante.
-
-
-
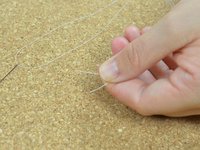
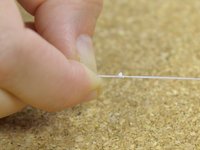
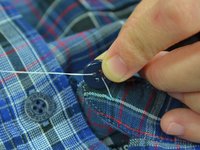
Tagliare una gugliata di filo—una gugliata lunga come il braccio dovrebbe essere più che sufficiente.
-
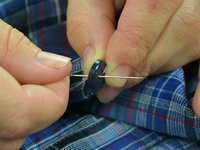
Infilare un ago.
-
-
-
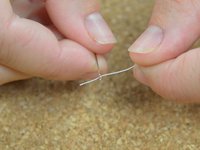
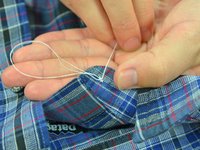
Far scorrere l'ago fino al centro della gugliata. A questo punto la lunghezza dei due capi di filo dovrebbe essere uguale.
-
Annodare insieme le due estremità del filo.
-
-
-
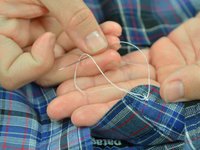
Fare un secondo nodo sopra il primo in modo da renderlo più spesso. Questo accorgimento serve ad evitare che il nodo passi attraverso la trama del tessuto.
-
-
-
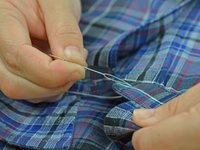
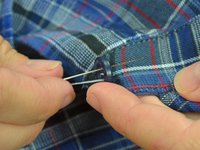
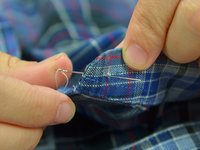
Inserire l'ago nel tessuto da sotto a sopra, in corrispondenza del segno fatto con il gesso.
-
Tendere bene il filo fino a sentire che il nodo si blocca sul rovescio del tessuto.
-
-
-
-
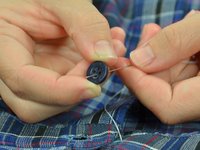
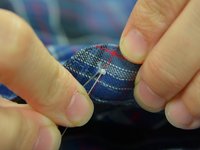
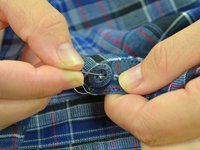
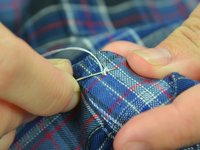
Infilare l'ago in uno dei fori del bottone, scegliendo a caso un foro da cui iniziare.
-
Lasciar scorrere il bottone lungo il filo fino al tessuto.
-
-
-
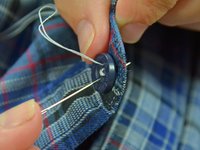
Far passare l'ago nel foro del bottone opposto a quello in cui lo si è appena infilato.
-
L'ago deve passare solo nel foro, non nel tessuto.
-
-
-
Ora infilare nuovamente l'ago nel tessuto, questa volta da sopra a sotto, vicino al punto in cui lo si è infilato all'inizio.
-
Tendere bene il filo finché il bottone rimane ben piatto sul tessuto.
-
-
-
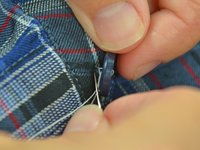
Infilare nuovamente l'ago nel tessuto da sotto a sopra, esattamente accanto al nodo iniziale.
-
Far passare l'ago in uno dei due fori rimasti non ancora infilati.
-
Tendere bene il filo.
-
-
-
Infilare l'ago nell'ultimo foro del bottone, da sopra a sotto.
-
L'ago deve passare solo nel foro, non nel tessuto.
-
Inserire nuovamente l'ago nel tessuto, il più vicino possibile agli altri due fili.
-
Tendere bene il filo.
-
-
-
Infilare di nuovo l'ago da sotto a sopra e farlo passare nel foro che si era infilato per primo.
-
Tendere bene il filo.
-
-
-
Far uscire l'ago dal foro e infilarlo direttamente nel secondo foro, da sopra a sotto.
-
Tendere bene il filo.
-
-
-
Spingere l'ago da sotto a sopra nel terzo foro del bottone.
-
Tendere bene il filo.
-
Infilare l'ago da sopra a sotto nel quarto foro e tendere bene il filo.
-
-
-
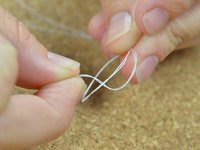
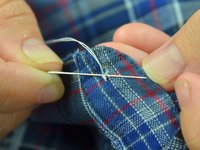
Spingere l'ago attraverso i fili che fissano il bottone sul rovescio del tessuto. Fare attenzione a non afferrare anche il tessuto.
-
-
-
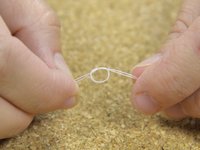
Lasciare un po’ di lasco nel filo e far passare l'ago nell'anello di filo così creato.
-
Tendere bene il filo, formando un nodo.
-
Ripetere ancora una volta i passaggi 15 e 16 per aggiungere un secondo nodo.
-
-
-
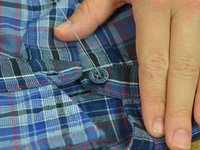
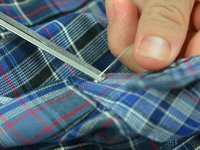
Tagliare i fili in eccesso.
-
Controllare che il bottone sia ben fissato.
-


Annulla: non ho completato questa guida.
Altre 64 persone hanno completato questa guida.
Un ringraziamento speciale a questi traduttori:
94%

Questi traduttori ci stanno aiutando ad aggiustare il mondo! Vuoi partecipare?
Inizia a tradurre ›


5Commenti sulla guida
What helps after the last step 14 is to wrap the thread around and around a few times underneath the button itself (binding all the threads together) and making one last pass through the cloth before the final knot. This makes the repair much more durable.
Wrapping the threads underneath the button to create a shank is useful for coat buttons where the fabric is thick and you don’t want the fabric to pucker. As noted, it adds durability to the button attachment. On a shirt collar, as seen here, it would create too much bulk where you need the button to lie quite flat, so this method is quite sufficient.
Thanks Jonathan. Great insight.