Salta al contenuto principale
Cricut Explore Air 2 Front Door Replacement

Cricut Explore Air 2 Front Door Replacement

Hannah Vanvlack

Hannah Vanvlack e un altro collaboratore

Ultimo aggiornamento il May 22, 2024

20 - 30 minuti
Moderato

Introduzione

Vai al passo 1

If you need to replace the front door of the Cricut, use this guide to access and remove it. If the front door gets severely cracked or becomes misaligned, it may need to be replaced. For this repair, you need a Phillips #2 and #1 screwdrivers. No steps are particularly difficult, but there are a good number of them, and they require careful attention as to not crack or break any parts.

Cosa ti serve

Strumenti

Mostra di più…

iFixit guadagna commissioni quando acquisti tramite questi link.
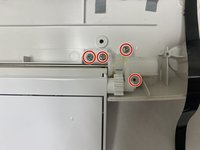
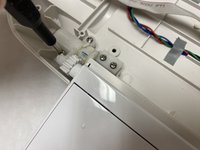
  1. Cricut Explore Air 2 Front Door Replacement, Front Door: passo 1, immagine 1 di 2 Cricut Explore Air 2 Front Door Replacement, Front Door: passo 1, immagine 2 di 2
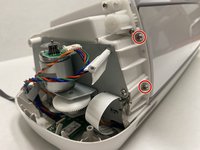
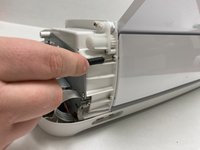
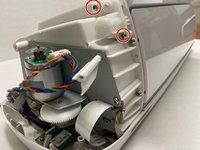
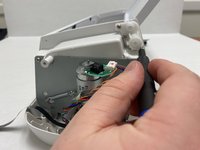
    • On both the left and right sides of the Cricut, locate the two internal screws.

    • Use a Phillips #1 screwdriver bit to unscrew the top 10.8 mm screw and the lower 9.1 mm screw on each side, four screws in total.

  2. Cricut Explore Air 2 Front Door Replacement: passo 2, immagine 1 di 1
    • Rotate the Cricut so the bottom faces upwards.

  3. Cricut Explore Air 2 Front Door Replacement: passo 3, immagine 1 di 2 Cricut Explore Air 2 Front Door Replacement: passo 3, immagine 2 di 2
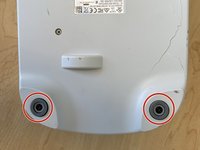
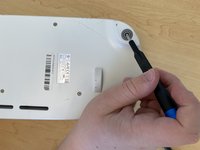
    • Locate the four screws, two on the left and two on the right, with pads attached.

    • Using a Phillips #2 screwdriver, remove all four of the screws and their pads.

  4. Cricut Explore Air 2 Front Door Replacement: passo 4, immagine 1 di 1
    • Rotate the Cricut back to an upright position.

  5. Cricut Explore Air 2 Front Door Replacement: passo 5, immagine 1 di 1
    • Gently lift the left and right sides of the Cricut's plastic shell off.

  6. Cricut Explore Air 2 Front Door Replacement: passo 6, immagine 1 di 2 Cricut Explore Air 2 Front Door Replacement: passo 6, immagine 2 di 2
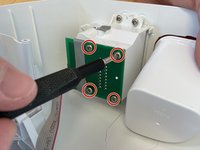
    • On the right side of the Cricut, locate the circuit board screwed in to the cover just removed.

    • Locate the four screws securing the circuit board to the shell.

    • Use a Phillips #1 screwdriver to unscrew each of the four 10 mm screws.

  7. Cricut Explore Air 2 Front Door Replacement: passo 7, immagine 1 di 1
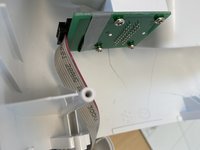
    • Gently unplug the connector from the circuit board, freeing the right side of the plastic shell completely.

  8. Cricut Explore Air 2 Front Door Replacement: passo 8, immagine 1 di 2 Cricut Explore Air 2 Front Door Replacement: passo 8, immagine 2 di 2
    • On both the left and right sides of the back plastic panel.

    • Using a Phillips #2 screwdriver, unscrew each of the four 5mm screws.

  9. Cricut Explore Air 2 Front Door Replacement: passo 9, immagine 1 di 2 Cricut Explore Air 2 Front Door Replacement: passo 9, immagine 2 di 2
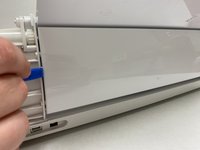
    • Wedge a plastic pryer tool next to the left side of the back panel.

    • Gently pry the left side of the back door from the rest of the machine.

    • Repeat with the right side of the back door to completely remove the back panel.

  10. Cricut Explore Air 2 Front Door Replacement: passo 10, immagine 1 di 2 Cricut Explore Air 2 Front Door Replacement: passo 10, immagine 2 di 2
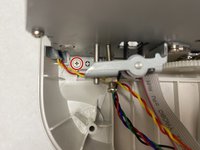
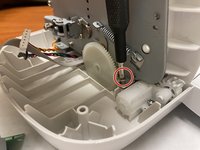
    • On both the left and right sides, locate the screws securing the top door's hinge.

    • Use a Phillips #1 screwdriver to remove the two 6.5 mm screws on each side, four in total.

  11. Cricut Explore Air 2 Front Door Replacement: passo 11, immagine 1 di 1
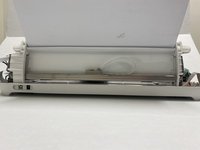
    • Gently lift the lid off of the Cricut.

  12. Cricut Explore Air 2 Front Door Replacement: passo 12, immagine 1 di 2 Cricut Explore Air 2 Front Door Replacement: passo 12, immagine 2 di 2
    • Locate the screws on the corners of the metal interior plate on both the left and right sides.

    • Unscrew the two the 8 mm screws on each side, four in total.

  13. Cricut Explore Air 2 Front Door Replacement: passo 13, immagine 1 di 1
    • Gently lean the metal interior and all that comes with it backwards, exposing the bottom plastic shell of the Cricut.

  14. Cricut Explore Air 2 Front Door Replacement: passo 14, immagine 1 di 2 Cricut Explore Air 2 Front Door Replacement: passo 14, immagine 2 di 2
    • Locate the screws securing the front door hinge to the bottom plate of the Cricut.

    • Unscrew each of the four 5 mm screws on each side, 8 in total.

  15. Cricut Explore Air 2 Front Door Replacement: passo 15, immagine 1 di 1
    • Gently remove the front door from the bottom plate of the Cricut.

Conclusione

To reassemble your device, follow these instructions in reverse order.

0 Commenti

Aggiungi Commento

Visualizza Statistiche:

Ultime 24 Ore: 0

Ultimi 7 Giorni: 10

Ultimi 30 Giorni: 27

Tutti i Tempi: 232