Salta al contenuto principale
Cooler Master Laptop Fan Replacement

Cooler Master Laptop Fan Replacement

Britton Williams

Britton Williams e un altro collaboratore

Ultimo aggiornamento il January 25, 2024

10 minuti
Facile

Introduzione

Vai al passo 1

Overheating laptops can be a serious problem. Luckily devices like the Cooler Master Laptop

Fan can help keep your laptop cooler than the fans in your laptop can. This helps extend the life

of your laptop and allows better performance for your laptop as well. However even laptop fans

can fail and need to be replaced.

Cosa ti serve

  1. Cooler Master Laptop Fan Replacement, Fan: passo 1, immagine 1 di 1
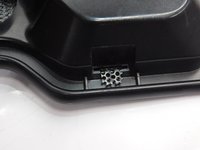
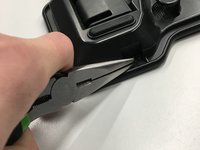
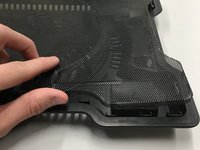
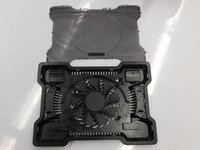
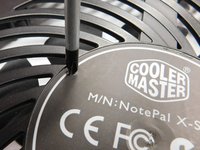
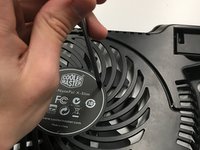
    • Set your laptop cooler on the table and make sure it is not plugged into a laptop or powered on.

    • Never try to open the cooler while plugged in.

  2. Cooler Master Laptop Fan Replacement: passo 2, immagine 1 di 1
    • Flip the Device over and find ten folded metal slots holding the metal cover onto the base.

  3. Cooler Master Laptop Fan Replacement: passo 3, immagine 1 di 3 Cooler Master Laptop Fan Replacement: passo 3, immagine 2 di 3 Cooler Master Laptop Fan Replacement: passo 3, immagine 3 di 3
    • Bend each metal flap straight up with the pliers to allow the metal cover to slide off.

  4. Cooler Master Laptop Fan Replacement: passo 4, immagine 1 di 2 Cooler Master Laptop Fan Replacement: passo 4, immagine 2 di 2
    • Remove the cover and expose the inside of the Cooler.

  5. Cooler Master Laptop Fan Replacement: passo 5, immagine 1 di 2 Cooler Master Laptop Fan Replacement: passo 5, immagine 2 di 2
    • Unplug the power cable to the fan.

    • Make sure not to apply too much force and disconnect the wires to the device.

  6. Cooler Master Laptop Fan Replacement: passo 6, immagine 1 di 2 Cooler Master Laptop Fan Replacement: passo 6, immagine 2 di 2
    • On the bottom of the base locate the screw holes under the sticker on the base.

    • Unscrew the three fan screws.

  7. Cooler Master Laptop Fan Replacement: passo 7, immagine 1 di 1
    • Once all the pieces are taken apart, set aside the old fan and prep the new one for installation.

  8. Cooler Master Laptop Fan Replacement: passo 8, immagine 1 di 1
    • Apply a small amount of thermal compound to the base where the fan sets.

    • Make sure to apply thermal compound to keep the fan from overheating and damaging the base.

  9. Cooler Master Laptop Fan Replacement: passo 9, immagine 1 di 2 Cooler Master Laptop Fan Replacement: passo 9, immagine 2 di 2
    • Connect power cable for the fan and place the cables back in their slots.

  10. Cooler Master Laptop Fan Replacement: passo 10, immagine 1 di 2 Cooler Master Laptop Fan Replacement: passo 10, immagine 2 di 2
    • Screw fan back onto base.

  11. Cooler Master Laptop Fan Replacement: passo 11, immagine 1 di 1
    • Place cover back on base.

  12. Cooler Master Laptop Fan Replacement: passo 12, immagine 1 di 1
    • Fold all metal flaps back to hold cover on base.

  13. Cooler Master Laptop Fan Replacement: passo 13, immagine 1 di 1
    • Flip it over and it's finished.

Conclusione

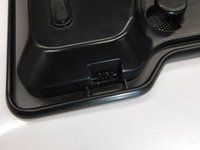
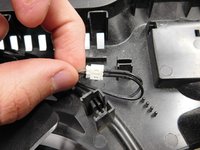
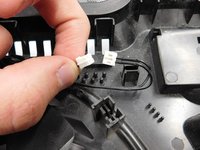
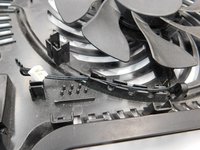
Plug in the USB to insure proper working condition. And the cooling pad fan replacement is done.

Altre 3 persone hanno completato questa guida.

2 Commenti

Hi there,

I’ve got a Targus Lap Chill Matt (Laptop Cooling Pad 15 - 17" Laptops) but the USB port had worn out and require a new replacement. Does anyone have any examples on how to replace the UBS port from a Laptop Cooler Pad?

Thanks!

rolly - Replica

Hi,

Just wanted to say huge thanks to you for this guideline! I have a Cooler Master Notepal L1 and the fan kept making noises. But now it works totally fine after I was able to open the cover.

Thanks again!

//Parisa

Parisa - Replica

Aggiungi Commento

Visualizza Statistiche:

Ultime 24 Ore: 2

Ultimi 7 Giorni: 20

Ultimi 30 Giorni: 45

Tutti i Tempi: 6,227