Salta al contenuto principale
Unisciti alla Community delle riparazioni - Crea un account
Cleaning Function Buttons

Cleaning Function Buttons

Tyler Grossheim

Tyler Grossheim e 4 altri collaboratori

Ultimo aggiornamento il 19 feb 2016

5 minuti
Molto facile

Introduzione

Vai al passo 1

Use this guide to clean the function buttons.

Cosa ti serve

Strumenti

  1. Cleaning Function Buttons, Front and Rear Cover: passo 1, immagine 1 di 2 Cleaning Function Buttons, Front and Rear Cover: passo 1, immagine 2 di 2
    • Remove wrist strap and battery.

  2. Cleaning Function Buttons: passo 2, immagine 1 di 3 Cleaning Function Buttons: passo 2, immagine 2 di 3 Cleaning Function Buttons: passo 2, immagine 3 di 3
    • Remove 2 screws from each side of the camera (4 total, 0.102 in).

    • Remove 2 screws from the bottom on the camera (0.138 in).

    • Do not mix the 4 side screws with the 2 bottoms ones; they are different sizes.

  3. Cleaning Function Buttons: passo 3, immagine 1 di 3 Cleaning Function Buttons: passo 3, immagine 2 di 3 Cleaning Function Buttons: passo 3, immagine 3 di 3
    • Gently pull off the front cover.

    • The plate on the side should come off.

    • Gently pull off the back cover.

  4. Cleaning Function Buttons: passo 4, immagine 1 di 1
    • The cases should now be removed.

  5. Cleaning Function Buttons, Cleaning Function Buttons: passo 5, immagine 1 di 1
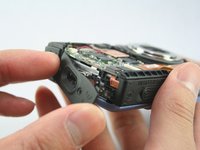
    • Clean around the function buttons with a cotton swab dipped in isopropyl alcohol.

Conclusione

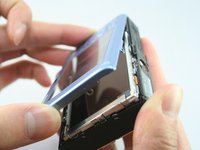
To reassemble your device, follow these instructions in reverse order.

Un'altra persona ha completato questa guida.

Preparati per le riparazioni future

Acquista tutti

Team

Cal Poly, Team 3-32, Regan Winter 2011 Membro di Cal Poly, Team 3-32, Regan Winter 2011

CPSU-REGAN-W11S3G32

3 Membri

8 Guide realizzate

0Commenti sulla guida

Aggiungi Commento

Visualizza Statistiche:

Ultime 24 Ore: 1

Ultimi 7 Giorni: 2

Ultimi 30 Giorni: 8

Tutti i Tempi: 2,028