
Canon PowerShot SD200 Flash Assembly Replacement

Introduzione
Vai al passo 1The Canon PowerShot SD200 has a built in flash in the camera. If the flash no longer works, it might need replacing. This guide will show you how to remove the flash assembly.
Cosa ti serve
Strumenti


-
-
Use your fingernail to slide the dark gray tab located on the bottom of the device towards the edge of camera.
-
Slide the light gray door away from the LCD screen and pull up to open the door.
-
-
-
Close the light gray battery compartment door.
-
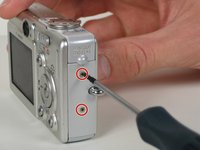
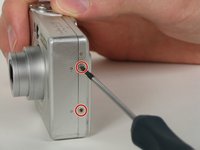
Remove the six 2.8 mm Phillips screws on the outside of the case. Two screws are found on each side of the camera, and the final two are found on the bottom.
-
-
-
-
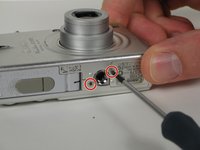
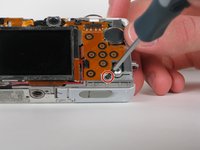
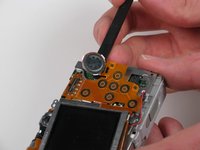
Remove the one 2.4 mm Phillips screw from the bottom of the motherboard.
-
Remove the two 3.9 mm Phillips screws from the top of the motherboard.
-
-
-
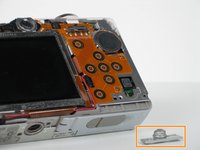
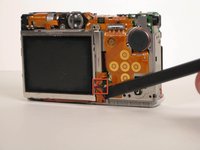
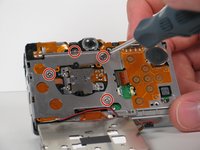
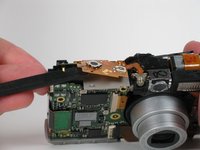
Using the flat end of the spudger, begin to slightly peel back the orange ribbon cable from the rest of the camera by lifting up at the bottom corner. The ribbon cable should pop off of the pegs.
-
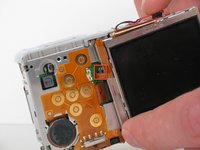
Rotate the speaker so that it unlatches from the camera frame. Then use the flat end of the spudger to lift up the speaker from the rest of the camera.
-
-
-
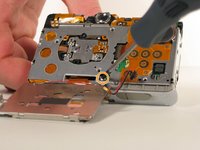
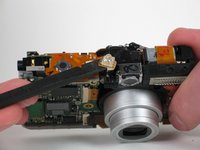
Use the flat end of the spudger to peel back the orange ribbon cable on the top of the camera where the power button contact is located. Only apply enough force to lift the power button contact up from the rest of the camera.
-
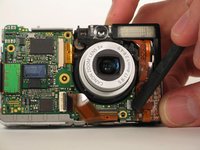
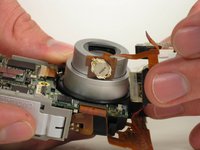
Use the flat end of the spudger to lift up the LED bulb from the rest of the camera.
-
-
-
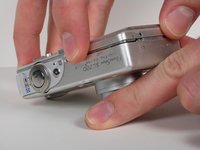
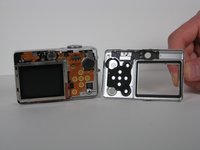
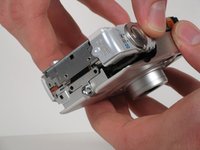
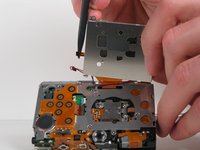
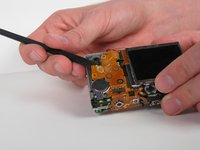
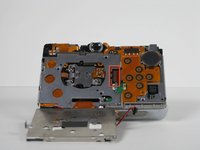
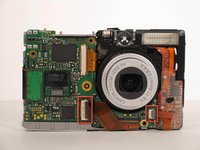
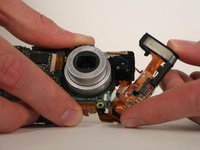
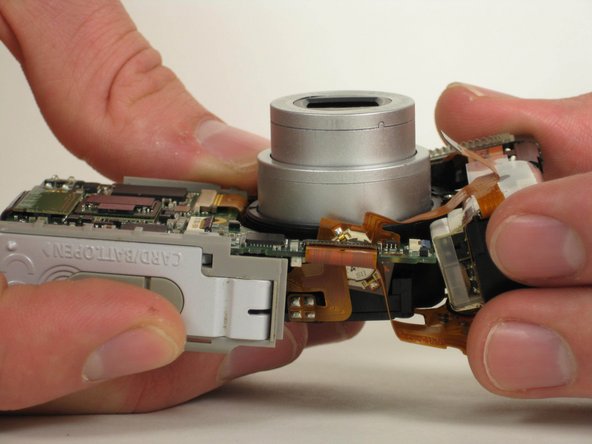
Use your fingers to carefully pry off the back metal casing.
-
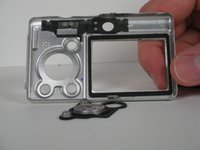
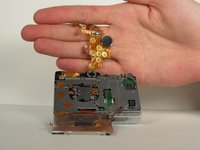
Separate the metal case and tripod internal thread end from the rest of the camera.
-


To reassemble your device, follow these instructions in reverse order.
To reassemble your device, follow these instructions in reverse order.

Team

Cal Poly, Team 5-12, Maness Fall 2010 Membro di Cal Poly, Team 5-12, Maness Fall 2010
CPSU-MANESS-F10S5G12
4 Membri
9 Guide realizzate