Salta al contenuto principale

Canon PowerShot A620 Shutter Button Replacement

Cosa ti serve

  1. Canon PowerShot A620 Shutter Button Replacement, Side Panel: passo 1, immagine 1 di 3 Canon PowerShot A620 Shutter Button Replacement, Side Panel: passo 1, immagine 2 di 3 Canon PowerShot A620 Shutter Button Replacement, Side Panel: passo 1, immagine 3 di 3
    • Unscrew the three Phillips #00 1.6x3mm screws on the side.

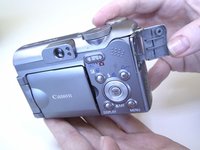
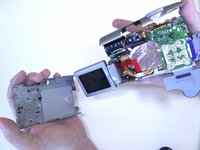
    • Lift loose panel from the case.

    • Unscrew the two Phillips #00 1.6x3mm screws that were previously hidden beneath the panel.

  2. Canon PowerShot A620 Shutter Button Replacement, Bottom Panel: passo 2, immagine 1 di 1
    • Unscrew the two Phillips #00 1.6x3mm screws on the bottom panel.

  3. Canon PowerShot A620 Shutter Button Replacement, Battery Compartment: passo 3, immagine 1 di 1
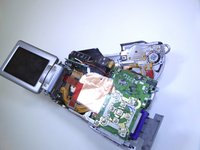
    • Open the battery door.

    • Unscrew the four Phillips #00 1.6x3mm screws in the battery compartment.

  4. Canon PowerShot A620 Shutter Button Replacement, Terminal Cover: passo 4, immagine 1 di 2 Canon PowerShot A620 Shutter Button Replacement, Terminal Cover: passo 4, immagine 2 di 2
    • Lift the terminal cover on the side of the camera.

    • Unscrew the three Phillips #00 1.6x3mm screws beneath the terminal cover.

  5. Canon PowerShot A620 Shutter Button Replacement, Top Panel: passo 5, immagine 1 di 1
    • Gently pull the top panel to separate it from the case.

    • Although the top panel will now be free from the rest of the case, it will still be attached to the camera by a ribbon cable.

  6. Canon PowerShot A620 Shutter Button Replacement, Front Panel: passo 6, immagine 1 di 2 Canon PowerShot A620 Shutter Button Replacement, Front Panel: passo 6, immagine 2 di 2
    • Gently pull the front panel to separate it from the camera.

    • The battery terminals are easy to access from this step.

  7. Canon PowerShot A620 Shutter Button Replacement, Terminal Cover: passo 7, immagine 1 di 2 Canon PowerShot A620 Shutter Button Replacement, Terminal Cover: passo 7, immagine 2 di 2
    • Gently pull the terminal cover to separate it from the camera.

  8. Canon PowerShot A620 Shutter Button Replacement, Memory Card Cover: passo 8, immagine 1 di 2 Canon PowerShot A620 Shutter Button Replacement, Memory Card Cover: passo 8, immagine 2 di 2
    • Slide the memory card cover down.

    • Unscrew the Phillips #00 1.6x3mm screw beneath the memory card cover.

  9. Canon PowerShot A620 Shutter Button Replacement, Back Panel: passo 9, immagine 1 di 2 Canon PowerShot A620 Shutter Button Replacement, Back Panel: passo 9, immagine 2 di 2
    • Gently pull the back panel to separate it from the camera.

  10. Canon PowerShot A620 Shutter Button Replacement, Metal Plate Screws: passo 10, immagine 1 di 2 Canon PowerShot A620 Shutter Button Replacement, Metal Plate Screws: passo 10, immagine 2 di 2
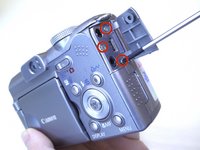
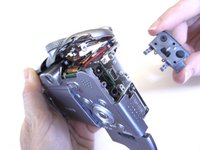
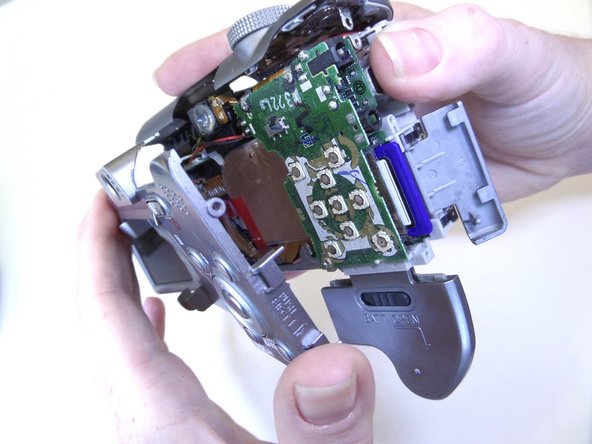
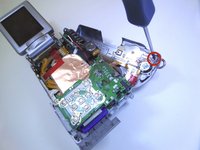
    • Unscrew the Phillips #00 1.6x3mm screw located on the top panel.

  11. Canon PowerShot A620 Shutter Button Replacement, Metal Plate: passo 11, immagine 1 di 1
    • Gently lift the metal plate and move it to the side.

  12. Canon PowerShot A620 Shutter Button Replacement, Trigger Button Screws: passo 12, immagine 1 di 2 Canon PowerShot A620 Shutter Button Replacement, Trigger Button Screws: passo 12, immagine 2 di 2
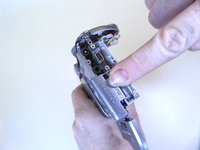
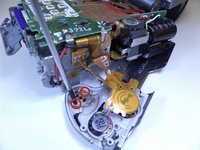
    • Unscrew the two Phillips #00 1.6x3mm screws that hold in the trigger button.

  13. Canon PowerShot A620 Shutter Button Replacement, Trigger Button: passo 13, immagine 1 di 1
    • The trigger button will fall off once the screws have been removed.

Conclusione

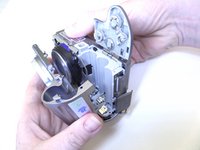
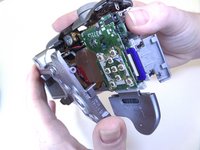
To reassemble your device, follow these instructions in reverse order.

Un'altra persona ha completato questa guida.

Jaime Abraham

Membro da: 09/08/14

350 Reputazione

3 Guide realizzate

Team

CSU Fullerton, Team 1-1, Bruce Fall 2014 Membro di CSU Fullerton, Team 1-1, Bruce Fall 2014

CSUF-BRUCE-F14S1G1

3 Membri

6 Guide realizzate

0 Commenti

Aggiungi Commento

Visualizza Statistiche:

Ultime 24 Ore: 0

Ultimi 7 Giorni: 2

Ultimi 30 Giorni: 12

Tutti i Tempi: 1,229