Salta al contenuto principale
Brother CS6000i Body Replacement

Brother CS6000i Body Replacement

Ava Martinez

Ava Martinez e 4 altri collaboratori

Ultimo aggiornamento il December 31, 2024

10 minuti
Facile

Introduzione

Vai al passo 1

If your Brother CS6000i sewing machine is having any issues internally, it requires the body of the machine to be removed to repair any issue. This guide provides all the information on what screws to remove in order to open up the sewing machine.

This guide will act as a prerequisite to the majority of the Brother CS6000i guides.

Before beginning on this replacement guide, make sure that the Brother CS6000i is completely disconnected from any power source.

Cosa ti serve

iFixit guadagna commissioni quando acquisti tramite questi link.
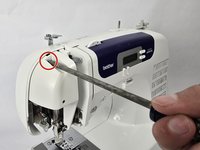
  1. Brother CS6000i Body Replacement, Body: passo 1, immagine 1 di 2 Brother CS6000i Body Replacement, Body: passo 1, immagine 2 di 2
    • Remove the five 20 mm Phillips #2 screws on the back of the device.

    • Remove the single 28 mm Phillips #2 screw on the back of the device.

    • Remove the single 23 mm Phillips #2 screw on the back of the device.

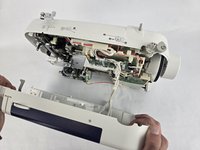
  2. Brother CS6000i Body Replacement: passo 2, immagine 1 di 2 Brother CS6000i Body Replacement: passo 2, immagine 2 di 2
    • Pull the white cover off.

  3. Brother CS6000i Body Replacement: passo 3, immagine 1 di 2 Brother CS6000i Body Replacement: passo 3, immagine 2 di 2
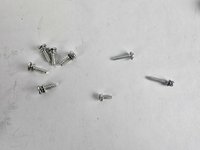
    • Remove the final screw, a 11 mm Phillips #2.

    • After removing all eight screws, you will have five 2 mm screws, one 28 mm screw, one 23 mm screw, and one 11 mm screw, all of which are Phillips #2.

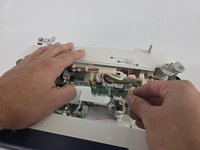
  4. Brother CS6000i Body Replacement: passo 4, immagine 1 di 3 Brother CS6000i Body Replacement: passo 4, immagine 2 di 3 Brother CS6000i Body Replacement: passo 4, immagine 3 di 3
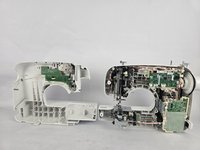
    • Slightly pull apart the two halves of the machine, taking care not to strain the attached cables.

    • Unhook the white wires that are connected to the motherboard.

    • Fully separate the two halves.

Conclusione

To reassemble your device, follow these instructions in reverse order.

Ava Martinez

Membro da: 10/31/24

433 Reputazione

4 Guide realizzate

Team

Cuesta, Team 20-1, Krynen Fall 2024 Membro di Cuesta, Team 20-1, Krynen Fall 2024

CUESTA-KRYNEN-F24S20G1

5 Membri

8 Guide realizzate

0Commenti sulla guida

Aggiungi Commento

Visualizza Statistiche:

Ultime 24 Ore: 0

Ultimi 7 Giorni: 14

Ultimi 30 Giorni: 63

Tutti i Tempi: 219