
Acer Spin 3 SP315-51-757C Hard Drive Replacement

Introduzione
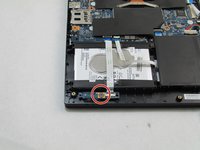
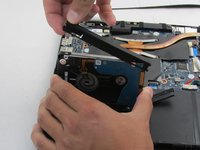
Vai al passo 1When an Acer Spin 3 SP315-51-757C turns on, but the operating system does not start, there is usually a problem with the hard drive. You may also want to get a hard drive with more storage and use it to replace your old hard drive. This guide shows you how to properly unplug and remove your hard drive from your laptop. When installing a brand new hard drive, be sure to have Windows installed onto the hard drive before putting it in your laptop.
Cosa ti serve
Kit di riparazione
Questo kit contiene tutti i ricambi e gli strumenti necessari per completare questa guida.

Ricambi


Strumenti


Mostra di più…


To reassemble your device, follow these instructions in reverse order.
To reassemble your device, follow these instructions in reverse order.
Annulla: non ho completato questa guida.
Altre 2 persone hanno completato questa guida.

Team

Embry-Riddle Aeronautical University, Team S20-G2, Branham Fall 2019 Membro di Embry-Riddle Aeronautical University, Team S20-G2, Branham Fall 2019
ERAU-BRANHAM-F19S20G2
4 Membri
6 Guide realizzate
2 Commenti
Awesome. Thanks for the tips here. Do you have any recommendations on what SSD may go with Acer Spin 3 SP315-51-757C ? I am a little clue less here since i am new to this, and any feedback here would help. Thanks.
I just replaced my HDD with a 1TB Crucial MX500 SSD. It was easy to clone the drive and simple to install. My computer went from almost unusable to better than new, I highly recommend it.