Salta al contenuto principale
Acer Chromebook C740-C4PE LCD Screen Replacement

Acer Chromebook C740-C4PE LCD Screen Replacement

Sang Huynh

Sang Huynh e 9 altri collaboratori

Ultimo aggiornamento il June 15, 2020

20 minuti
Moderato

Introduzione

Vai al passo 1

When an Acer Chromebook C740-C4PE screen does not function as it should (including black circles, colored lines, black screen, etc) the best solution is to replace the screen with a new one. This guide helps you to remove the old screen with all of the components that hold it, and install the new screen and secure it.

Cosa ti serve

Ricambi

Strumenti

  • Phillips #0 Screwdriver
    Phillips #0 Screwdriver
  • Spudger
    Spudger

Mostra di più…

  1. Acer Chromebook C740-C4PE LCD Screen Replacement, LCD Screen: passo 1, immagine 1 di 1
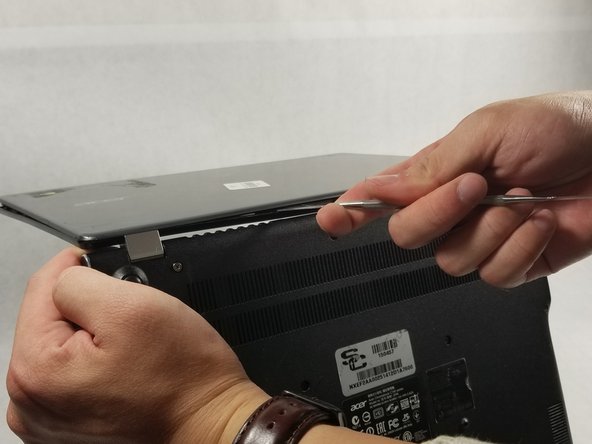
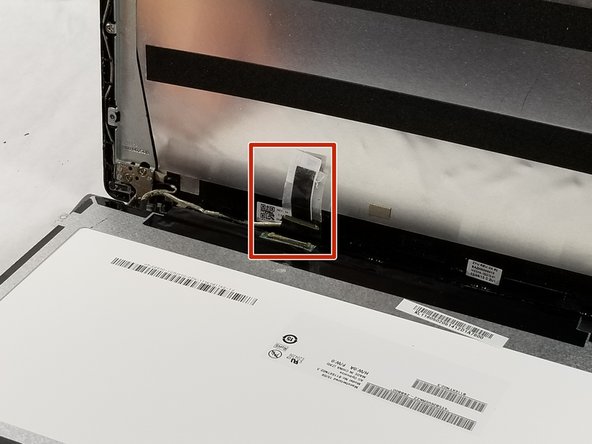
    • Turn off the Acer Chromebook, remove it from the charger, and disconnect the battery adapter.

  2. Acer Chromebook C740-C4PE LCD Screen Replacement: passo 2, immagine 1 di 2 Acer Chromebook C740-C4PE LCD Screen Replacement: passo 2, immagine 2 di 2
    • Remove the black frame off the screen by using a spudger.

    • It is recommended to start removing the frame from the top corner.

  3. Acer Chromebook C740-C4PE LCD Screen Replacement: passo 3, immagine 1 di 2 Acer Chromebook C740-C4PE LCD Screen Replacement: passo 3, immagine 2 di 2
    • Use the spudger to open the two hinges that connect the screen frame to the bottom of the Chromebook.

    • Move the spudger along the bottom of the screen frame until you can pull the frame out entirely.

  4. Acer Chromebook C740-C4PE LCD Screen Replacement: passo 4, immagine 1 di 2 Acer Chromebook C740-C4PE LCD Screen Replacement: passo 4, immagine 2 di 2
    • Remove the four 3.4 mm screws by using the Phillips #0 screwdriver.

  5. Acer Chromebook C740-C4PE LCD Screen Replacement: passo 5, immagine 1 di 3 Acer Chromebook C740-C4PE LCD Screen Replacement: passo 5, immagine 2 di 3 Acer Chromebook C740-C4PE LCD Screen Replacement: passo 5, immagine 3 di 3
    • Place the LCD screen on top of the keyboard.

    • Lift the tape that holds the back of the LCD screen to the connector, and unplug the connector.

    • Remove the LCD screen and replace it with the new one.

Conclusione

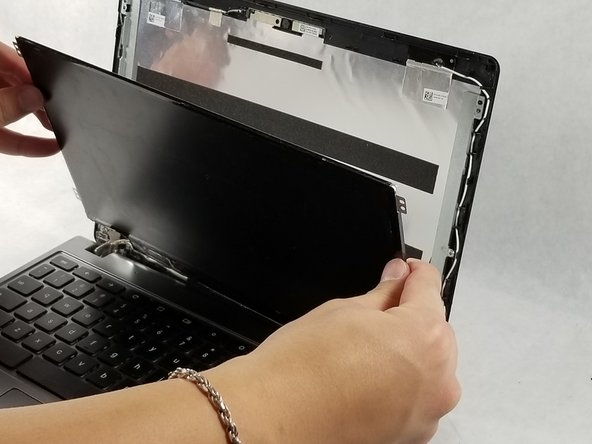
To reassemble your device, follow these instructions in reverse order.

Altre 3 persone hanno completato questa guida.

Sang Huynh

Membro da: 03/08/17

252 Reputazione

2 Guide realizzate

Team

0 Commenti

Aggiungi Commento

Visualizza Statistiche:

Ultime 24 Ore: 0

Ultimi 7 Giorni: 2

Ultimi 30 Giorni: 11

Tutti i Tempi: 662