Salta al contenuto principale
Acer Aspire R R5-471T-51UN SSD Replacement

Acer Aspire R R5-471T-51UN SSD Replacement

John Sandor

John Sandor e 5 altri collaboratori

Ultimo aggiornamento il June 14, 2021

15 - 20 minuti
Moderato

Introduzione

Vai al passo 1

If you ever need to replace the SSD in your Acer Aspire R R5-471T-51UN, then this guide is for you. Here, you will be using tools like the Jimmy and the Phillips #0 screwdriver to disconnect certain components. Step 5 asks you to be cautious when removing the battery. Before you begin, power off the device and disconnect from any external connections.

Cosa ti serve

Strumenti

Mostra di più…

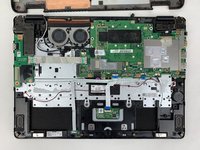
  1. Acer Aspire R R5-471T-51UN SSD Replacement, Battery: passo 1, immagine 1 di 3 Acer Aspire R R5-471T-51UN SSD Replacement, Battery: passo 1, immagine 2 di 3 Acer Aspire R R5-471T-51UN SSD Replacement, Battery: passo 1, immagine 3 di 3
    • Flip your laptop over so the bottom is facing you.

    • Remove the twelve 5 mm screws with a Phillips #0 screwdriver.

  2. Acer Aspire R R5-471T-51UN SSD Replacement: passo 2, immagine 1 di 3 Acer Aspire R R5-471T-51UN SSD Replacement: passo 2, immagine 2 di 3 Acer Aspire R R5-471T-51UN SSD Replacement: passo 2, immagine 3 di 3
    • Insert the Jimmy between the back cover of the laptop and the base of the laptop and then slowly use the Jimmy to pry off the back cover of the laptop.

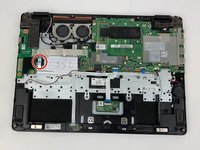
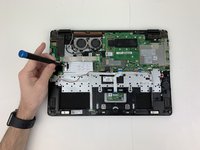
  3. Acer Aspire R R5-471T-51UN SSD Replacement: passo 3, immagine 1 di 2 Acer Aspire R R5-471T-51UN SSD Replacement: passo 3, immagine 2 di 2
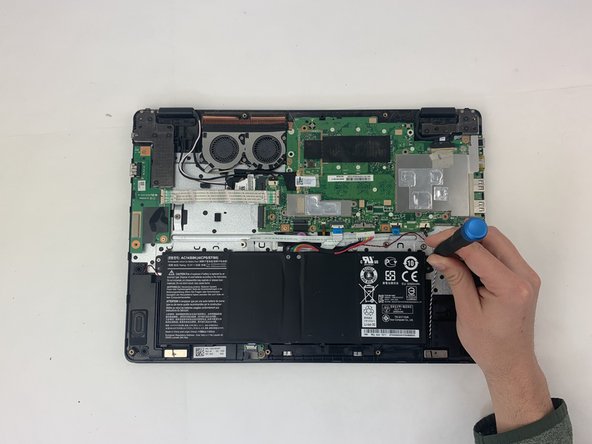
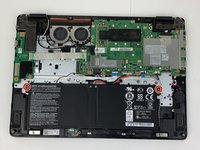
    • Use your Phillips #0 screwdriver to remove the two 3mm screws on the battery.

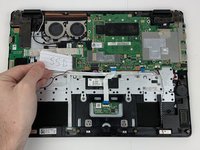
  4. Acer Aspire R R5-471T-51UN SSD Replacement: passo 4, immagine 1 di 3 Acer Aspire R R5-471T-51UN SSD Replacement: passo 4, immagine 2 di 3 Acer Aspire R R5-471T-51UN SSD Replacement: passo 4, immagine 3 di 3
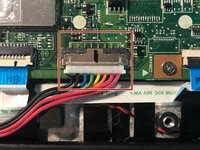
    • Gently and cautiously pinch the white ends of the battery connector cable and slowly pull it from the motherboard.

  5. Acer Aspire R R5-471T-51UN SSD Replacement: passo 5, immagine 1 di 2 Acer Aspire R R5-471T-51UN SSD Replacement: passo 5, immagine 2 di 2
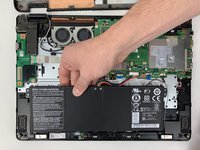
    • Gently lift the battery out of the laptop.

    • Be cautious with the lithium ion battery as you remove it.

  6. Acer Aspire R R5-471T-51UN SSD Replacement, SSD: passo 6, immagine 1 di 2 Acer Aspire R R5-471T-51UN SSD Replacement, SSD: passo 6, immagine 2 di 2
    • Using the Phillips #0 screwdriver, unscrew the single 5mm screw holding the SSD in place.

  7. Acer Aspire R R5-471T-51UN SSD Replacement: passo 7, immagine 1 di 2 Acer Aspire R R5-471T-51UN SSD Replacement: passo 7, immagine 2 di 2
    • Gently pull the SSD to the left and out of the assembly.

Conclusione

To reassemble your device, follow these instructions in reverse order.

Altre 2 persone hanno completato questa guida.

0Commenti sulla guida

Aggiungi Commento

Visualizza Statistiche:

Ultime 24 Ore: 0

Ultimi 7 Giorni: 1

Ultimi 30 Giorni: 5

Tutti i Tempi: 970