Salta al contenuto principale
Unisciti alla Community delle riparazioni - Crea un account

Microsoft Surface Pro 7 Kickstand Replacement

Cosa ti serve

  1. Microsoft Surface Pro 7 Kickstand Replacement, Open the kickstand: passo 1, immagine 1 di 3 Microsoft Surface Pro 7 Kickstand Replacement, Open the kickstand: passo 1, immagine 2 di 3 Microsoft Surface Pro 7 Kickstand Replacement, Open the kickstand: passo 1, immagine 3 di 3
    • Lift the kickstand to expose the hinge screws.

    Chiedi a FixBot

    Aggiungi Commento

  2. Microsoft Surface Pro 7 Kickstand Replacement, Remove the kickstand screws: passo 2, immagine 1 di 2 Microsoft Surface Pro 7 Kickstand Replacement, Remove the kickstand screws: passo 2, immagine 2 di 2
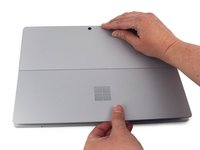
    • Remove the four 2.7 mm T3 screws—two on each side of the kickstand.

    Chiedi a FixBot

    Aggiungi Commento

  3. Microsoft Surface Pro 7 Kickstand Replacement, Close the kickstand: passo 3, immagine 1 di 3 Microsoft Surface Pro 7 Kickstand Replacement, Close the kickstand: passo 3, immagine 2 di 3 Microsoft Surface Pro 7 Kickstand Replacement, Close the kickstand: passo 3, immagine 3 di 3
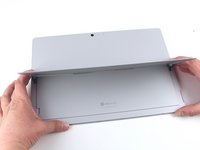
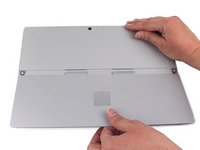
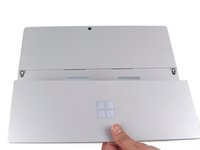
    • Move the kickstand back down to a flat position.

    • The hinges are stiff and you may need to use some force to get it down.

    Chiedi a FixBot

    Aggiungi Commento

  4. Microsoft Surface Pro 7 Kickstand Replacement, Remove the kickstand: passo 4, immagine 1 di 3 Microsoft Surface Pro 7 Kickstand Replacement, Remove the kickstand: passo 4, immagine 2 di 3 Microsoft Surface Pro 7 Kickstand Replacement, Remove the kickstand: passo 4, immagine 3 di 3
    • Remove the kickstand from the back cover.

    • There are two adhesive tabs in the middle of the kickstand that disengage most easily when the kickstand is pulled directly downward from the device.

    • Be sure to insert these tabs when reinstalling the new kickstand before replacing the screws.

    Chiedi a FixBot

    Aggiungi Commento

Conclusione

To reassemble your device, follow the above steps in reverse order.

Take your e-waste to an R2 or e-Stewards certified recycler.

Repair didn’t go as planned? Try some basic troubleshooting, or ask our Answers community for help.

Annulla: non ho completato questa guida.

Un'altra persona ha completato questa guida.

Sam Omiotek

Membro da: 02/25/19

98.734 Reputazione

290 guide realizzate

2Commenti sulla guida

One of the hinges broke on my Surface Pro 6.

1. I removed the broken hinge, closed the kickstand and duct taped the seam.

2. I opened the kickstand wide and duct taped the seam.

The single hinge and duct tape seem to be working!

"Spare the duct tape, spoil the job." - Red Green

P Best - Rispondi Condividi

What are the parts used for this fix?

Andrea Shaw - Rispondi Condividi

Aggiungi Commento

Visualizza statistiche:

Ultime 24 ore: 1

Ultimi 7 giorni: 17

Ultimi 30 giorni: 79

Tutti i Tempi: 10,070