Introduzione
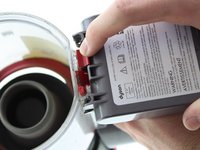
If your Dyson V8 Animal’s battery fails to charge or turn the vacuum on, use this guide to replace the battery. The battery is used to power the vacuum. A broken or worn-out battery may fail to turn the vacuum on or charge.
Before using this guide check that your battery does not just need to be charged and refer to The Devices LED Flashes troubleshooting page for more information on troubleshooting your battery.
No special skills are required for this guide.
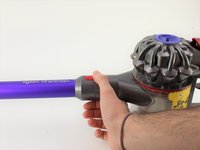
Before beginning, make sure to turn off the vacuum and disconnect it from any external power source.
Cosa ti serve
-
-
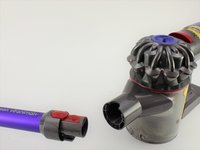
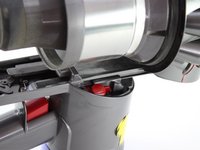
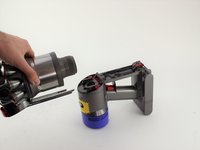
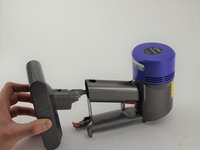
Pull up on the red tab and continue to slide the motor completely up.
-
-
-
-
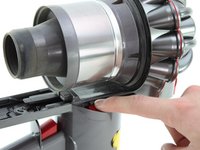
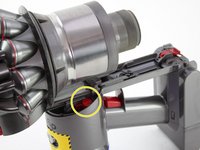
Push down on the red tab on the other side.
-
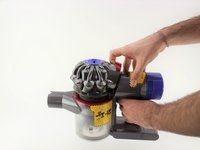
Pull the motor away from the handle.
-
-
-
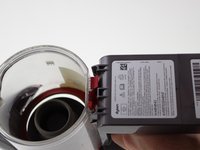
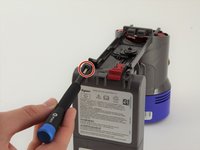
Use a Phillips #0 screwdriver to remove two 18 mm screws on the bottom of the battery.
-
-
-
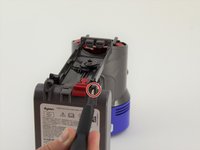
Use a Phillips #0 screwdriver to remove one 18 mm screw on the back of the handle.
-


To reassemble your device, follow these instructions in reverse order.
Annulla: non ho completato questa guida.
Altre 19 persone hanno completato questa guida.

Team

Cal Poly, Team S19-G1, White Winter 2020 Membro di Cal Poly, Team S19-G1, White Winter 2020
CPSU-WHITE-W20S19G1
4 Membri
13 guide realizzate
8Commenti sulla guida
Replacement Vacuum Cleaner Batteries for Dyson V8 Animal
Battery Type: Li-ion
Voltage: 21.6V
Capacity: 4000mAh
Color: Grey
Weight: 770.26g
Dimensions: 145.00 x 90.10 x 115.90mm
If you intereted in this battery, please view more info on http://www.drillbattery.com.au/orderbatt...
Thankyou! I'll be able to replace the battery soon.
Thank you. These instructions just helped me to replace the worn out battery on our V8 Animal in 5 minutes! Now it's humming along again with 3 blue bars. Great! (Note: I was concerned I might strip the screw head but I just pressed harder while turning and the screwdriver did not slip. Then I saw that the replacement battery came with four new replacement screws. So, it's all good.)