Introduzione
Use this guide to replace the front glass and digitizer assembly on an iPad 5 LTE.
Note that since the Touch ID sensor in the home button is paired to the logic board, this guide includes instructions for removing the home button. In order to retain Touch ID functionality, you need to transfer the original home button to the new front panel assembly.
Parts of this guide were shot with a Wi-Fi model and as such the internals may look slightly different from the LTE model. The procedure is the same for both models except where noted.
Warning: the battery isolation method in this guide is outdated, and may result in irreversible damage to the battery pins of the logic board, effectively destroying it. If you choose to isolate the battery this way, heed all warnings and work extremely carefully. If you choose to complete the guide without isolating the battery, avoid using metal tools except when completely necessary (like when removing screws) to prevent shorting the battery and damaging sensitive circuit components.
Cosa ti serve
-
-
Heat an iOpener and apply it to the left edge of the device for two minutes.
-
-
-
While you're waiting for the adhesive to loosen, note the following areas that are sensitive to prying:
-
Front camera
-
Antennas
-
Display cables
-
-
Attrezzo utilizzato in questo passaggio:Clampy - Anti-Clamp$24.95
-
Pull the blue handle backwards to unlock the Anti-Clamp's arms.
-
Place an object under your iPad so it rests level between the suction cups.
-
Position the suction cups near the middle of the left edge—one on the top, and one on the bottom.
-
Hold the bottom of the Anti-Clamp steady and firmly press down on the top cup to apply suction.
-
-
-
Wait one minute to give the adhesive a chance to release and present an opening gap.
-
If your screen isn't getting hot enough, you can use a hair dryer to heat along the left edge of the iPad.
-
Insert an opening pick under the digitizer when the Anti-Clamp creates a large enough gap.
-
Skip the next step.
-
-
-
Once the screen is warm to touch, apply a suction handle to the left edge of the screen and as close to the edge as possible.
-
Lift the screen with the suction handle to create a small gap between the digitizer and the frame.
-
Insert an opening pick into the gap between the digitizer and the frame.
-
-
-
Insert a second opening pick into the gap you just created.
-
Slide the pick toward the bottom-left corner of the device to separate the adhesive.
-
Leave the pick in the bottom-left corner to prevent the adhesive from re-sealing.
-
-
-
Heat an iOpener and apply it to the top edge of the device for two minutes.
-
-
-
Rotate the pick around the top-left corner of the device to separate the adhesive.
-
-
-
Slide the opening pick along the top edge of the device, stopping just before you reach the front camera.
-
-
-
Heat an iOpener and apply it to the right edge of the device for two minutes.
-
-
-
-
Rotate the pick around the top-right corner of the device to separate the adhesive.
-
-
-
Insert a new opening pick and slide it to the middle of the iPad's right edge.
-
-
-
Heat an iOpener and apply it to the bottom edge of the device for two minutes.
-
-
-
Slide the bottom-left pick to the bottom-left corner to separate the adhesive.
-
Leave the pick in the bottom-left corner before moving to the next step.
-
-
-
Insert a new opening pick into the gap you just created on the bottom edge of the iPad.
-
Slide the pick over the antenna, stopping just before the home button.
-
Leave the pick to the left of the home button before continuing.
-
-
-
Heat an iOpener and apply it to the right edge of the device for two minutes.
-
-
-
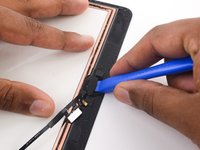
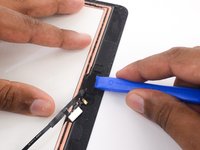
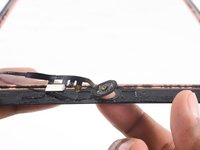
While supporting the digitizer, slide an opening pick between the two display cables to separate the last of the adhesive.
-
-
-
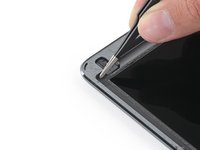
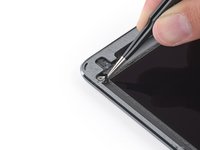
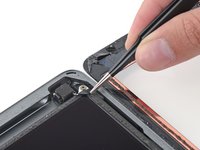
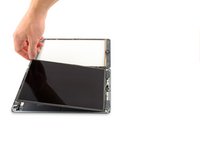
Use the flat end of a spudger to pry the LCD out of its recess just enough to grab it with your fingers.
-
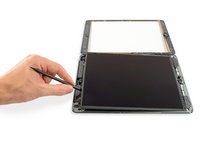
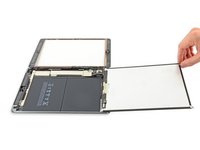
Flip the iPad LCD like a page in a book, lifting near the camera and turning it over the home button end of the rear case.
-
Lay the LCD on its face to allow access to the display cables.
-
-
-
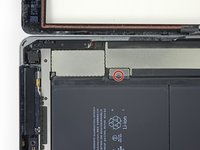
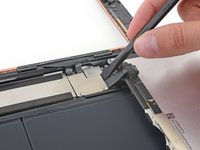
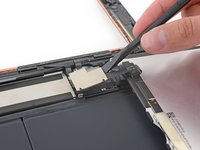
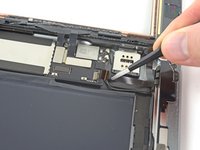
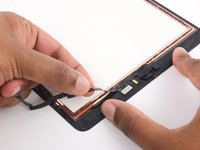
Remove any tape covering the home button ribbon cable connector.
-
-
Attrezzo utilizzato in questo passaggio:Polyimide Tape$9.99
-
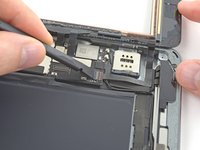
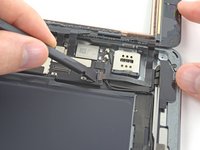
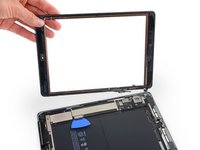
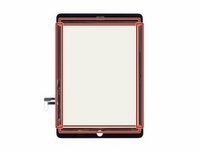
Remove the front panel assembly.
-
If you experience "ghost" or "phantom" touch input issues with your new display, this can be resolved by adding a layer of very thin insulating tape, such as Kapton (polyimide) tape, to the highlighted areas on the back of the panel. iFixit panels come with the proper insulation, and should not require the addition of any tape.
-
-
-
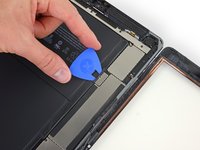
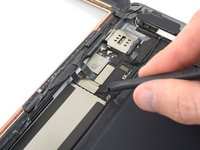
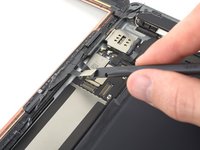
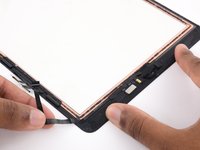
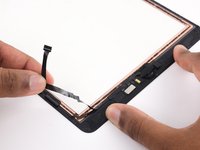
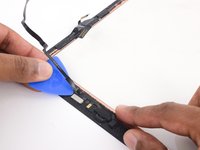
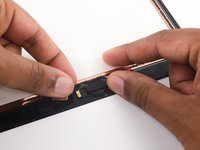
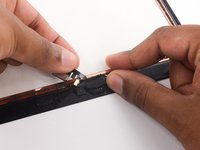
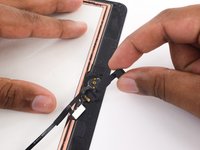
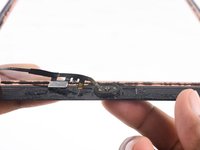
Gently begin peeling the home button cable off the back of the front panel.
-
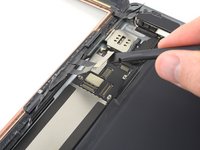
Continue peeling until you reach the metal shield on the cable.
-


To reassemble your device, follow these instructions in reverse order.
To reassemble your device, follow these instructions in reverse order.
Annulla: non ho completato questa guida.
Altre 35 persone hanno completato questa guida.


6 Commenti
I was able to complete this repair although the screen on the iPad that I was trying to repair was completely shattered and I ended up having to just take it out in chunks. A little more detail about best practices in that situation would be good. I also am having some issues with the home button not being quiet right after the repair and now that I am seeing that I would have purchased a replacement for the adhesive holder piece when I got the screen. It is working fine for now and I plan to just be careful with it so I don’t have to pull the display again and risk messing up the screen adhesive and having to order another set of that again too.
It didn´t work for me. I did this repair 2 times.
At the first try, the front glass was not totaly fixed, so I I used 10 strong clamps to get a better connection, but the glass was not really fixed and broke again with a new one.
So I tried twice. I cleaned everything very well, waited half an hour before I put the glass on the ipad. I put it on a flat surface on top with some haevy gear for 24 hours. After only some days the glass lost connection at the right down side where the cables are. So the display got a crack again.
I asked ifixit to fix this.
They told me: This is my fault.
Most likely you did not route the display cables down into between the housing and the lcd this is tricky if done right and the chassie is not bent and no debre is left the screen should adhear no problem. I have done many of these with no issues.
I like the instructions for how to get the new panel on "do this all in reverse, completely useless. I want to know how to glue the home button back onto the new panel, where to run each wire now that the tape is all removed, how to get the new screen on, seems half done. Can we just update it to have reassembly instructions. also the kit no longer comes with that tool and it says "skip ahead to alternative" and there is none, and the suction cup is 100% useless, it does not suck at all, no matter how perfect the glass is under it or how hard you press it on, you can just blow on it and it will move, no force at all required and it immediately comes off. Just forget the toolkit, but the screen and watch some youtube videos, this guide and toolkit are useless.