Salta al contenuto principale
Unisciti alla Community delle riparazioni - Crea un account

Solio CLASSIC2 Electric Wire Replacement

Cosa ti serve

    1. Solio CLASSIC2 Electric Wire Replacement, Disconnecting the Battery: passo 1, immagine 1 di 1
      • Turn off the device by pressing on the clear power button behind the device.

      • To make sure that it is off, make sure the button is not flashing green.

      Chiedi a FixBot

      Aggiungi Commento

    2. Solio CLASSIC2 Electric Wire Replacement: passo 2, immagine 1 di 1
      • Using the Phillips #1 screwdriver, remove the 2mm screw located on the bottom of the device, near the hinge.

      Chiedi a FixBot

      Aggiungi Commento

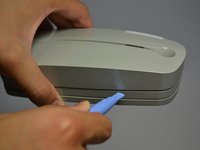
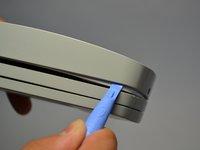
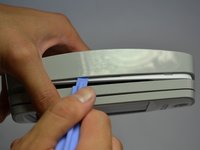
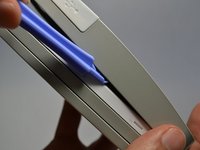
    3. Solio CLASSIC2 Electric Wire Replacement: passo 3, immagine 1 di 3 Solio CLASSIC2 Electric Wire Replacement: passo 3, immagine 2 di 3 Solio CLASSIC2 Electric Wire Replacement: passo 3, immagine 3 di 3
      • Using the plastic opening tools, gently pry open the side of the large panel.

      • Keeping the tool in, slowly slide the tool along the side of the panel.

      Chiedi a FixBot

      Aggiungi Commento

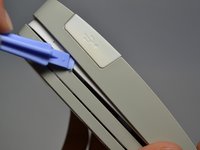
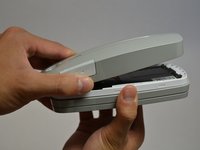
    4. Solio CLASSIC2 Electric Wire Replacement: passo 4, immagine 1 di 2 Solio CLASSIC2 Electric Wire Replacement: passo 4, immagine 2 di 2
      • Rotate the device 180 degrees.

      • Make sure the opening on other side of the device does not snap closed.

      • Gently slide the plastic opening tool along the side of the panel.

      Chiedi a FixBot

      Aggiungi Commento

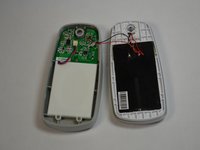
    5. Solio CLASSIC2 Electric Wire Replacement: passo 5, immagine 1 di 2 Solio CLASSIC2 Electric Wire Replacement: passo 5, immagine 2 di 2
      • Do not fully pull apart the back panel from the device. Doing so can rip the two red and blue wires attached to the panel.

      • Using both hands, slowly pull apart the back panel from the rest of the device.

      • Gently flip the back panel open so the circuit board faces up and the two panels are side by side.

      Chiedi a FixBot

      Aggiungi Commento

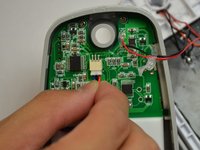
    6. Solio CLASSIC2 Electric Wire Replacement: passo 6, immagine 1 di 2 Solio CLASSIC2 Electric Wire Replacement: passo 6, immagine 2 di 2
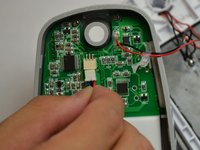
      • Softly pinch the red and blue wires close to the white connector.

      • To pull the wires out, wiggle them back and forth until the connector is fully out.

      Chiedi a FixBot

      Aggiungi Commento

    1. Solio CLASSIC2 Electric Wire Replacement, Circuit Board: passo 7, immagine 1 di 1
      • Unscrew the three 2mm screws holding the circuit board down using a Phillips #1 screwdriver.

      Chiedi a FixBot

      Aggiungi Commento

    2. Solio CLASSIC2 Electric Wire Replacement: passo 8, immagine 1 di 1
      Strumento utilizzato in questo passaggio:
      Tweezers
      $4.99
      • Make sure the white USB port cover on the side of the device is pulled out or you won't be able to lift the circuit board.

      • Gently lift the circuit board out of the device using tweezers.

      Chiedi a FixBot

      Aggiungi Commento

    1. Solio CLASSIC2 Electric Wire Replacement, Electric Wire: passo 9, immagine 1 di 2 Solio CLASSIC2 Electric Wire Replacement, Electric Wire: passo 9, immagine 2 di 2
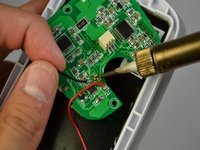
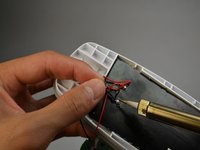
      • Soldering can melt key components and cause harm to both the user and the device. Read soldering guide before attempting.

      • Using a solder iron with a fine tip, slowly solder off the broken wire from the first connection point.

      • Repeat for other connection point of wire.

      Chiedi a FixBot

      Aggiungi Commento

Conclusione

To reassemble your device, follow these instructions in reverse order.

Annulla: non ho completato questa guida.

Kelly Perkins

Membro da: 10/20/13

110 Reputazione

Una guida realizzata

Team

Cal Poly, Team 4-28, Amido Fall 2013 Membro di Cal Poly, Team 4-28, Amido Fall 2013

CPSU-AMIDO-F13S4G28

4 Membri

22 guide realizzate

0Commenti sulla guida

Aggiungi Commento

Visualizza statistiche:

Ultime 24 ore: 4

Ultimi 7 giorni: 8

Ultimi 30 giorni: 32

Tutti i Tempi: 708