Introduzione
Replacing the Wi-Fi card may be necessary if your Samsung Impression experiences slow or unstable internet connections. This guide will show you how to remove and install a new Wi-Fi card to restore proper functionality.
Before beginning, power off the device and disconnect the battery to prevent electrical damage. This repair involves handling small internal components. Use caution when working inside the device, as cables and connectors are fragile and can be easily damaged.
Cosa ti serve
-
-
Orient the phone with the screen facing downward.
-
Slide the panel away from the camera using your thumb. This will expose the battery.
 Chiedi a FixBot
-
-
-
Insert the tip of the spudger on the left side of the battery.
-
Pry the battery out. It will pivot in the direction of the white arrow.
-
-
-
Remove the six 3.5 mm screws using a Phillips #000 screwdriver. Unscrew in a counterclockwise direction.
-
-
-
-
Gently pry around the edges with the spudger to remove back panel.
-
The side buttons will become loose and will fall out, so put these in a safe place.
-
-
-
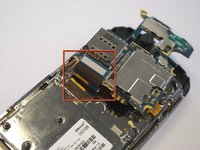
Gently remove the black wire to free the circuit board.
-
Remove the wire by gently prying up the gold terminator attached to the green circuit board.
-
-
-
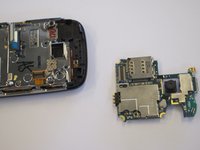
Gently tug the black and blue ribbon upwards to release the circuit board.
-
-
-
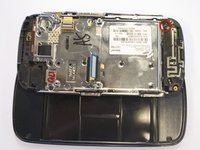
Use a Phillips screwdriver to remove the six 3.5 mm screws by rotating.
-
The antenna assembly will snap off.
-


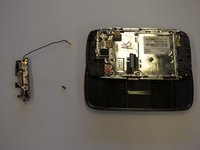
To replace the antenna and reassemble your device, follow the steps in reverse order. Take your e-waste to an R2 or e-Stewards certified recycler.
Annulla: non ho completato questa guida.
Un'altra persona ha completato questa guida.
Team

Cal Poly, Team 8-10, Regan Spring 2011 Membro di Cal Poly, Team 8-10, Regan Spring 2011
CPSU-REGAN-S11S8G10
4 Membri
34 guide realizzate