Introduzione
This guide will show how to repair the trackpad contact switch if it will not register a click.
Cosa ti serve
-
-
Remove the following 10 screws securing the lower case to the MacBook Pro 13" Unibody:
-
Seven 3 mm Phillips screws.
-
Three 13.5 mm Phillips screws.
-
-
-
Slightly lift the lower case and push it toward the rear of the computer to free the mounting tabs.
-
-
-
Remove the following tri-point screws securing the battery to the upper case:
-
One 5.5 mm tri-point screw.
-
One 13.5 mm tri-point screw.
-
-
-
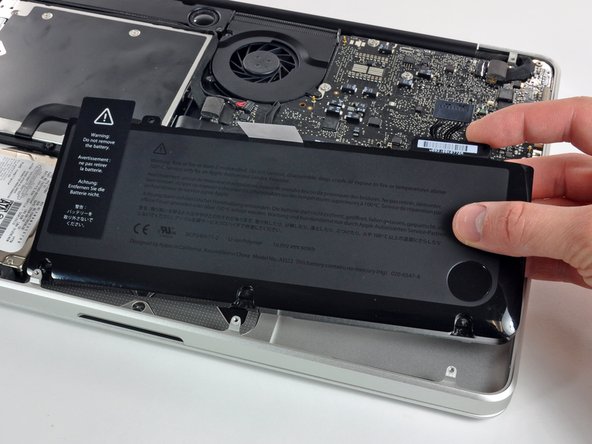
Lift the battery out of the upper case.
-
Charge it to 100%, and then keep charging it for at least 2 more hours. Next, unplug and use it normally to drain the battery. When you see the low battery warning, save your work, and keep your laptop on until it goes to sleep due to low battery. Wait at least 5 hours, then charge your laptop uninterrupted to 100%.
-
If you notice any unusual behavior or problems after installing your new battery, you may need to reset your MacBook's SMC.
-
-
-
-
Use the flat end of a spudger to carefully pry the trackpad connector up from its socket on the logic board.
-
-
-
If necessary, carefully dislodge the edge of the trackpad closest to the keyboard from its recess in the upper case by pushing it away from the brackets attached to the upper case.
-
Carefully push the trackpad connector and cable down through the slot cut into the upper case.
-
It may be necessary to use a spudger to help get the trackpad connector past the edge of the logic board.
-
Once the cable has been completely pulled through its slot in the upper case, pull the trackpad away from the outer edge of the upper case and remove it from the machine.
-
-
-
To remove the flex cable from the old trackpad, first flip open the latch on the ZIF connector, opposite the cable. Then, apply a little heat from a hair dryer or iOpener to soften the adhesive securing the cable to the trackpad, and carefully peel off and remove the cable.
-
-
-
Using a small X-Acto knife or pin, carefully lift the tape. Peel it back to lift the top of the contact switch.
-
NOTE: Do not completely remove the tape. Leave the other side attached as shown in the next step. This will allow you to easily align the top contact with the bottom after cleaning.
-
-
-
Once the contact is revealed, use a Q-tip with a small amount of Isopropyl Alcohol (91%) to wipe both the top and bottom of the contact.
-
-
-
Place the tape back down and rub it with your fingernail or a plastic spudger to assure contact.
-


To reassemble your device, follow these instructions (From Step 11) in reverse order.
To reassemble your device, follow these instructions (From Step 11) in reverse order.
Annulla: non ho completato questa guida.
Altre 17 persone hanno completato questa guida.
15 Commenti
In the other trackpad replacement guide, it doesn't have this tip, to take off the clicker and clean it. I did just that thanks to this guide and the clicker is now working reliably again.
That's great. The one I repaired this way has been working great. The original replacement guide is just that. It's meant to remove the trackpad and replace it with a new one. I figured I had nothing to lose by digging a little deeper to fix the one I had and this guide is the result. Glad it was helpful.
Scott
Awesome guide! it was very helpfull and acurate ! Thanks, my trackpad came back to life!